
Stop a Running Toilet With a Flush Seal Replacement
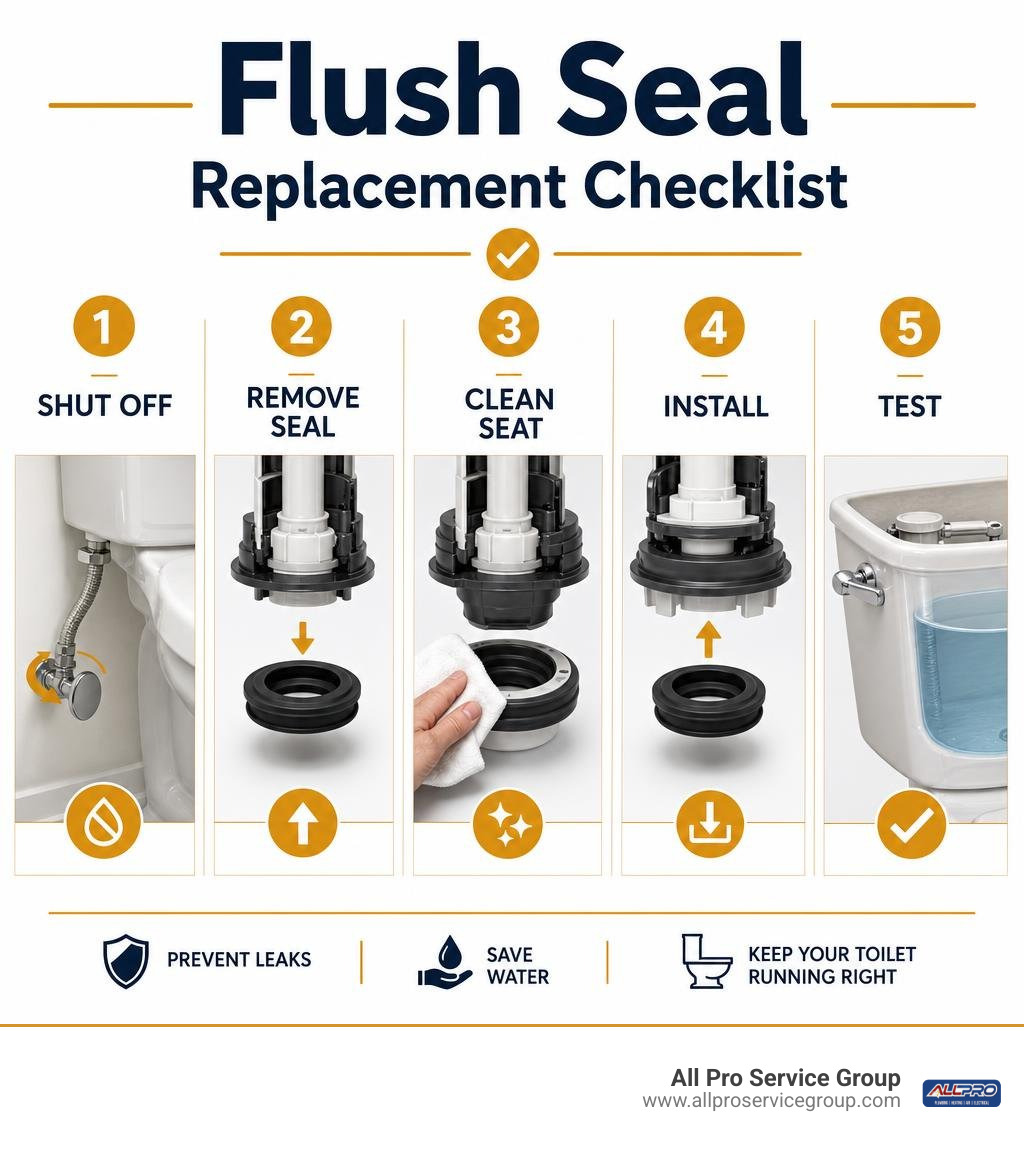
A flush seal replacement can stop water from slowly leaking from the tank into the bowl, which causes phantom refills and a constantly running toilet. In most toilets with a canister or tower-style flush valve, the basic process is simple:
- Turn off the water and flush the tank to lower the water level.
- Remove the valve cover or canister as your toilet model requires.
- Take off the old gasket and clean the valve seat.
- Fit the correct new seal evenly into its groove.
- Reassemble the valve, turn the water back on, and test for leaks.
The key is buying the right seal. Toilet flush seals are often model-specific, especially on dual-flush, touchless, power-flush, and canister toilets. A seal that is the wrong diameter, thickness, or shape may still let water leak into the bowl.
A worn seal may look warped, brittle, swollen, or coated with mineral buildup. Chlorine, hard water, and in-tank cleaning tablets can speed up wear. Replacing the seal every few years is often enough to restore a reliable flush without replacing the whole valve.
I'm Gary Leany with All Pro Service Group, serving Greater Salt Lake homeowners with practical plumbing repairs and system maintenance since 2008. This guide walks you through flush seal replacement so you can identify the problem, choose the correct part, and know when a damaged valve needs professional attention.
What Is a Flush Valve Seal and When Should You Replace It?
The flush valve seal is a flexible rubber or silicone gasket located at the base of your toilet tank's flushing mechanism. Its primary job is to create a watertight barrier between the tank and the toilet bowl. When you press the trip lever or push-button, the flush assembly lifts, permitting stored water to rush into the bowl and clear waste. Once the cycle finishes, the assembly drops back down, pressing the seal firmly against the valve seat to hold new incoming water in the tank.
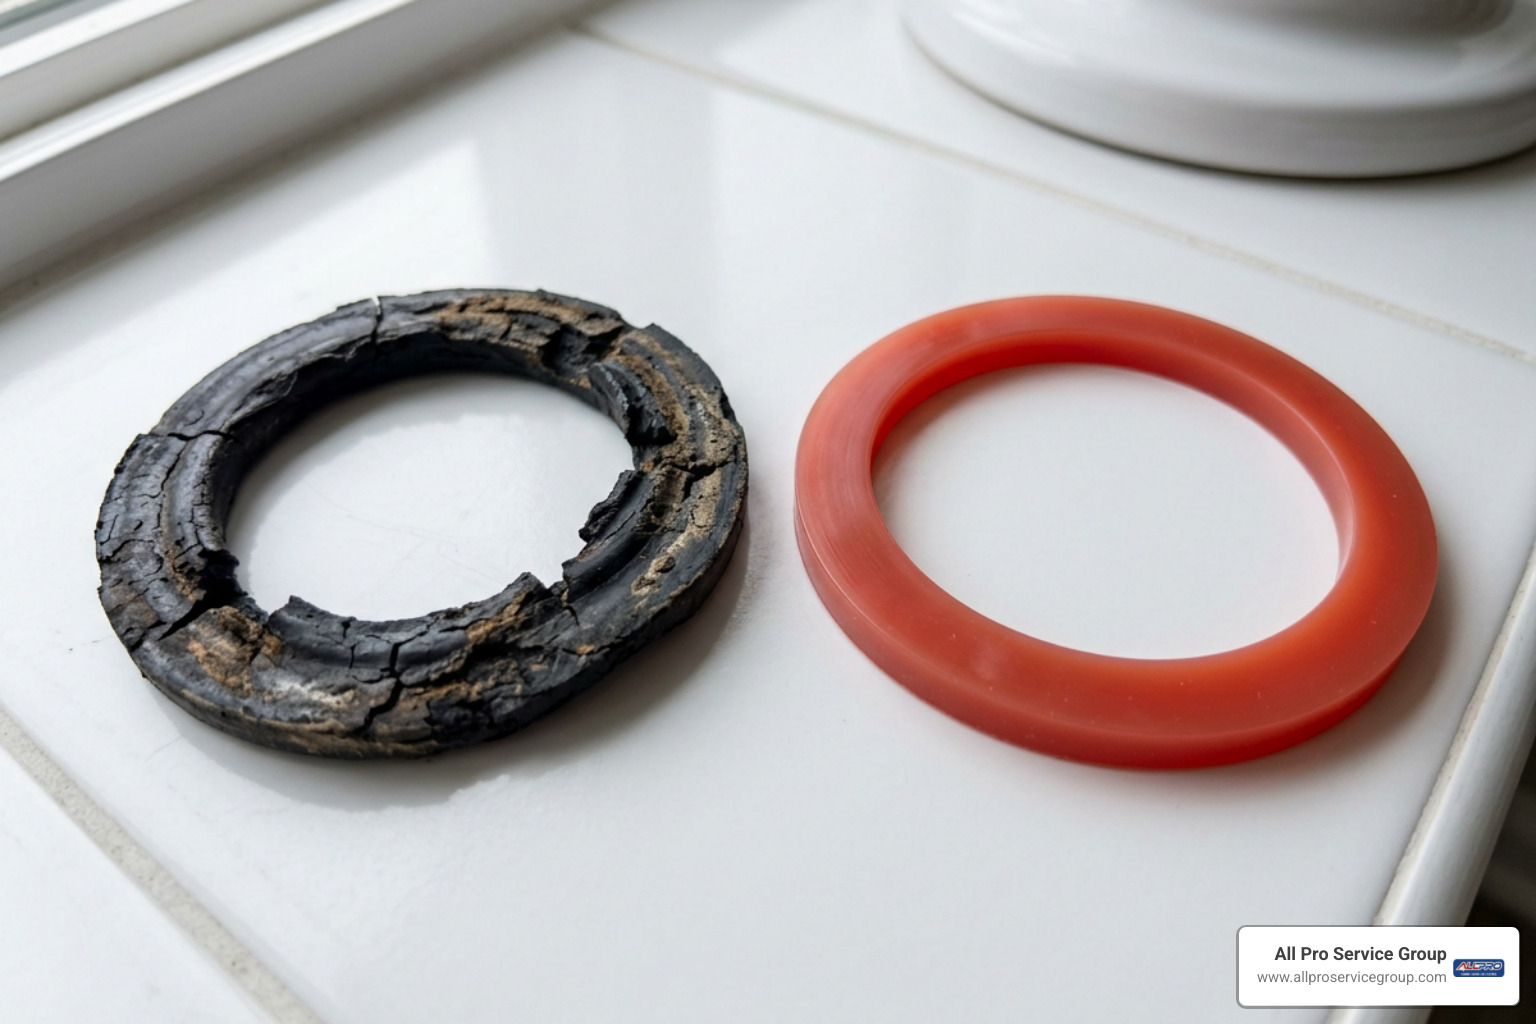
Over time, constant submersion, water treatment chemicals, and mineral buildup break down the material. When this gasket degrades, water continuously slips past the seal into the bowl. This silent tank-to-bowl leak causes phantom refills, wastes thousands of gallons of water, and drives up utility bills. Learning how to Fix Toilet Seal issues at the first sign of wear helps protect your plumbing system and household budget.
Common Signs of a Deteriorated Flush Valve Seal
A damaged flush gasket reveals itself through several distinct operational symptoms:
- Phantom Flushing: The fill valve suddenly kicks on for a few seconds when no one has used the bathroom. This happens because water slowly drains past the seal until the float drops enough to trigger a tank refill.
- Continuous Running: A soft, constant hissing or trickling sound indicates that water is continuously escaping the tank.
- Weak Flushes: If water leaks out before you flush, the tank cannot maintain enough volume for a powerful, clean siphon.
- Stiff or Hard Handle Action: A swollen or deformed gasket can stick to the valve seat, requiring extra force to pull the flush lever.
To verify a suspected leak, conduct a quick food coloring test. Place 5 to 10 drops of dark food coloring into the toilet tank, then wait 20 to 30 minutes without flushing. If colored water appears in the bowl, your flush valve seal is leaking and requires replacement.
Rubber vs. Silicone Flush Valve Seals
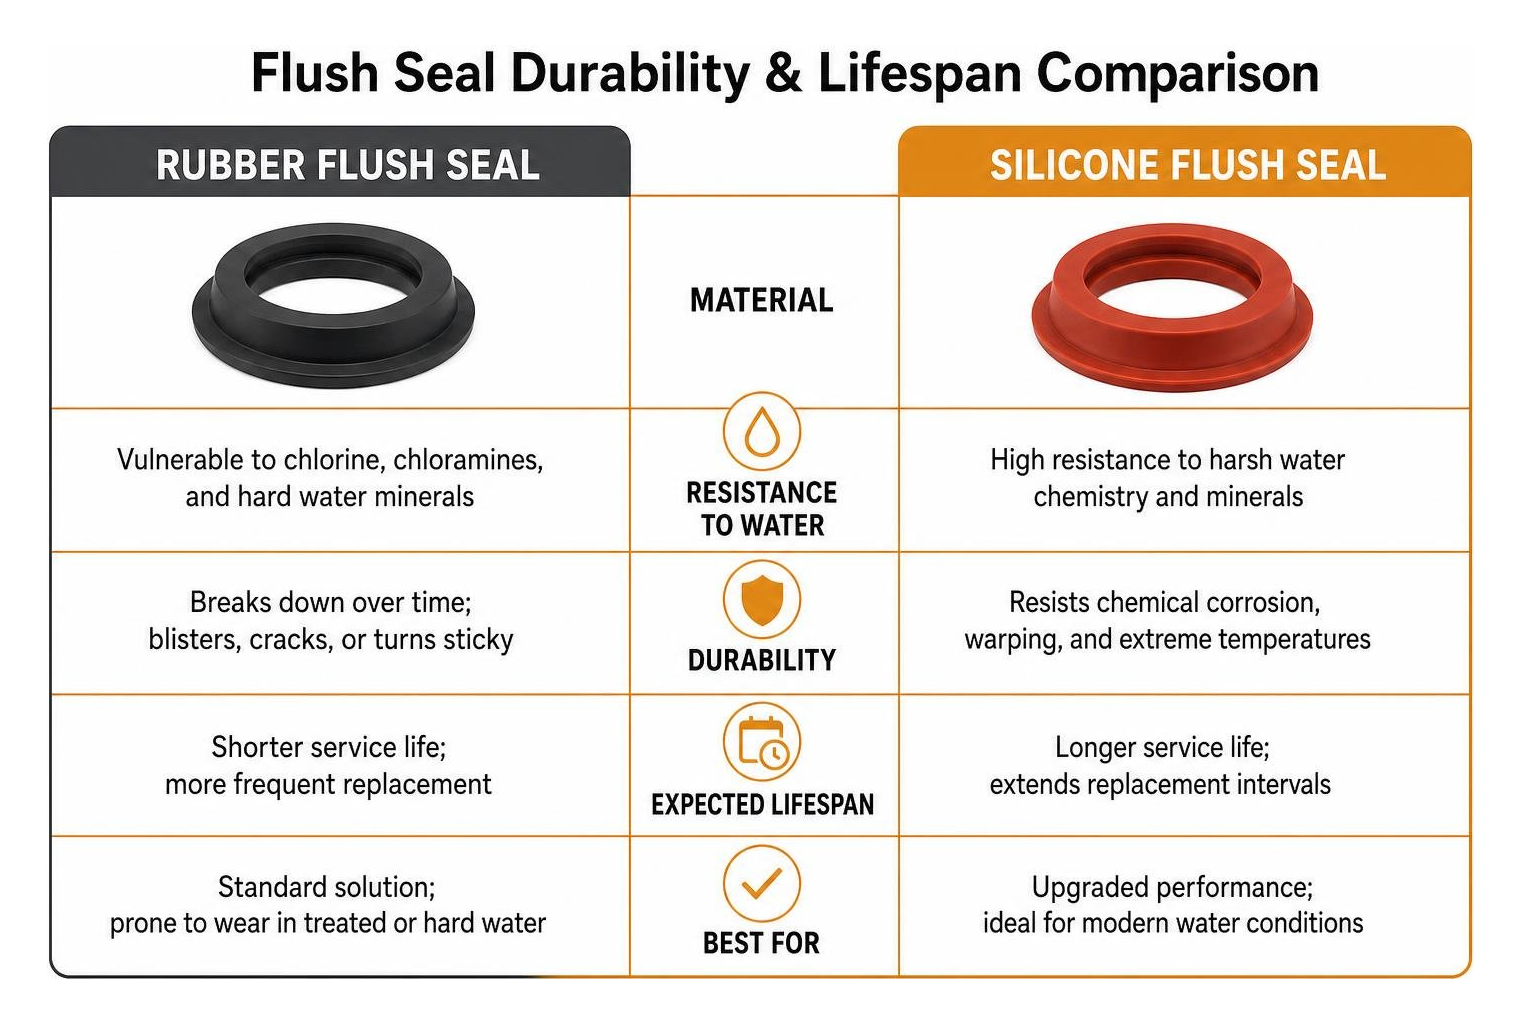
Standard factory toilet seals have historically been manufactured from standard black or red rubber formulations. While effective initially, rubber is vulnerable to municipal water treatment chemicals—specifically chlorine and chloramines—as well as hard water minerals. These agents cause standard rubber to blister, crack, or turn into a sticky, tar-like residue over time.
Modern aftermarket upgrades often feature specialized silicone. A Silicone Seal For Flush Valve provides superior resistance against harsh water chemistry, warping, and extreme temperatures. Engineered red rubber blends and high-grade silicone gaskets resist chemical corrosion far better than basic rubber, extending service life significantly.
Choosing the Correct Replacement Flush Seal for Your Toilet
Toilet mechanisms have evolved beyond traditional hanging flappers. Modern high-efficiency toilets utilize specialized canister towers, dual-flush cylinders, and vacuum-assist mechanisms. For an overview of how these parts interact across different models, review our Toilet Repair Complete Guide 2026.
Choosing the right seal requires matching your toilet's specific flush valve design:
| Seal / Mechanism Type | Common Compatible Brands & Models | Typical Outer Diameter (OD) | Key Identifying Characteristics |
|---|---|---|---|
| Standard Flapper / Seal Ring | Universal 2-inch & 3-inch gravity toilets | 2 in. to 3 in. | Hinged rubber flap or flat base disc |
| Large Canister Gasket | American Standard Champion 4, Eljer Titan 4 | 4 1/4 in. (108 mm) | Wide flat ring with inner locating lip |
| Canister Tower O-Ring | Kohler Class Five & Class Six (K-GP1059291) | ~3 in. to 3 1/4 in. | Yellow, red, or black ring set around base |
| Dual-Flush Ring | Glacier Bay, AquaSource, Ove, Project Source | 2 1/4 in. to 2 5/8 in. | Thin silicone/rubber ring; color-specific fit |
| Vacuum-Assist / Stealth | Niagara Stealth, Glacier Bay Power Flush | Symmetrical round profile | Specialized symmetrical silicone ring |
Selecting the Right Gasket for Your Flush Seal Replacement
To avoid purchasing the wrong replacement, measure the dimensions of your existing seal:
- Outer Diameter (OD): Measure the widest point across the outer edge.
- Inner Diameter (ID): Measure the interior opening where the seal sits around the center shaft.
- Lip Thickness: Check whether the seal features a raised profile or flat retention ridge.
Dual-flush mechanisms frequently rely on valve color coding to indicate compatibility. For instance, a Dual Flush Valve Seal D - Korky is engineered for black flush valves, whereas white flush valves from the same manufacturer may require an entirely different seal profile.
Single-Flush, Canister, and Dual-Flush Mechanisms
Different toilet systems house their flush seals in distinct configurations:
- Canister/Tower Systems: Use a central cylinder that lifts vertically along a guide post. The seal is stretched around a lower retaining lip on the canister.
- Top-Mounted Push-Button Toilets: Dual-flush systems mount a release cartridge at the bottom of the tank. If buttons stick or fail to drop the cylinder, you may need a Flush Button Replacement alongside a new seal.
- Power-Flush and Vacuum Systems: High-efficiency units utilize dedicated seals such as the Niagara Stealth Power Flush Replacement Seal | Fluidmaster to maintain airtight siphon performance.
Step-by-Step Guide: How to Complete a Flush Seal Replacement in 5 Steps
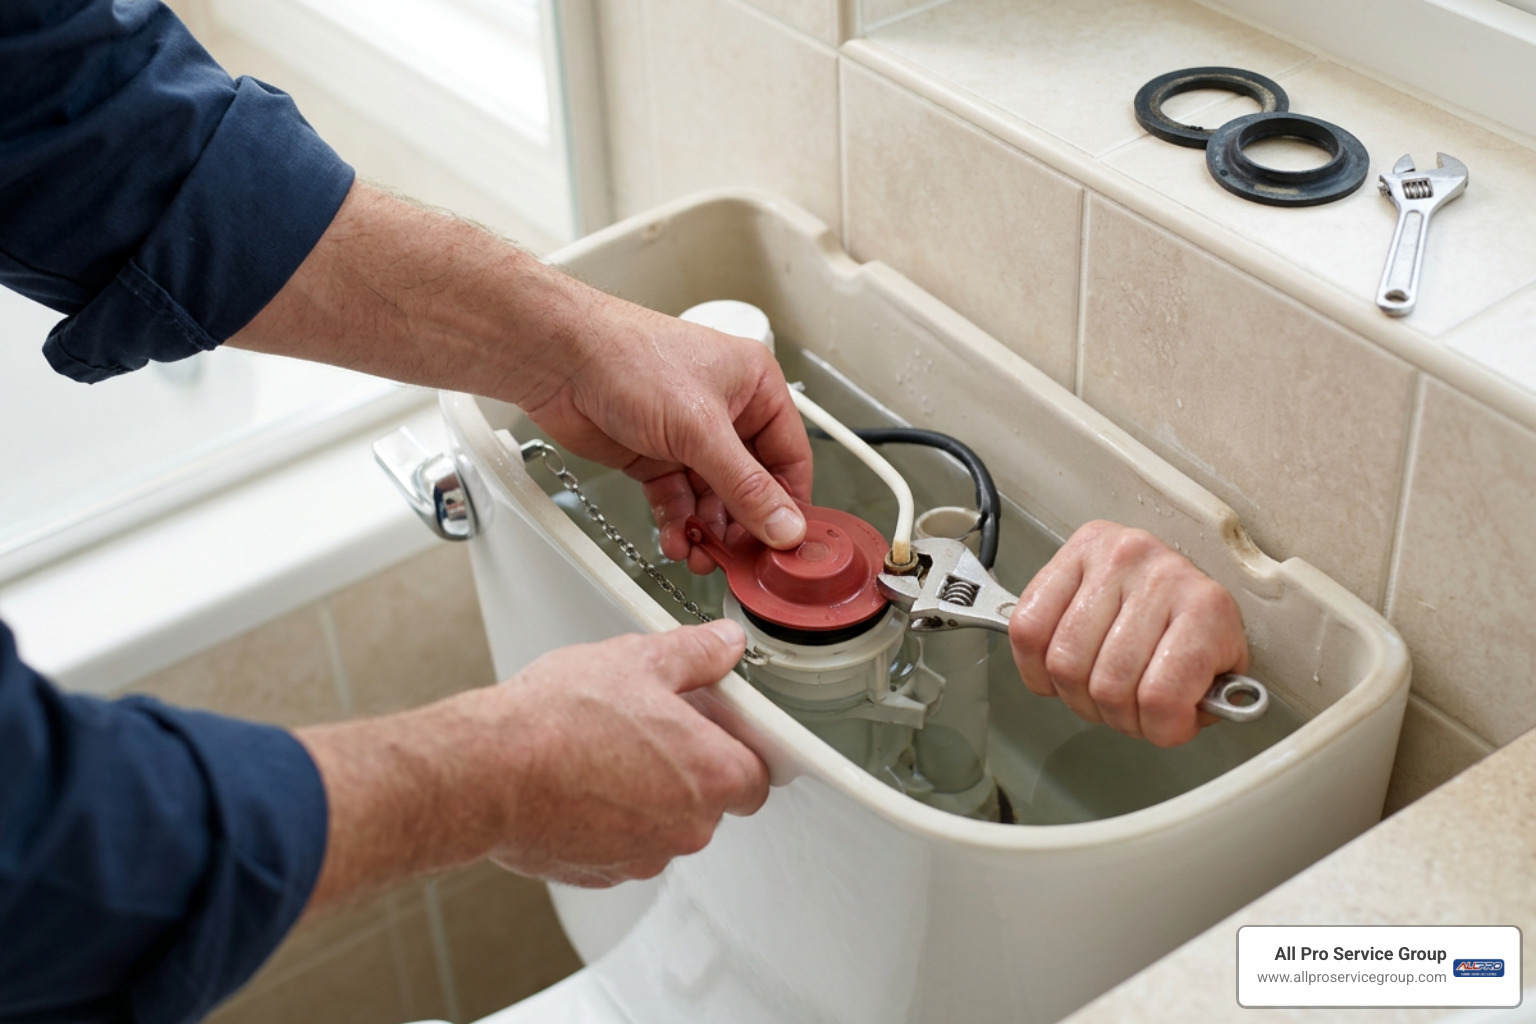
Replacing a flush seal is a straightforward DIY repair that takes approximately 15 to 30 minutes. Before beginning, make sure you have a towel, sponge, replacement seal, and a small flat-head screwdriver or pair of pliers. If you notice irregular tank refilling while working inside the tank, refer to our guide on how to Fix Toilet Float Valve assemblies.
Step 1: Prepare the Toilet Tank and Lower the Water Level
Begin by shutting off the water supply valve located on the wall behind the toilet by turning it clockwise until tight. Press and hold the flush handle or push button to drain most of the water from the tank into the bowl. Use a clean sponge or towel to soak up any remaining pooled water around the flush valve base to create a dry, clean workspace.
Step 2: Disassemble the Flush Valve Assembly or Canister
Depending on your toilet model, access the flush seal using the appropriate method:
- Kohler Canister Style: Grasp the center stem of the canister, turn it 90 degrees counterclockwise to release the bayonet lock, and lift the canister out of the tank.
- American Standard Champion 4 Style: Unscrew the central thumb nut on top of the valve cover. Keep the chain attached to avoid losing tension, and lift off the upper housing to expose the gasket.
- Dual-Flush Drop-in Style: Twist the top dual-flush valve cylinder roughly a quarter-turn counterclockwise to release it from its tank base basket, then lift it out.
Step 3: Remove the Old Degraded Flush Gasket
Inspect the exposed flush gasket. Degraded seals are often sticky, warped, or covered in hard mineral crust. Peel the old gasket out of its retention groove or pull it free from the bottom lip of the canister.
Using a damp rag or non-abrasive scouring pad, thoroughly clean the flush valve seat. Wipe away all limescale, mineral deposits, and old rubber residue. Any debris left on the sealing surface can prevent the new gasket from forming a watertight seal.
Step 4: Install and Seat the New Replacement Seal
Take your new silicone or rubber seal and slip it into the mounting groove on the valve assembly:
- Work the seal evenly around the perimeter of the cylinder or base ring.
- Confirm the gasket sits completely flat without any twists, stretches, or pinched edges.
- If your model features a multi-piece canister cover, nest the cover over the new seal, rotate it into its locked position, and tighten the retaining nut until you feel or hear the locking clicks.
Step 5: Reassemble, Restore Water Supply, and Test for Leaks
Reinstall the flush cylinder or canister back onto its center guide post in the tank, locking it securely into place. Reconnect the refill tube to the top overflow port if it was removed during disassembly.
Turn the water supply valve counterclockwise to restore flow. Allow the tank to fill to its designated waterline, then observe the base of the valve. Perform several test flushes to confirm that the flush assembly lifts freely, seals immediately, and eliminates all trickling sounds.
Troubleshooting Post-Installation Issues and Leaks
If your toilet continues to run or leak after installing a new gasket, a few common installation issues may be at fault.
Why Does the Toilet Leak After a Flush Seal Replacement?
- Misaligned or Twisted Gasket: If the seal is rolled or unevenly seated in its channel, water will seep beneath the fold. Remove the assembly and verify the seal is seated flat.
- Pitted Valve Seat: If the plastic or brass rim beneath the seal is cracked, corroded, or heavily grooved, the new seal cannot sit flush. Smoothing deposits with fine abrasive mesh or applying an overlay repair ring can resolve the leak.
- Improper Chain or Lever Tension: An overly tight chain will hold the canister slightly elevated, while excessive slack can snag under the descending valve.
- Float Height Misadjustment: If the tank water level is adjusted higher than the top of the overflow tube, water will continuously drain down the tube regardless of seal condition.
For a broader breakdown of repair expenses, view our breakdown of the Cost To Replace Toilet Seal.
When to Replace the Entire Flush Valve or Call a Plumber
While swapping a gasket solves most leaks, a gasket replacement cannot fix structural issues with the flush valve housing itself. If the vertical overflow tube is cracked, the mounting lugs are broken, or the tank-to-bowl gasket beneath the porcelain is deteriorating, you will need a complete valve assembly swap. Read our guide on Changing Toilet Valve assemblies for full replacement instructions.
If you notice water pooling on the floor rather than inside the bowl, the issue may involve a cracked tank or damaged wax ring. In these cases, consult our guide for a Broken Toilet or schedule an inspection with Plumbing/Leak Detection Repair professionals.
Frequently Asked Questions About Toilet Flush Seals
Can you replace a flush valve seal without draining the toilet tank?
Yes, on certain canister-style valves, a shortcut method allows you to replace the seal without fully draining the tank. By flushing once to temporarily drop the water level, you can slide the old seal off the bottom of the canister and carefully stretch the new flexible seal over the top lever and down the overflow cylinder into its groove. However, draining the tank and removing the canister is generally recommended because it allows you to thoroughly clean mineral deposits from the valve seat.
How long do flush valve replacement seals typically last?
A standard rubber flush valve seal typically lasts between 3 and 5 years under normal municipal water conditions. High-grade silicone replacement seals or heavy-duty chemical-resistant rubber seals can last up to 10 years. Lifespan is significantly reduced by hard water minerals, high chlorine levels, and drop-in chemical cleaning tablets placed directly inside the tank.
What is the difference between OEM and aftermarket toilet seals?
Original Equipment Manufacturer (OEM) seals are produced by your toilet's maker to exact original factory specifications. Aftermarket seals are produced by specialized plumbing parts manufacturers and frequently feature design enhancements—such as upgraded silicone materials, chemical-resistant rubber compounds, or symmetrical sealing lips—that often outlast the original factory rubber gaskets.
Conclusion
Completing a DIY flush seal replacement is one of the most effective ways to stop phantom refills, lower your water bill, and keep your toilet operating smoothly. With basic household tools and the correct model-specific gasket, most homeowners can finish this repair in under 30 minutes.
If your toilet continues to run after replacing the seal, or if you encounter damaged valve bodies and hidden leaks, All Pro Service Group is ready to assist. Since 2008, our team has delivered trusted plumbing solutions throughout Salt Lake City, Ogden, Provo, and the Greater Salt Lake Valley. Contact us today for dependable professional plumbing repair and home maintenance services.