Why Car Charging Port Installation Is the Smartest Upgrade for EV Owners
Car charging port installation at home is one of the most practical upgrades you can make as an EV owner. Here's a quick summary of what it involves:
What is home car charging port installation?
- A licensed electrician installs a dedicated charging station (usually Level 2) in your garage or on your home's exterior
- It requires a 240-volt dedicated circuit connected to your electrical panel
- A permit from your local building department is required in nearly every jurisdiction
- The full process — from assessment to final inspection — typically takes 3 to 6 weeks
- Costs range from $800 to $2,500 for a straightforward installation, or more if a panel upgrade is needed
Instead of relying on slow public chargers or the basic 120-volt cord that came with your car, a properly installed home charging station lets you wake up every morning to a full battery — on your schedule.
The difference is significant. A standard 120-volt outlet adds only 2 to 5 miles of range per hour. A Level 2 home charger adds 20 to 40 miles per hour, fully charging most EVs overnight in just 3 to 8 hours. For most homeowners, that's the difference between an EV that fits your life and one that frustrates it.
But the installation itself isn't as simple as plugging something in. It involves high-voltage wiring, panel assessments, local permits, and code compliance — all of which need to be done correctly to protect your home, your warranty, and your safety.
At All Pro Service Group, our electrical team has handled countless car charging port installations across the Greater Salt Lake Valley — from straightforward garage setups to full panel upgrades for older homes. In this guide, we'll walk you through everything you need to know to get it done right.
EV Charger Levels and Home Compatibility
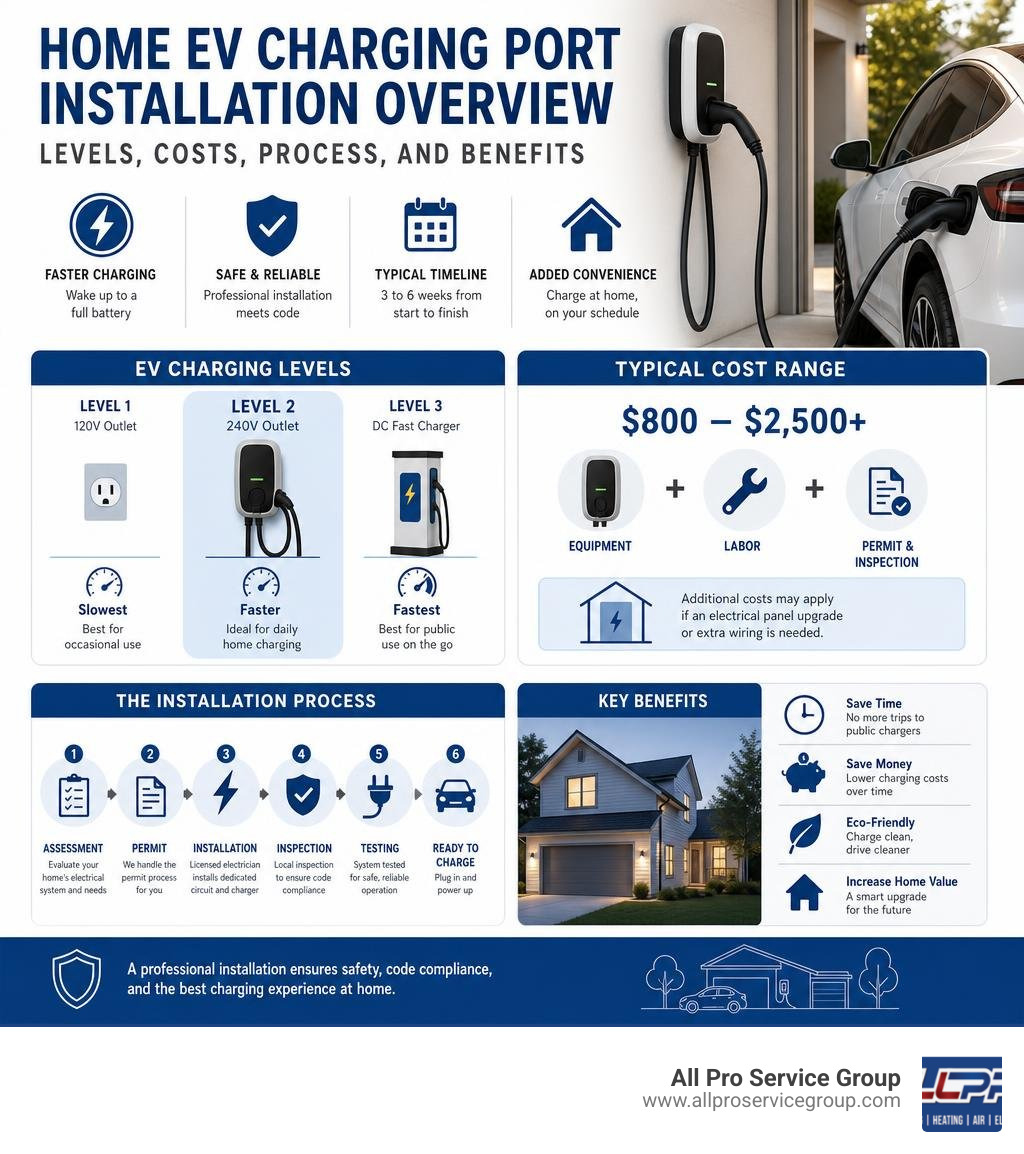
Before diving into the physical installation process, it is essential to understand the different levels of electric vehicle supply equipment (EVSE) and how they interact with your home's electrical grid. EV charging is divided into three distinct levels, each with its own power requirements, charging speeds, and ideal use cases.
| Charger Level | Voltage | Typical Amperage | Charging Speed (Miles of Range per Hour) | Best Use Case |
|---|---|---|---|---|
| Level 1 | 120V AC | 8 – 15 Amps | 2 – 5 miles | Emergency backup, low-mileage plug-in hybrids |
| Level 2 | 240V AC | 16 – 80 Amps | 20 – 60 miles | Primary residential home charging |
| Level 3 (DCFC) | 400V – 800V DC | Up to 400+ Amps | 100+ miles (in 15-30 mins) | Public highway charging, commercial fleets |
Level 1 Charging: The "Trickle" Cord in the Trunk
Level 1 charging uses a standard three-prong, 120-volt household outlet. It requires no specialized infrastructure or electrical upgrades. While incredibly convenient because you can plug it in anywhere, it is painfully slow. Level 1 chargers add only 2 to 5 miles of electric range for each hour of charging.
If you drive a plug-in hybrid with a tiny battery, Level 1 might get you by. However, for a full battery-electric vehicle (BEV), a complete charge can take 20 hours or more. Relying on this method often leaves drivers feeling limited in how far and how often they can drive.
Level 2 Charging: The Gold Standard for Home Charging
A Level 2 charger is the superior choice for daily residential use, striking the perfect balance between charging speed, equipment cost, and home compatibility. Operating on a 240-volt AC circuit—similar to what your clothes dryer or electric oven uses—Level 2 charging delivers roughly 20 to 40 miles of range per hour. A typical charging session takes between 3 and 6 hours to provide a complete charge.
To set up a Level 2 system, you must install a car charging port for home. This requires a dedicated 240-volt branch circuit running directly from your main electrical panel to the charger's mounting location.
DC Fast Charging (Level 3): Public Use Only
Direct Current Fast Charging (DCFC), commonly known as Level 3, bypasses the vehicle's onboard charger to deliver high-voltage DC power directly to the battery pack. A DCFC unit can provide more than 100 miles of range in just an hour—often reaching an 80% charge in 20 to 40 minutes.
However, DC Fast Chargers are technically incompatible with residential properties. They require commercial-grade three-phase electrical service, operating at up to 800 volts. Furthermore, DCFC charging stations cost between $25,000 and $50,000 for the equipment alone, combined with $50,000 to $100,000 in utility service upgrades. These systems are reserved exclusively for public highway rest stops, commercial centers, and fleet depots.
Planning Your Car Charging Port Installation
Proper planning is the secret to a smooth, cost-effective, and safe car charging port installation. Skipping this phase can lead to overloaded circuits, code violations, or unexpected expenses down the road.

Every home has a maximum electrical capacity, typically capped at 100 amps in older homes or 200 amps in modern builds. Adding a Level 2 EV charger—which draws a high continuous load of 32 to 48 amps—is equivalent to adding another heavy appliance like a central air conditioner or a hot tub to your system.
To determine if your system can safely handle this load, a licensed electrician must perform an official load calculation under the guidelines of National Electrical Code (NEC) Section 220.82. This mathematical calculation evaluates your home’s square footage, heating and cooling loads, and existing appliances against your total panel capacity. For a detailed breakdown of this setup, consult our 240-volt charger installation complete guide.
Choosing the Optimal Location for Your Car Charging Port Installation
Where you mount your charger impacts both your daily convenience and your upfront installation costs. Consider the following factors when selecting the perfect spot:
- Distance to the Electrical Panel: The closer your charger is to your main electrical panel, the less conduit and heavy-gauge copper wire the electrician will need to run. This is the single biggest factor in controlling your installation labor and material costs.
- Know Your Port Location: EV charging ports are highly non-standardized. Teslas typically charge from the rear-left, while other models may have ports on the front-fender or front-center. Park your car exactly where you intend to keep it and measure the distance to ensure the cable reaches comfortably.
- Cable Management and Safety: Standard charging cables are 18 to 25 feet long. Ensure the cable does not drape across high-traffic walkways where it could create a tripping hazard. We recommend mounting the charger 36 to 48 inches (3 to 4 feet) from the floor and leaving 12 to 18 inches of clearance around the unit.
- Indoor vs. Outdoor Installation: If you plan to install your charger on an exterior wall or next to a driveway, ensure the hardware has a NEMA 3R or NEMA 4 weatherproof rating to protect it from extreme Utah weather.
- Wi-Fi Signal Strength: Most modern Level 2 "smart" chargers require at least two bars of Wi-Fi signal at the mounting location. This connectivity enables scheduled off-peak charging, remote monitoring, and firmware updates.
- The Shared Stall Strategy: If you have a multi-car garage, consider mounting the charger on the wall between the two bays. This future-proofs your setup, allowing you to charge vehicles parked in either stall without moving them.
Hardwired vs. Plug-In (NEMA 14-50) Connections
When installing a Level 2 charger, you must decide between hardwiring the unit directly into your electrical system or installing a heavy-duty 240-volt plug-in outlet (typically a NEMA 14-50 receptacle).
- Hardwired Installations (Highly Recommended): Hardwiring is the safest, most reliable, and most code-compliant method. Because there is no plug-and-outlet connection, you eliminate potential points of failure, moisture intrusion, and electrical resistance. Furthermore, hardwired units can support up to 48 amps of continuous draw on a 60-amp breaker.
- Plug-In Installations (NEMA 14-50): A plug-in installation offers flexibility; if the charger fails, you can easily unplug it and swap it out without calling an electrician. However, code restricts plug-in chargers to a maximum of 40 amps of continuous draw on a 50-amp breaker. Additionally, because EV charging draws high, continuous power for hours at a time, cheap $12 home-center outlets can overheat and melt. If you choose a plug-in setup, you must use a high-quality, industrial-grade receptacle costing $40 to $80. To understand the financial differences between these options, read our guide on 240-volt outlet for electric car cost.
Assessing Your Electrical Panel Capacity
If your home has an older 100-amp electrical panel that already powers an electric range, clothes dryer, and central air conditioner, adding a 40-amp EV charger will likely overload the system. In these scenarios, you have two primary options:
- A Full Service Panel Upgrade: Upgrading your home's electrical service to a modern 200 amp power panel is the most robust, future-proof solution. It ensures you have more than enough power to run your charger alongside all household appliances, and even leaves room for future electrification upgrades like heat pumps or a second EV. Check out our electrical panel upgrade complete guide for more details.
- Smart Load Management: If a full panel upgrade is cost-prohibitive, you can install a load-management or "load-shedding" device (such as a DCC-9 or NeoCharge). These smart systems monitor your home's real-time energy consumption. If you turn on a high-load appliance like an electric dryer while your car is charging, the device will temporarily pause or throttle the EV charger to prevent overloading your panel, resuming full-speed charging once the other appliance turns off.
The Professional Installation Process and Timeline
Installing an EV charger is a highly technical process that involves working with high-voltage electricity, routing conduit through structural walls, and making precise terminations at your electrical panel.
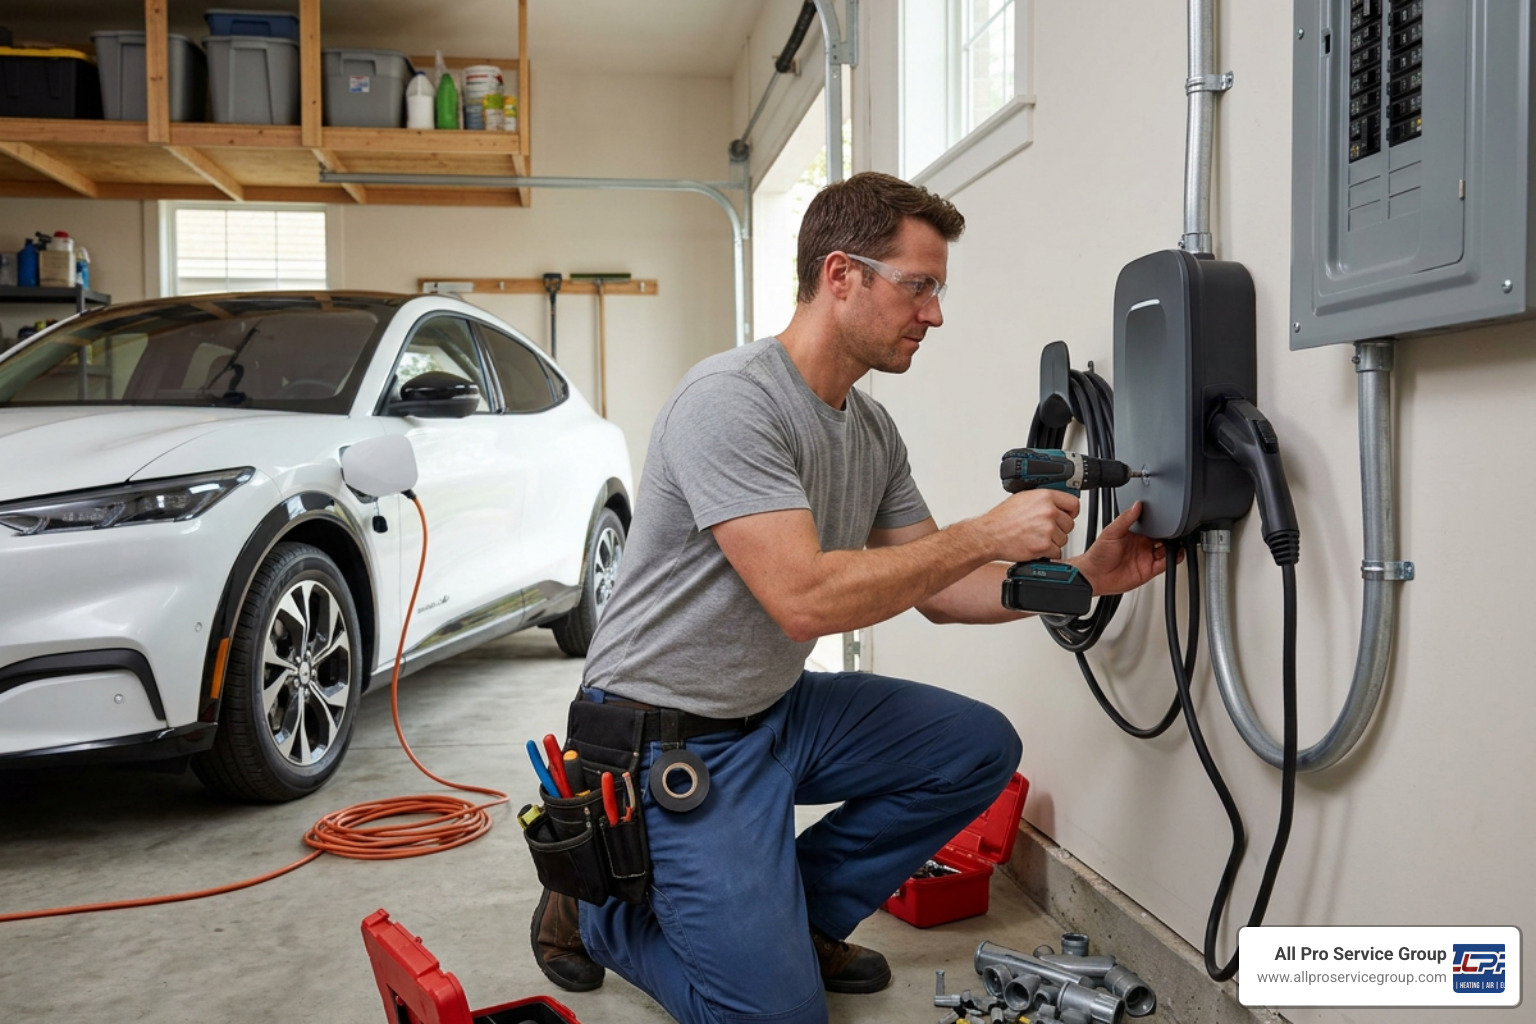
To ensure the system operates safely and complies with all local building codes, the installation must follow a structured, professional process. You can review the complete setup steps in our comprehensive EV charger install guide.
Why You Must Hire a Licensed Electrician
While DIY projects are great for painting or landscaping, high-voltage electrical work is not the place to cut corners. Here is why hiring a licensed professional is non-negotiable:
- Safety and Fire Prevention: Electrical issues cause over 51,000 home fires every year. A loose wire termination under high continuous load can easily generate enough heat to start a structural fire.
- Code Compliance: Professional electricians ensure all wiring, conduit, grounding, and circuit breakers strictly comply with the National Electrical Code (NEC).
- Warranty Protection: Most major EV charger manufacturers explicitly state in their warranty terms that the product warranty is voided if the unit is not installed by a licensed electrician.
- Home Value and Insurance: Unpermitted electrical work can void your homeowner's insurance policy if a fire occurs. Furthermore, unpermitted installations often cause major delays or financial penalties during home inspections when selling your property. For reliable, safe execution, always rely on certified Electrical services.
- Manufacturer Technical Specifications: Specialized chargers require precise physical and electrical steps. For instance, the official VersiCharge ™ AC manual specifies that installers must torque terminal lugs to exactly 35 in-lbs for #6 AWG wire or 25 in-lbs for #8 AWG wire to prevent arcing. Licensed electricians use calibrated torque screwdrivers to meet these exact standards.
The Step-by-Step Car Charging Port Installation Timeline
From your initial inquiry to the moment you plug in your vehicle, the end-to-end installation process typically takes three to six weeks. This timeline is largely dictated by local municipal permitting speeds and utility coordination.

- Preliminary Assessment (Days 1–3): You provide photos of your electrical panel, your garage layout, and your preferred charger location. Our team reviews these details to perform a preliminary load calculation.
- On-Site Consultation (Days 4–7): An electrician visits your home to verify panel capacity, map out the exact conduit path, and confirm if any panel upgrades or trenching are required.
- Permitting and Approval (Weeks 2–4): We submit the necessary electrical plans and permit applications to your local municipal building department (such as Salt Lake City, Provo, or West Jordan).
- Physical Installation (Day of Install): Once the permit is approved, the physical installation takes approximately 4 to 6 hours. If a panel upgrade is required, it will add an extra day of work.
- Final Inspection (Weeks 5–6): A local municipal building inspector visits your home to review the installation, verify code compliance, and officially sign off on the permit.
Costs, Permits, and Rebates for Home EV Charging
Understanding the financial side of a car charging port installation helps you budget accurately and take advantage of available financial incentives.
A typical residential Level 2 charging station costs between $1,000 and $4,000 per charging port when factoring in both hardware and professional installation. If you are a commercial property owner or business manager, you can explore specialized commercial pricing and installation requirements in our Business EV charger installation guide 2026.
Typical Installation Costs and Price Factors
The overall cost of your home installation is influenced by several key variables:
- Hardware Costs: High-quality Level 2 smart chargers generally retail between $300 and $800.
- Basic Installation Labor and Materials: For a straightforward installation where the charger is mounted within a few feet of a panel with existing capacity, expect to pay between $700 and $1,500.
- Electrical Panel Upgrades: If your home requires a service upgrade to 200 amps, this will add $2,000 to $3,500 to the total project cost.
- Conduit Run Distance: Heavy-gauge copper wire (#6 AWG for a 60-amp breaker or #8 AWG for a 50-amp breaker) is expensive. Running conduit across a finished basement or through attic spaces increases material and labor costs.
- Trenching for Detached Garages: If your charger is going into a detached garage or carport, excavating a trench to bury underground conduit will add significant labor costs.
Navigating Permits, Warranties, and Utility Rebates
While the upfront costs can seem significant, several incentives and protections are available to help offset the expense:
- Electrical Permits: Permit fees typically run between $50 and $250 depending on your local municipality. Never skip this step; it is your legal guarantee that the work is safe and code-compliant.
- Local Utility Rebates: Many local utility companies offer substantial rebates for installing smart Level 2 chargers. For example, Rocky Mountain Power in Utah frequently offers residential rebates and special Time-of-Use (TOU) rates that allow you to charge your vehicle at discounted rates during off-peak overnight hours.
- State and Federal Tax Credits: While the federal IRS Section 30C tax credit expired on June 30, 2026, keep an eye out for local state-level EV incentives that may still be active in your area.
- Manufacturer Warranties: Most high-quality chargers come with a 3-year parts warranty. By hiring a licensed electrician to perform the installation, you ensure this warranty remains fully valid.
To check out charging infrastructure details near you, you can explore local regional resources such as Park City, Utah EV Charging Stations Info, EV charging stations in Provo, West Jordan, Utah EV Charging Stations Info, or EV charging stations in West Valley City.
Conclusion
Installing a home car charging port is the single best way to maximize the convenience, cost-savings, and daily utility of your electric vehicle. By upgrading from a slow Level 1 trickle charger to a professionally installed Level 2 station, you eliminate public charging anxiety and ensure your car is always ready to go when you are.
At All Pro Service Group, we have been providing dependable, high-quality plumbing, heating, air, and electrical services across the Greater Salt Lake Area since 2008. Our certified electricians are fully trained, background-checked, and "Gephardt Approved," ensuring your home electrical upgrades are handled with the highest level of safety and customer service. Whether you live in Salt Lake City, Ogden, Park City, Provo, South Jordan, West Jordan, or West Valley City, we are here to help you power up your ride.
Ready to make the switch to fast, convenient home charging? Contact us today to schedule your professional EV charger installation consultation!