
Replace a Broken Toilet Fill Valve Before It Wastes Water
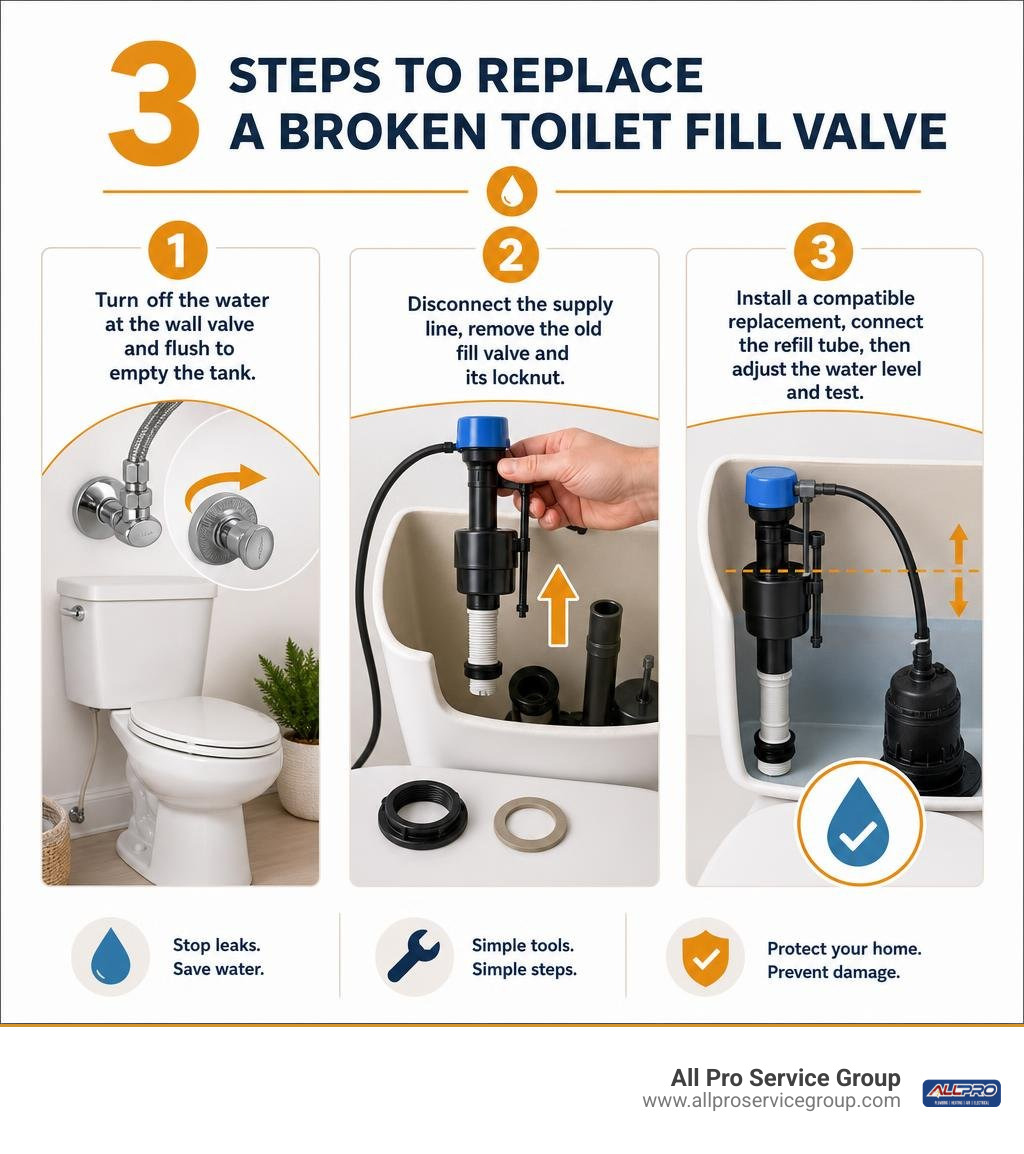
A broken toilet valve that makes the toilet run nonstop, fill slowly, or overflow is often a fill valve problem. You can usually replace it in three steps:
- Turn off the water at the wall valve and flush to empty the tank.
- Disconnect the supply line, remove the old fill valve and its locknut.
- Install a compatible replacement, connect the refill tube, then adjust the water level and test.
Start by checking the flapper, too. A worn flapper or inexpensive fill-valve cap can sometimes stop a running toilet without replacing the whole assembly. But if water keeps flowing into the overflow tube, the fill valve is cracked, or the float will not move correctly, replacement is usually the more reliable fix. A running toilet can waste up to 200 gallons of water per day.
At All Pro Service Group, we have been serving Greater Salt Lake homeowners with plumbing repairs and system maintenance since 2008. Our team regularly helps homeowners diagnose a broken toilet valve, prevent water damage, and decide when a repair is safe to handle on their own.
How to Identify and Diagnose a Broken Toilet Valve
When a toilet begins acting up, figuring out which part has failed is half the battle. Toilets operate using a remarkably simple mechanical system, yet multiple parts can cause similar symptoms when they wear out. Before grabbing your wrenches, it helps to know which specific valve is causing the problem.
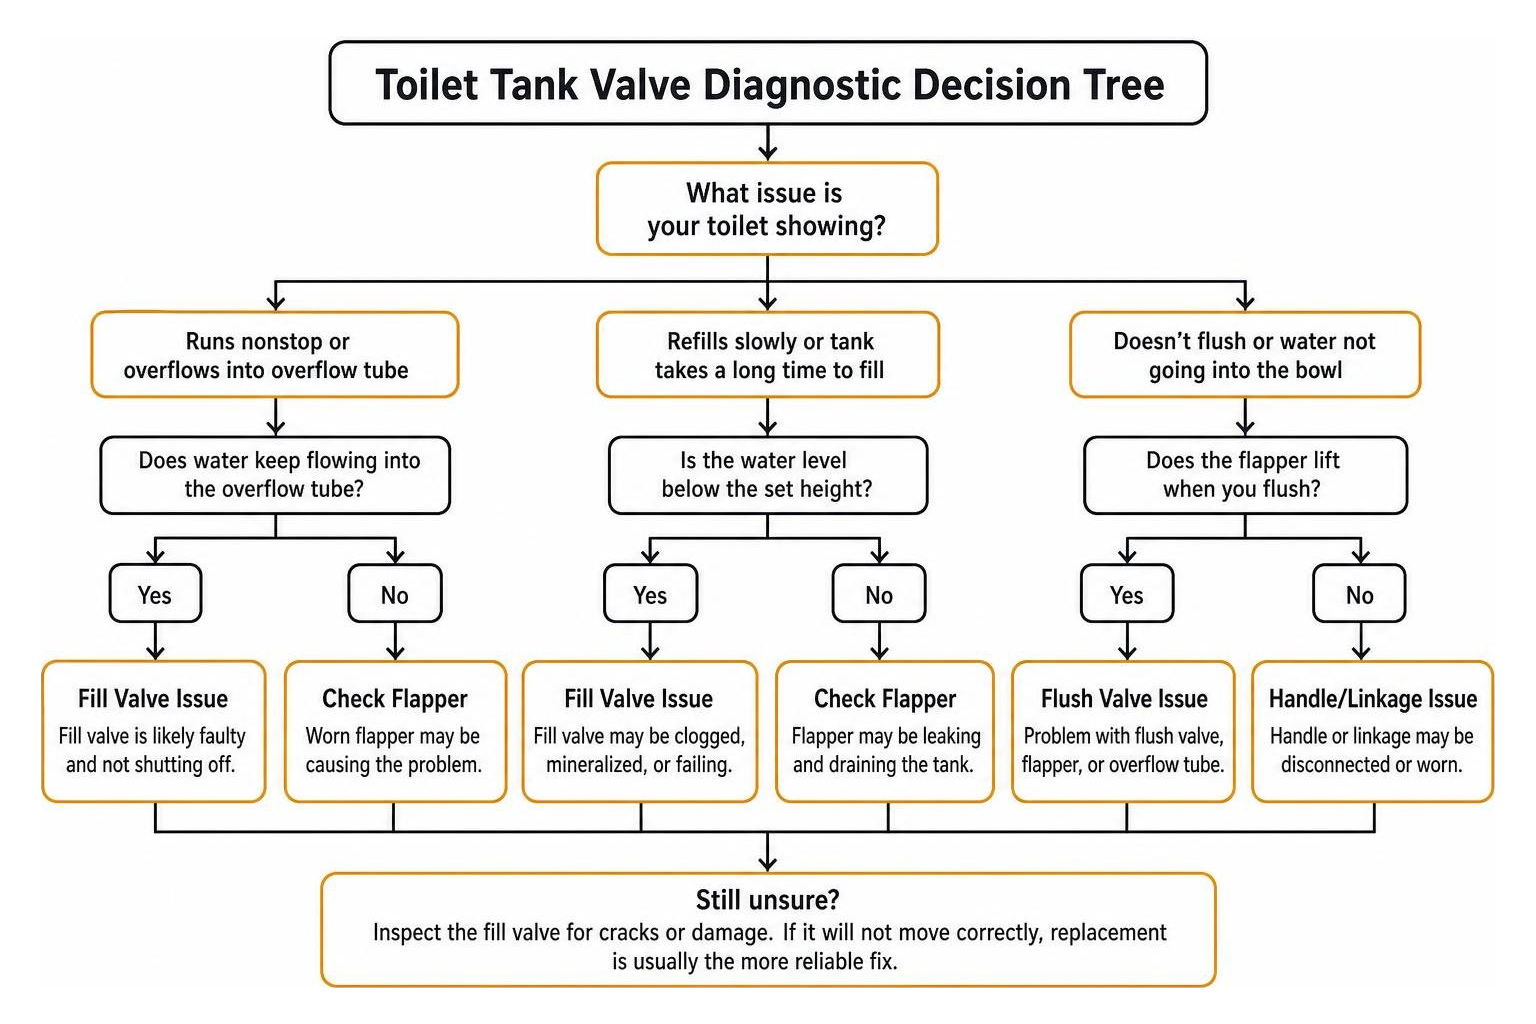
A standard two-piece residential toilet uses three distinct valves to control water flow:
- The Fill Valve (Ballcock / Float Valve): Located on the left side of the tank, this valve is connected directly to your home's water supply line. Its job is to refill the tank and bowl to a precise level after every flush and shut off automatically when the water level reaches the set height.
- The Flush Valve: Located in the center of the tank base, this assembly includes the overflow tube and the flapper or canister seal. When you push the flush handle, the flapper lifts, allowing water to rush into the bowl.
- The Shut-Off Valve (Angle Stop): Located on the wall or floor underneath the tank, this manual valve controls the water supply feeding the toilet.
| Valve Type | Primary Function | Common Failure Symptoms | Typical Repair vs. Replace |
|---|---|---|---|
| Fill Valve | Refills the tank and bowl after a flush; shuts off water at set level. | Continuous hissing, water running into overflow tube, slow refill, erratic tank water level. | Full replacement ($7–$30 DIY parts; 30–45 minutes). |
| Flush Valve | Releases tank water into the bowl and provides overflow protection. | Phantom flushing (intermittent cycling), constant trickle into bowl, leaking tank-to-bowl gasket. | Replace flapper first ($5–$15); replace entire flush valve if seat is grooved ($15–$50). |
| Shut-Off Valve | Manually turns water supply on and off to the fixture. | Drips from valve stem when turned, leak at compression nut, won't shut water off completely. | Tighten packing nut or replace stem washer; upgrade to quarter-turn ball valve if seized. |
Signs You Have a Broken Toilet Valve vs. Simple Flapper Leak
A constantly running toilet is one of the most common plumbing headaches in Utah homes, but you do not want to replace parts you do not need. Often, homeowners suspect a bad fill valve when the actual culprit is a degraded rubber flapper, or vice versa.
To isolate the problem quickly, use the simple dye test:
- Remove the tank lid and place 4 to 5 drops of dark food coloring or a leak-detector tablet into the tank water.
- Do not flush the toilet for 20 to 30 minutes.
- Inspect the toilet bowl. If colored water has seeped into the bowl without flushing, the flapper or the flush valve seat is failing to create a watertight seal.
If the dye test is clear (no color in the bowl), look closely at the water level inside the tank:
- Water overflowing into the overflow pipe: If water is constantly spilling over the top edge of the central overflow tube, your fill valve is either adjusted too high or its internal diaphragm seal has failed to close. If you try to Fix Toilet Float Valve mechanisms by adjusting the float screw downward and water still spills into the tube, the fill valve assembly is broken and requires replacement.
- Water level is normal, but the valve hisses continuously: The internal shut-off diaphragm inside the fill valve head is worn out or fouled by sediment from hard water.
Essential Tools and Replacement Parts to Gather
Replacing a toilet fill valve requires only basic plumbing hand tools and a few inexpensive parts. Having everything ready before you disconnect your plumbing prevents unexpected trips to the hardware store with your water turned off.
Required Tools:
- Adjustable wrench (6-inch or 8-inch)
- Channel-lock / slip-joint pliers
- Small bucket or shallow container
- Large sponge and heavy rags/towels
- Basin wrench (helpful if the shank nut is deeply recessed beneath the tank)
Required Materials:
- Universal toilet fill valve kit (such as a Fluidmaster 400A or Korky QuietFill)
- New flexible braided stainless steel toilet supply line (recommended whenever changing toilet valve components, as old rubber washers in supply lines harden and leak upon reinstallation)
- Small cup of clean water to clean the tank floor opening
Step-by-Step Guide: How to Replace a Broken Fill Valve in 3 Simple Steps
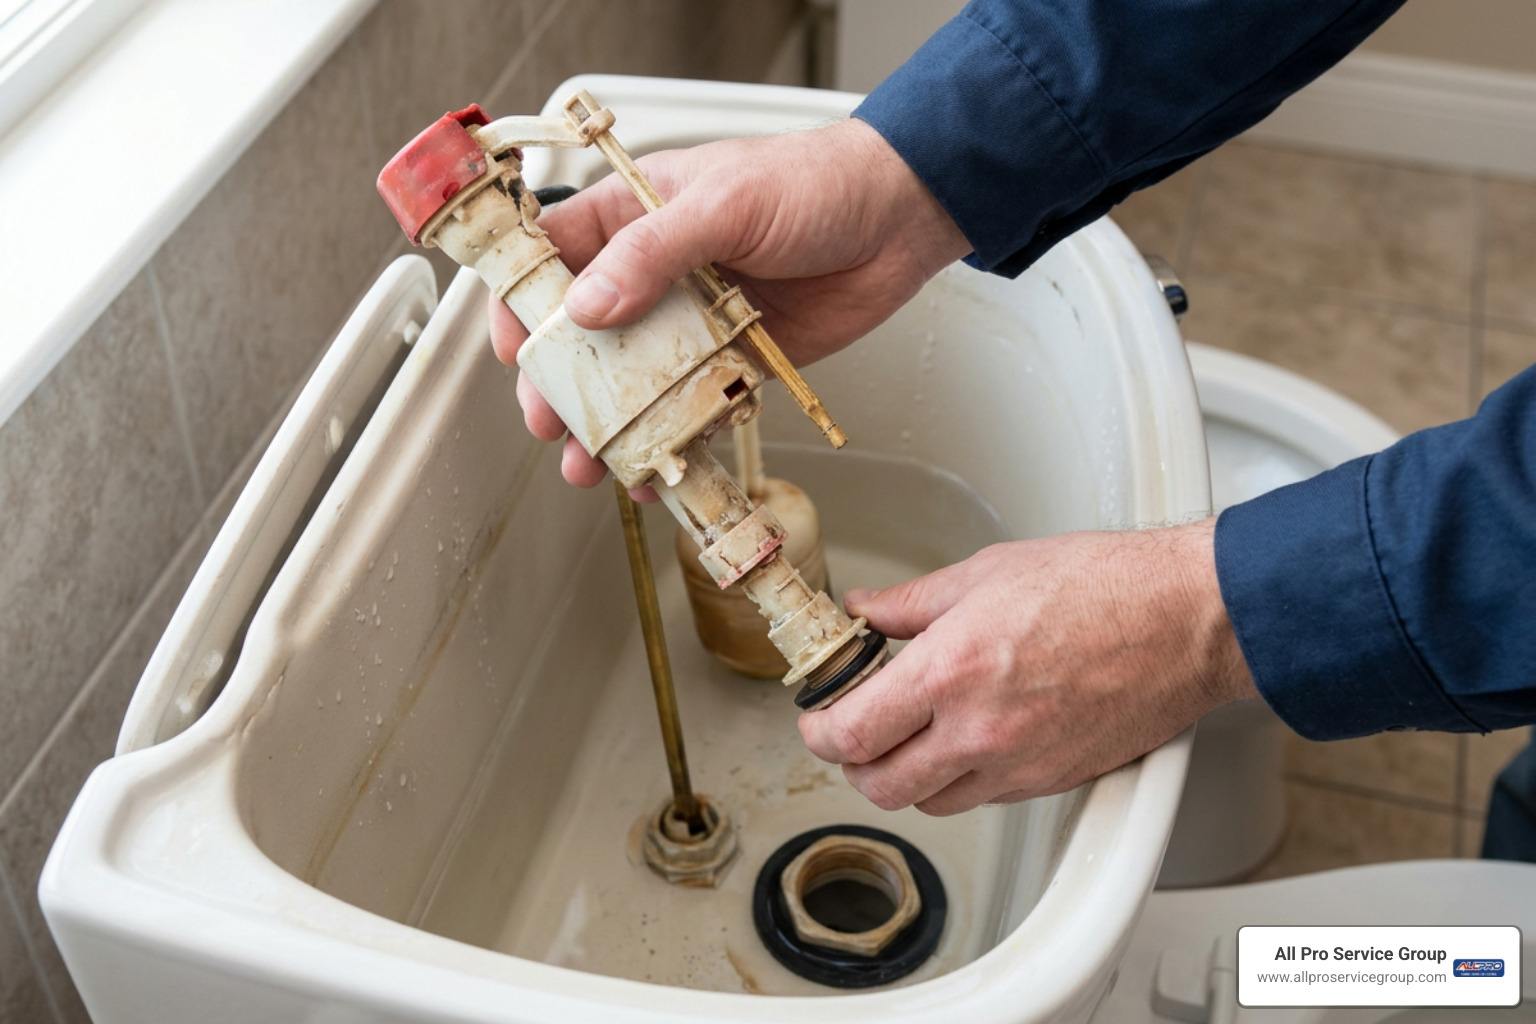
Replacing your toilet's fill valve is a beginner-friendly DIY project that typically takes 30 to 60 minutes. Standard universal fill valves fit roughly 80% to 90% of gravity-fed two-piece residential toilets. For in-depth mechanical perspectives, resources like the The DIYer's Guide to Toilet Fill Valve Replacement | Family Handyman provide helpful background on modern universal assemblies.
Follow these three structured steps to complete the replacement cleanly and safely.
Step 1: Shut Off Water and Drain the Tank
Before touching any plumbing nuts, you must isolate the water supply and remove the standing water inside the toilet tank.
- Turn off the water supply: Locate the angle stop shut-off valve on the wall behind the toilet. Turn the handle clockwise until it stops firmly (or turn a quarter-turn valve 90 degrees until perpendicular to the pipe).
- Flush and hold: Push the toilet flush handle down and hold it down completely until all standing water drains from the tank into the bowl.
- Mop up remaining water: A standard flush leaves roughly 1 to 2 inches of water below the flapper level. Place a large sponge into the bottom of the tank and squeeze the water out into a small bucket. Repeat until the bottom of the tank is completely dry.
- Place towels: Lay an old towel on the floor beneath the left rear corner of the tank, directly under the fill valve shank and water supply line.
Step 2: Remove the Old Valve and Prep the Tank Opening
With the tank dry, you can safely remove the old fill valve assembly without flooding your bathroom floor.
- Disconnect the water supply line: Place your small bucket under the supply line connection at the base of the tank. Using your adjustable wrench, loosen the coupling nut connecting the flexible supply line to the plastic threaded shank of the fill valve. Spin the nut off by hand and let any residual water drain into the bucket.
- Remove the mounting locknut: Underneath the exterior bottom of the porcelain tank, locate the plastic mounting nut threaded onto the fill valve shank. Use slip-joint pliers to turn the nut counterclockwise until loose, then spin it off by hand.
- Lift out the old valve: From inside the tank, disconnect the small rubber refill tube from the overflow pipe. Grab the fill valve body and pull it straight up out of the tank. Ensure the old rubber shank washer comes out with it.
- Clean the tank opening: Wipe away any mineral deposits, rust, or degraded rubber around the mounting hole on both the inside and outside surfaces of the porcelain. Ensuring a smooth surface is essential to Fix Toilet Seal interfaces properly on new installations.
Step 3: Install the New Valve and Adjust Water Level
Now you are ready to assemble, mount, and calibrate your replacement valve.
- Install the shank washer: Slide the thick rubber shank washer onto the threaded base of the new fill valve, bevel side facing downward toward the tank floor opening.
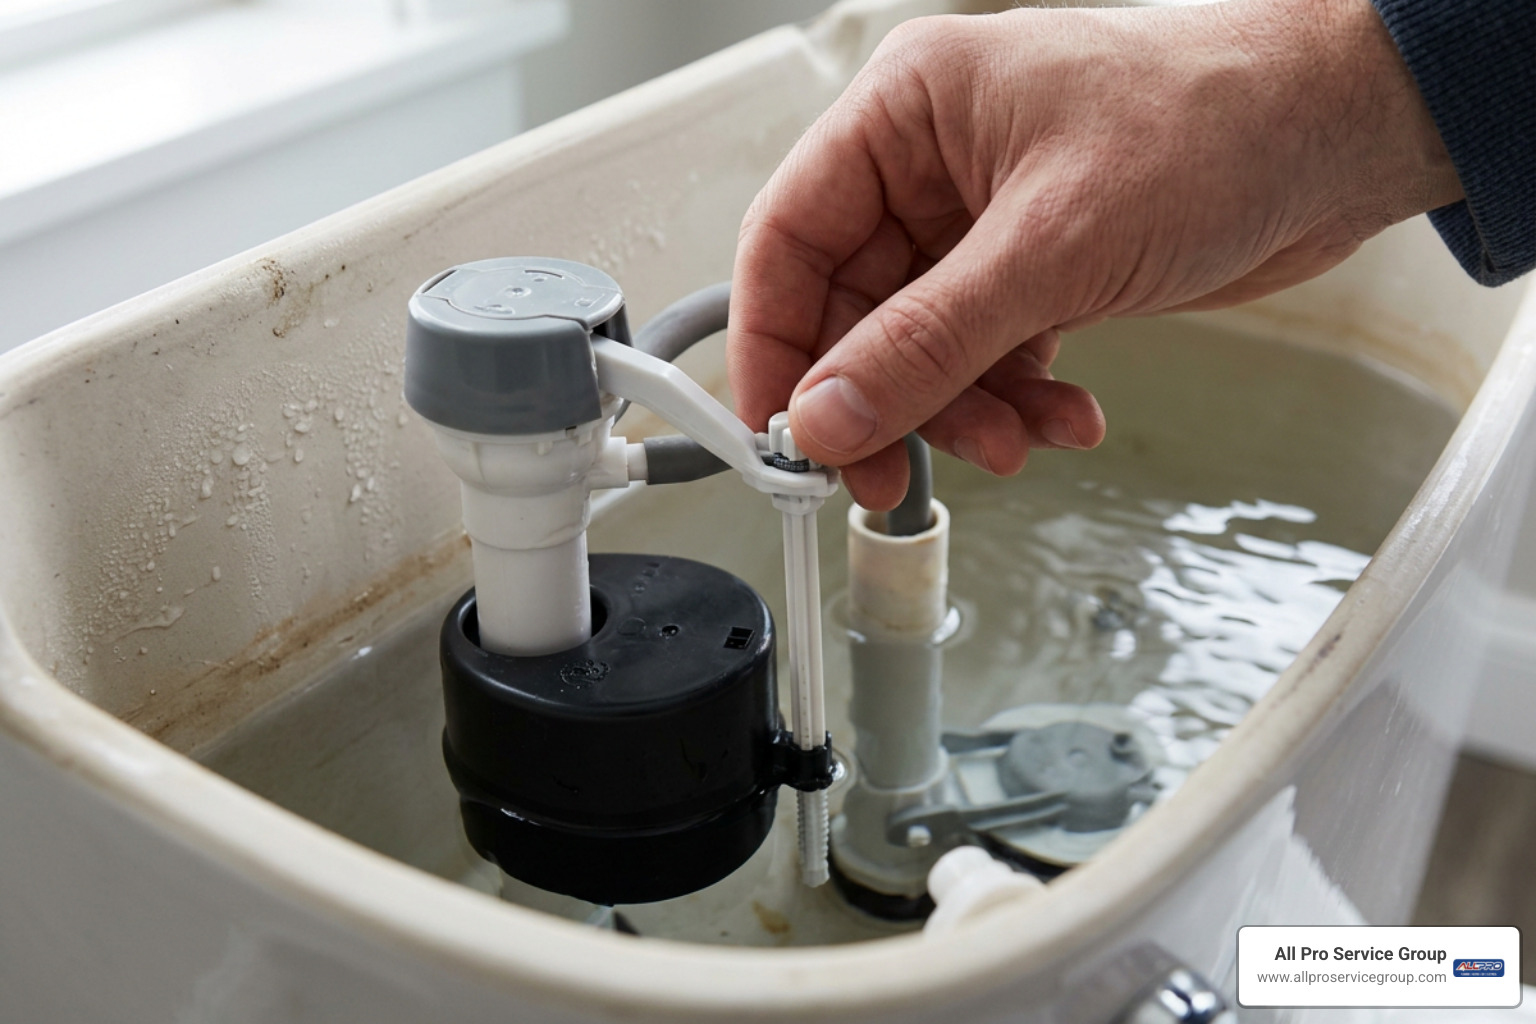
- Adjust the valve height: Most modern fill valves are height-adjustable. Twist or unlock the upper valve body relative to the threaded shank so that the critical level mark (marked "C.L." on the valve body) sits at least 1 inch above the top of the tank's overflow tube. Lock the adjustment ring firmly in place.
- Position and secure the valve: Insert the valve shank through the tank hole, positioning the arm and refill port so they do not touch the tank walls or interfere with the flush handle lever. While holding the valve straight from the inside, thread the plastic mounting locknut onto the shank from beneath the tank. Tighten the nut hand-tight, then use pliers to turn it an additional 1/2 turn. Do not overtighten, as excessive force can distort the rubber gasket or crack the porcelain.
- Attach the refill tube: Connect the small rubber refill tube to the nipple on the fill valve. Clip the other end of the tube to the top edge of the overflow pipe using the provided plastic angle adapter. Ensure the tube aims down into the overflow pipe but does not extend down inside below the water line (which could create an unintentional siphon). If you are servicing other internal tank components at the same time, consult our Flush Seal Replacement Guide 2026 for proper flapper and seal clearance.
- Reconnect supply line and test: Thread the water supply line onto the fill valve shank and tighten hand-tight plus a 1/4 turn with a wrench. Slowly turn the wall shut-off valve counterclockwise to restore water. Let the tank fill and verify that the water shuts off automatically roughly 1 inch below the top of the overflow pipe. Turn the water level adjustment screw clockwise to raise the level, or counterclockwise to lower it as needed.
Troubleshooting Other Toilet Valve Issues and Avoiding Mistakes
While fill valve replacement solves the majority of running toilet calls, other related valves can introduce complications during or after a repair.
What to Do If You Crack or Damage a Broken Toilet Valve During Repair
DIY plumbing repairs require a gentle touch, especially around brittle plastic threads and vitreous china porcelain.
If you accidentally crack the plastic shank of a fill valve while tightening, or if the lock tab on a Korky or Fluidmaster valve snaps off during height adjustment, do not attempt to patch the part with silicone, glue, or plumber's tape. A damaged fill valve shank is under continuous domestic water pressure (often 40 to 70 PSI); a cracked shank will eventually burst and cause extensive bathroom flooding. If the valve cracks, turn off the water immediately and replace the component.
If you encounter unexpected structural leaks or cracked fittings that extend beyond simple valve parts, our guide on dealing with a broken toilet outlines how to safeguard your home against severe water damage while evaluating repair options.
Repairing Leaking Shut-Off and Flush Valves
Sometimes, attempting to shut off the water to fix a fill valve reveals that the shut-off valve itself is leaking or failing to close.
Leaking Shut-Off Valve (Angle Stop)
Angle stops use internal rubber bibb washers and packing seals that dry out and degrade after years of sitting in one position.
- Stem Leaks: If water drips from the valve stem when you turn the handle, use an adjustable wrench to tighten the packing nut located directly behind the handle by 1/8 to 1/4 turn clockwise. This compresses the internal packing material and frequently stops the leak immediately.
- Compression Nut Leaks: If water drips where the valve connects to the copper pipe, support the valve body with one wrench and gently tighten the compression nut 1/4 turn with a second wrench. Never use Teflon tape on compression threads; apply a small dab of pipe dope to the brass ferrule instead.
- For complete step-by-step guidance on angle stop overhauls, check out How to Repair the Shut Off Valve on a Toilet [Stop Leaks Fast] - RapidRepair.blog.
Replacing a Corroded Flush Valve
If the toilet continues to drain water into the bowl after installing a brand-new flapper, the seat of the flush valve itself is likely pitted or cracked. Replacing the full flush valve assembly requires removing the tank from the bowl on two-piece toilets:
- Shut off water, drain and dry the tank, and disconnect the supply line.
- Remove the tank-to-bowl bolts located underneath the tank.
- Lift the tank straight up and set it gently on a padded surface or towels.
- Unscrew the large spud nut on the exterior bottom of the flush valve, pull out the old valve assembly, and install the new 2-inch or 3-inch flush valve kit along with a fresh tank-to-bowl rubber gasket.
- For additional technical instruction on full flush assemblies, refer to How to Replace a Toilet Flush Valve: Complete Step-by-Step Guide [2026] and Toilet Flush Valve Replacement: Step-by-Step Guide.
When to Call a Professional for Valve Repairs
While replacing a standard fill valve is well within the scope of most homeowners, certain red flags indicate it is time to put down the wrench and call a licensed professional:
- Seized or Rusted Tank Bolts: If the bolts connecting your tank to the bowl are heavily corroded, attempting to force them with large wrenches can easily crack the porcelain tank.
- Frozen Shut-Off Valves: If the angle stop under the toilet is completely seized or spins freely without shutting off water, the main water shut-off for the home must be closed, and the valve replaced.
- Rigid Copper Supply Lines: Older homes often have solid chrome-plated copper supply pipes instead of flexible braided lines. These require precise cutting and bending tools to avoid damaging the wall stub-out.
- Specialty or Pressure-Assist Toilets: Pressure-assist units (such as Sloan Flushmate systems) use pressurized air-water vessels rather than gravity-fed valves. Servicing these requires specialized procedures.
If you are running into complex structural or bowl-mounting challenges, explore our comprehensive Toilet Repair Complete Guide 2026 for wider diagnostics.
Frequently Asked Questions About Toilet Valve Repair
Can I replace a toilet fill valve without shutting off the water?
No, you should never attempt to replace or disassemble a toilet fill valve without shutting off the water supply first. The fill valve is under continuous residential water pressure. Loosening the mounting locknut or disconnecting the supply line with the water turned on will immediately cause high-pressure flooding in your bathroom. If your local toilet shut-off valve is stuck or broken, shut off the main water supply valve to your house before beginning any repair work.
How long does a replacement toilet valve typically last?
A quality toilet fill valve or flush valve assembly typically lasts between 4 and 7 years. In regions throughout Utah with high mineral content or hard municipal water, calcium and mineral scale buildup can degrade internal rubber diaphragms and flapper seals in as little as 3 to 4 years. Additionally, using in-tank drop-in chemical bleach or chlorine cleaning tablets significantly accelerates seal deterioration and can void manufacturer warranties.
Why is my toilet still running after installing a new fill valve?
If your toilet continues to run or cycles on and off after installing a new fill valve, check these three common causes:
- Float is set too high: The water level is rising above the lip of the overflow tube. Turn the adjustment screw counterclockwise to lower the float so the water stops 1 inch below the overflow rim.
- Refill tube is inserted too deep into the overflow pipe: If the small rubber refill tube is pushed deep down inside the overflow pipe rather than secured at the top with an angle clip, it creates a siphon that continuously pulls water out of the fill valve and into the bowl.
- Flapper is not sealing: The rubber flapper may be misaligned, caught on a taut lift chain, or resting on a pitted flush valve seat. Adjust the chain so it has approximately 1/2 inch of slack when closed.
Conclusion: Restoring Your Bathroom Plumbing
Fixing a faulty toilet valve is one of the most practical and cost-effective DIY projects a homeowner can tackle. By spending $7 to $30 on a modern replacement fill valve and investing under an hour of your time, you can permanently stop annoying hissing sounds, prevent phantom flushing, and protect your home from wasting thousands of gallons of clean water each month.
However, if you run into corroded hardware, stubborn angle stop leaks, or need an experienced hand to inspect your bathroom plumbing fixtures across Ogden, Salt Lake City, Provo, or anywhere in the Greater Salt Lake Valley, our team is ready to assist. Contact us today for dependable All Pro plumbing repair and maintenance services tailored to keep your home running smoothly.