
Replace a Broken Cistern Lid Without Replacing the Toilet
A broken cistern lid replacement is usually a simple job: remove loose ceramic pieces safely, find your toilet's make and model, measure the lid and flush-button opening, then order an exact-match replacement. You do not need to replace the full toilet unless the cistern itself is damaged or a suitable lid cannot be found.
Do not assume another lid will fit. Cistern lids are often model-specific, and even a small difference in shape, button position, or internal clearance can leave the lid unstable or stop the flush from working correctly.
First, wear gloves and eye protection, especially if the vitreous china has shattered. Then check the underside of the old lid, inside the cistern, and on the toilet pan for a brand name or part number. A clean, correctly fitted lid protects the flush parts, restores the look of the toilet, and avoids unnecessary replacement of an otherwise sound fixture.
I'm Gary Leany of All Pro Service Group, serving Greater Salt Lake homeowners with practical plumbing repairs and replacements since 2008. In this guide, I'll walk you through a safe broken cistern lid replacement, from identifying the right part to fitting and testing it.
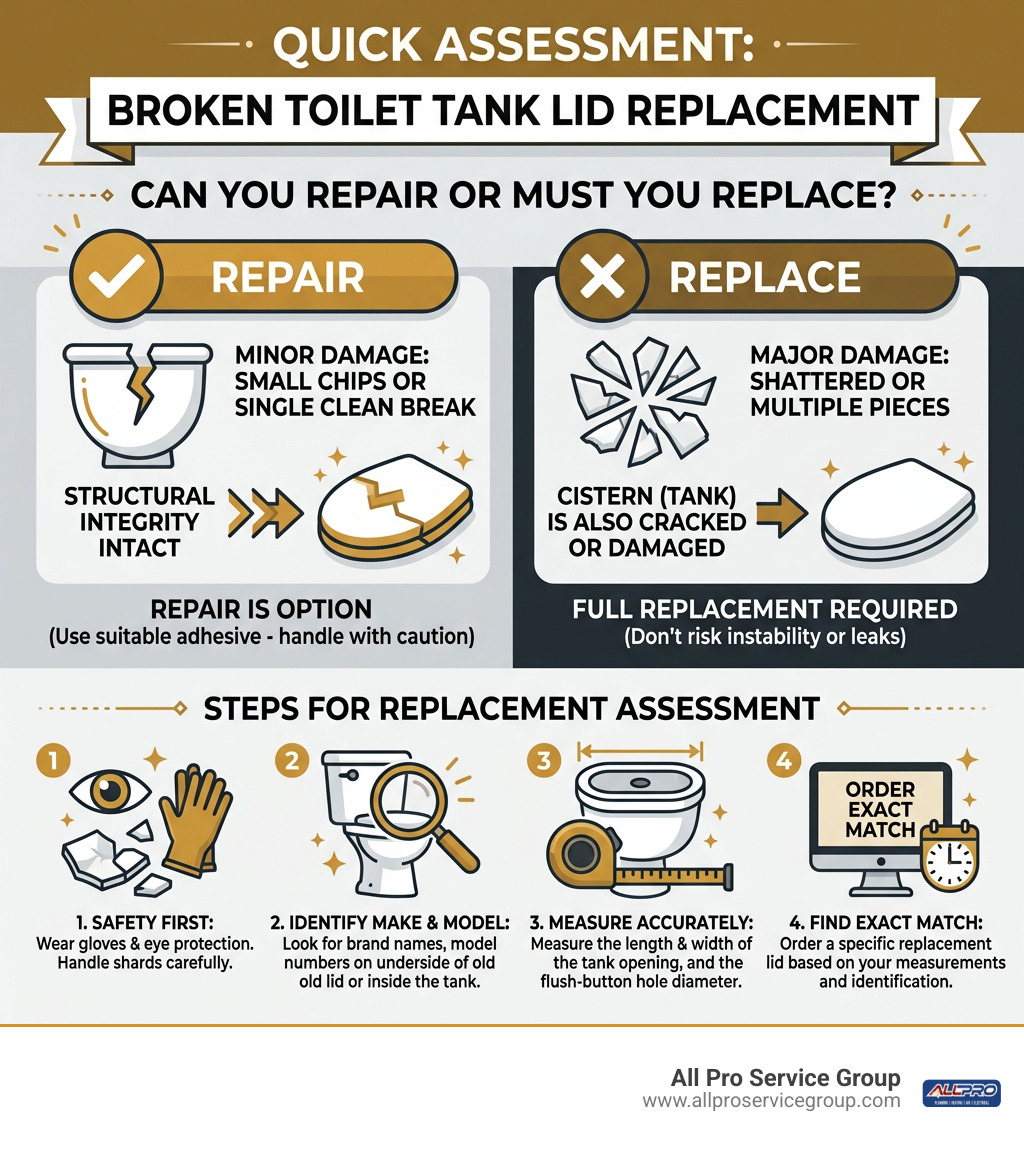
Can You Repair Porcelain or Must You Replace It?
When a heavy glass perfume bottle, candle jar, or aerosol can slips from your fingers, vitreous china takes the hit. Porcelain is rigid, heavy, and brittle. Under sudden impact, it fractures cleanly or shatters completely into razor-sharp shards. Before spending money on parts, we need to evaluate whether the cover is a candidate for chemical bonding or if a full replacement is the only safe option.
Handling broken vitreous china poses severe cut risks. Always wear heavy-duty work gloves and eye protection when picking up pieces. Never allow children or pets near broken porcelain shards.
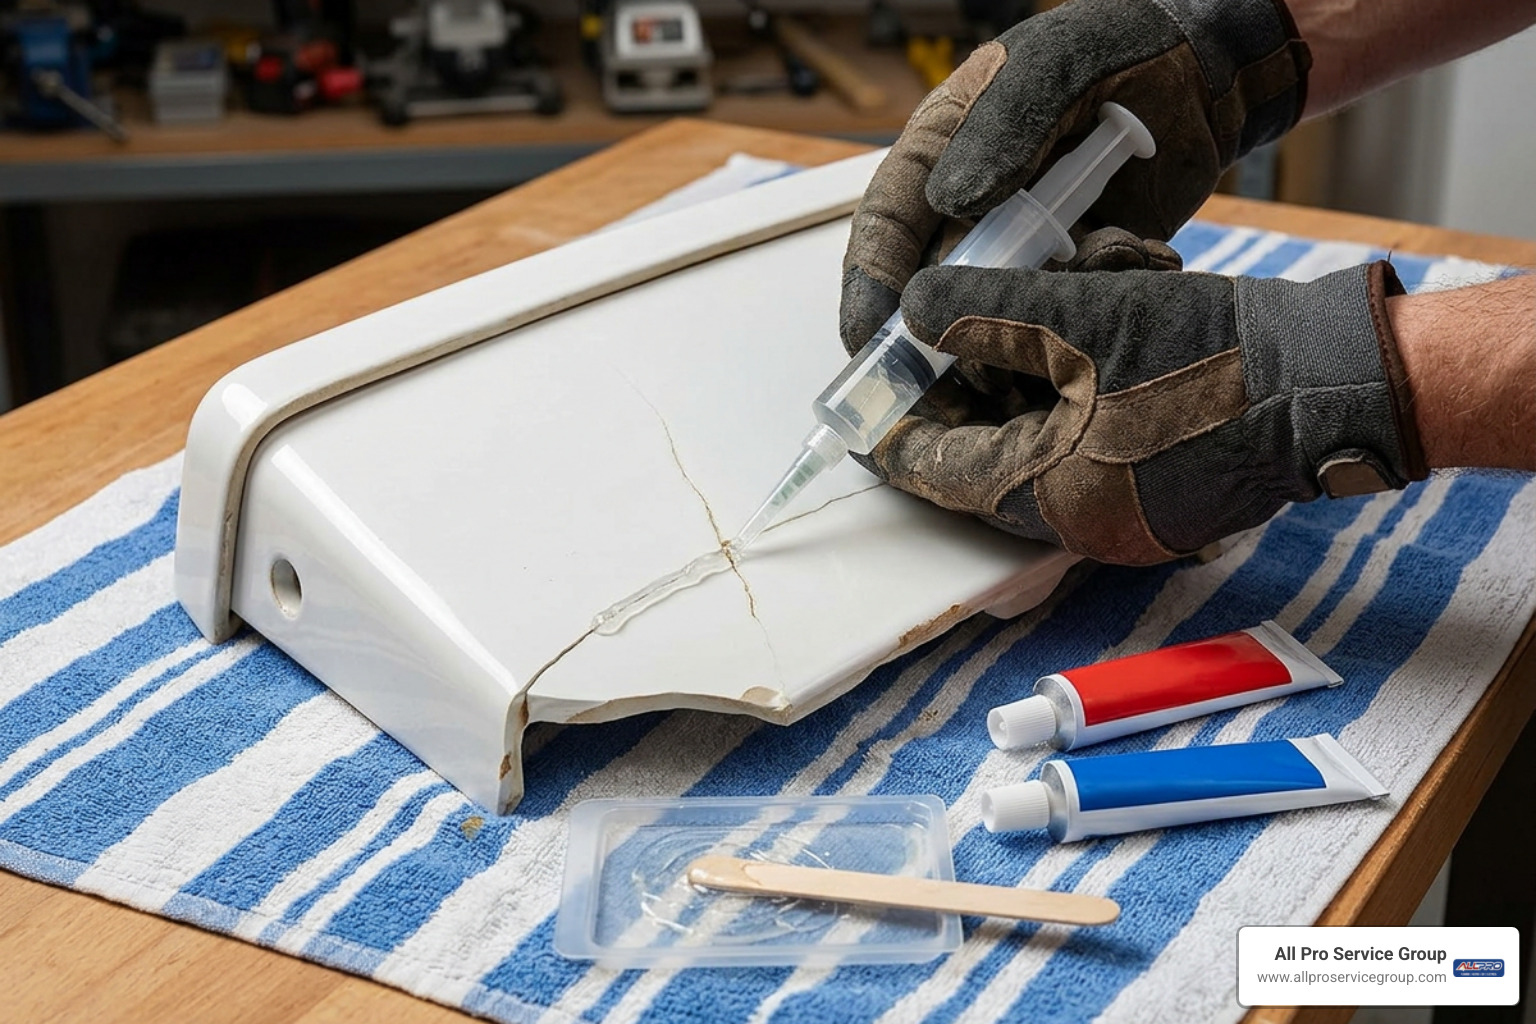
| Factor | DIY Two-Part Epoxy Repair | Full Cistern Lid Replacement |
|---|---|---|
| Average Cost | $15 – $25 (Adhesive & Mesh) | $50 – $140 (Model-Specific Lid) |
| Time Required | 24 Hours (Full Cure Time) | 10 – 15 Minutes (Install & Fit) |
| Aesthetic Result | Visible hairline seam | Factory-original, seamless look |
| Structural Integrity | Moderate; strictly non-load-bearing | High; original vitreous china strength |
| Ideal Scenario | 2-piece clean fracture, rare/vintage model | Multi-piece break, shattered corners, missing fragments |
DIY Porcelain Repair vs. Broken Cistern Lid Replacement
If your cistern cover cracked neatly into two or three large sections without missing fragments, a chemical repair can save an otherwise sound piece. Standard superglue (cyanoacrylate) is too brittle for this task, but high-performance two-part marine-grade epoxy offers tensile strengths exceeding 3,000 PSI—often stronger than the porcelain ceramic body itself (which typically sits around 1,500 PSI).
- Degrease the Edges: Clean every mating surface thoroughly using 90% isopropyl alcohol to remove grime, dust, and bathroom moisture. Let it dry completely.
- Dry Fit: Align the broken pieces together dry to verify that no tiny shards are blocking a flush, tight seam.
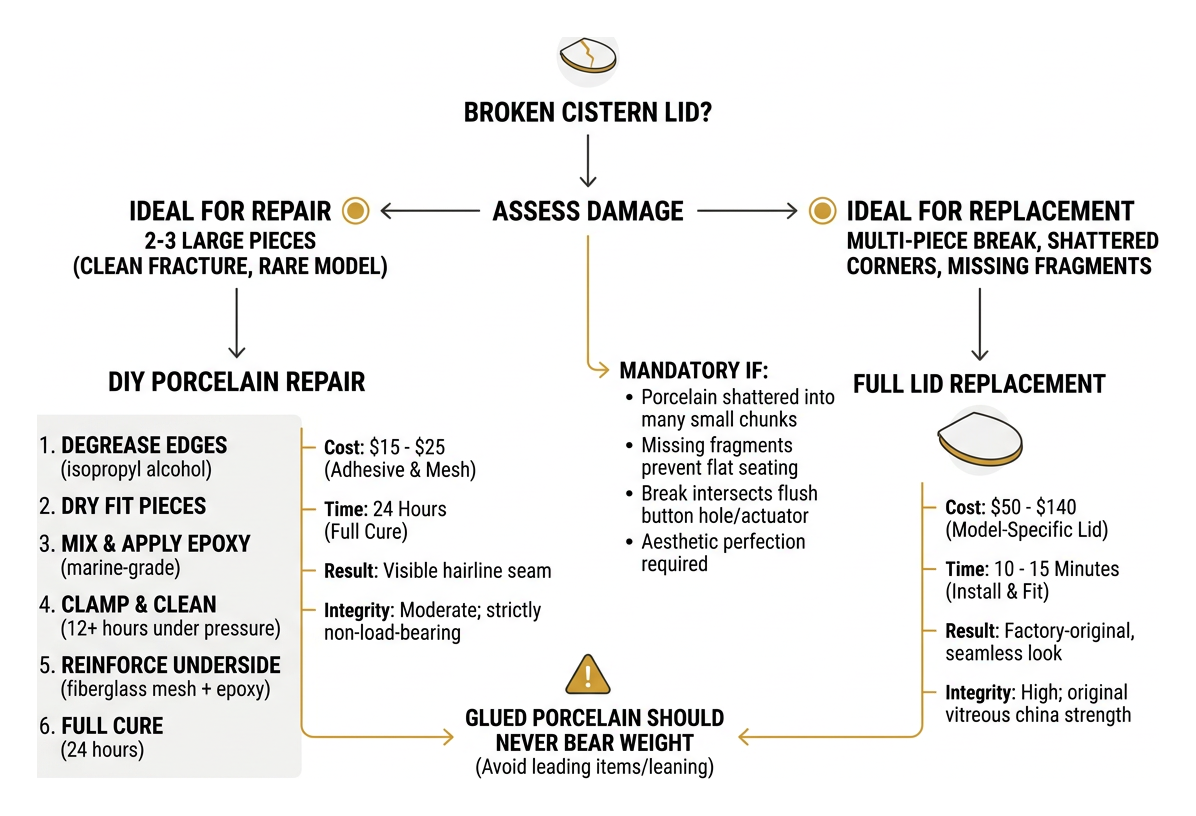
- Mix and Apply Epoxy: Mix equal parts of your two-part waterproof epoxy. Apply a thin, uniform layer along the fracture line.
- Clamp and Clean: Press the pieces firmly together. Wipe away any wet squeeze-out immediately using a cotton swab dipped in rubbing alcohol. Hold the pieces under steady pressure using a ratcheting strap or heavy-duty tension painter's tape for at least 12 hours.
- Reinforce the Underside: Turn the lid over and apply self-adhesive fiberglass mesh across the crack line on the underside. Coat the mesh in another layer of epoxy to create a mechanical bridge.
- Full Cure: Allow the piece to cure undisturbed for a full 24 hours before reinstalling.
For an in-depth breakdown of bonding techniques, explore this Guide on structural porcelain repair. If internal components were also damaged during the drop, review our advice on fixing a broken toilet component to restore total operation.
When Full Replacement Is the Smarter Choice
A repair kit cannot fix every mishap. Sourcing a matching lid is mandatory if:
- The porcelain shattered into multiple small chunks, crumbs, or splintered dust.
- Chunks along the outer rim or resting lip are missing, preventing the cover from sitting flat.
- The break intersects directly through a dual-flush button aperture or top-mount actuator hole where structural integrity is needed to withstand downward finger pressure.
- Aesthetic perfection is a priority for a master or guest bathroom.
Glued porcelain should never bear weight. If anyone in your household rests items or leans against the tank top, a bonded lid can unexpectedly shear, leading to personal injury or further damage to your bathroom floor.
How to Identify Your Toilet Model for a Broken Cistern Lid Replacement
About 90% of toilet cover issues can be solved with a simple part swap, avoiding the hassle and expense of removing the entire fixture. However, plumbing manufacturers design cisterns with proprietary dimensions, bevels, internal clearance channels, and lip profiles. A cover from one model rarely fits another, even within the same manufacturer catalog.
Before ordering, you must pinpoint the exact toilet model to ensure a wobble-free fit. If you are tackling other maintenance alongside your lid search, our toilet repair complete guide outlines common tank mechanics.
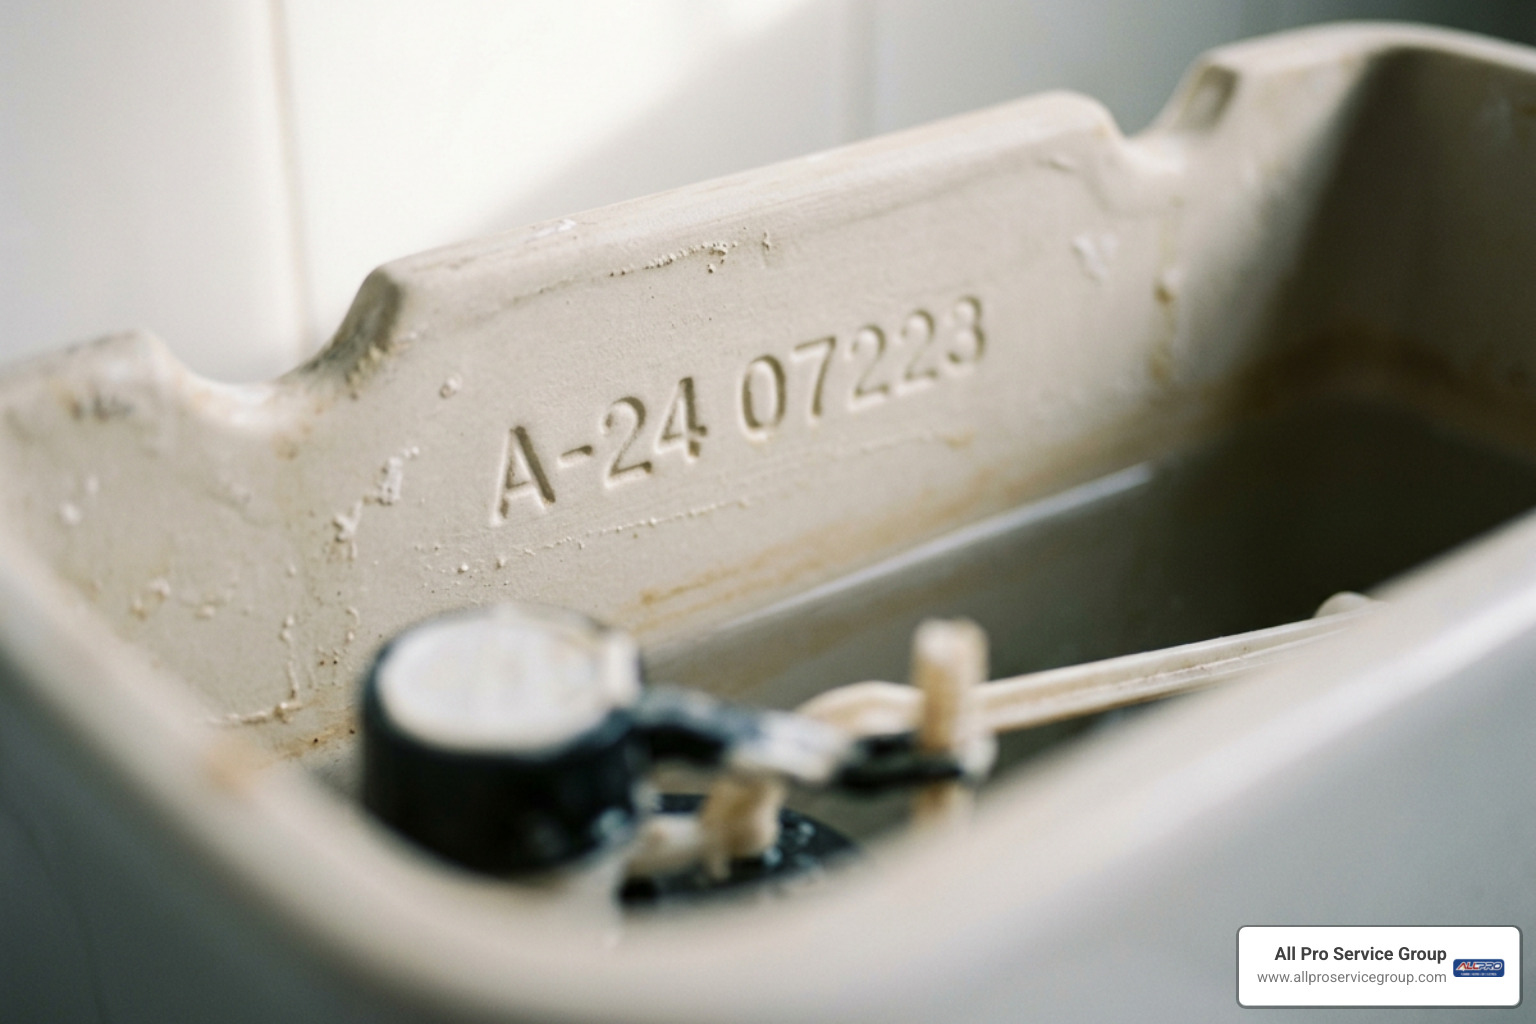
Checking Model Stamps and Part Numbers
Manufacturers stamp production codes directly into the clay before firing the glaze. Check these primary locations:
- The Underside of the Old Lid: Carefully flip over the remaining lid pieces. Look for an embossed or ink-stamped part number (e.g., Delta numbers starting with "RP", American Standard 4-digit codes, or Twyfords mold marks like "CN2109").
- The Back Wall Inside the Tank: Turn off the water supply, flush the toilet to lower the water level, and inspect the dry porcelain back wall above the water line. You will usually find a brand name (such as Kohler, American Standard, Delta, Roca, Twyfords, Gerber, or Mansfield) alongside a 4- or 5-digit tank model number.
- The Pan Base: Look near the toilet footprint or behind the trapway on the floor bowl for branded ceramic stamps.
Pay close attention to color matching. Standard white can vary significantly between brands, from pure arctic white to softer off-whites. Vintage bathrooms from the 1970s through the 1990s often feature specific period tones such as Almond, Biscuit, Bone, Pergamon, or Bahama Beige.
Measuring Tank Dimensions Accurately
If the stamps are illegible or missing, precise manual measurements will help narrow down the correct aftermarket or salvage match:
- Measure the Maximum Outside Dimensions: Measure the overall length (width across the front) and depth (front-to-back) across the top rim of the tank opening.
- Measure the Inside Lip: Measure the interior opening dimensions where the underside ridges of the lid nestle inside the cistern.
- Note the Actuator Hole: Measure the diameter and exact center-point position of the push-button hole, if your toilet uses a top-mounted button.
- Create a Cardboard Template: Place a piece of stiff cardboard over the top of the open cistern tank. Trace the outer perimeter with a pencil, cut it out, and mark the precise location of the flush valve overflow tube and fill valve.
A difference of just 5mm can cause a lid to rock, slide off, or bind against the internal flush mechanism.
Sourcing and Installing Your New Tank Cover
Once you have your model number or dimensions, sourcing the replacement is straightforward. For current production models, genuine replacement lids can be ordered directly through manufacturer parts catalogs or authorized distributors.
Sourcing Rare Parts for Broken Cistern Lid Replacement
If your toilet suite has been discontinued, you still have dependable options without replacing the entire bathroom suite:
- Specialty Salvage Suppliers: Architectural salvage businesses inventory thousands of vintage ceramic lids from brands like Crane, Briggs, Eljer, and vintage lines of Twyfords and Roca. You can browse specialized selections like vintage and discontinued replacement lids to track down matching legacy profiles.
- Reproduction Covers: Custom fabricators produce exact-fit reproduction lids molded from composite polymers or sealed hardwood designed to match vintage dimensions.
- Universal Multi-Fit Covers: High-impact plastic universal covers provide a low-cost, lightweight temporary solution while you hunt for an exact porcelain match.
Essential Gear & Tools for Installation:
- Heavy leather work gloves (for handling cracked porcelain)
- Safety goggles
- Soft microfiber cleaning cloths
- Mild bathroom cleaner or rubbing alcohol
- Adhesive rubber anti-slip bumpers (cushion pads)
- Flathead and Phillips screwdrivers (for button adjustment)
Installing, Aligning, and Testing the Flush Mechanism
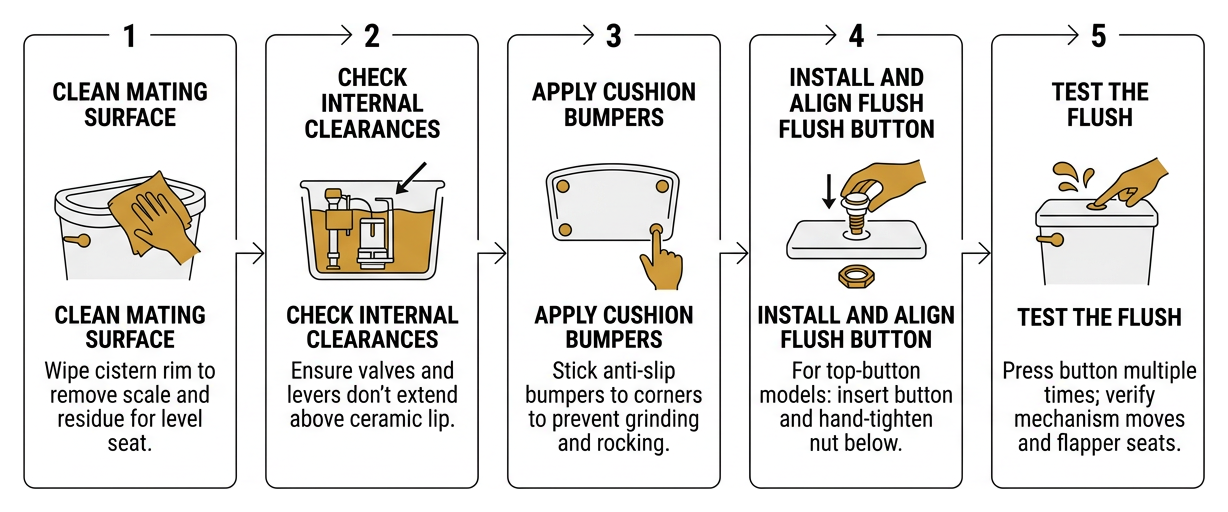
Fitting a replacement lid takes only a few minutes, but taking care during installation protects your new porcelain and ensures smooth flushing.
- Clean the Mating Surface: Wipe the upper rim of the ceramic cistern with a damp microfiber cloth to remove mineral scale, dust, and residue. A clean surface ensures the lid sits level.
- Check Internal Clearances: Look inside the tank before setting the lid down. Ensure the fill valve, refill tube, and flush valve levers do not extend above the ceramic lip. If the valve head sits too tall and lifts the lid, you may need to adjust the height or consider changing a toilet valve to restore proper vertical clearance.
- Apply Cushion Bumpers: If your replacement lid did not include pre-installed rubber feet, stick small clear silicone or rubber bumpers to the underside corners. This prevents ceramic-on-ceramic grinding and eliminates lid rocking.
- Install and Align the Flush Button: For top-button models, unscrew the retaining nut on the flush button assembly, insert the button body through the lid's aperture, and hand-tighten the nut from below. If you run into alignment issues, our guide on how to replace a toilet flush button walks through fine-tuning actuator rods.
- Test the Flush: Place the lid gently onto the cistern. Press the flush button or trip lever several times. Verify that the mechanism moves freely without sticking, that the flapper seats completely after each flush, and that the lid does not wobble under hand pressure.
Frequently Asked Questions About Toilet Lid Replacement
Can I use any universal lid on my toilet tank?
While universal plastic lids exist as affordable stopgaps, they are rarely ideal long-term solutions. Universal lids often lack dedicated underside locating ridges, allowing them to shift when touched. They may also fail to clear tall internal components or align properly with center dual-flush buttons, leading to partial flushes or running water.
Is it cheaper to replace just the lid or the entire toilet?
Replacing just the lid is significantly cheaper. A standalone replacement porcelain lid typically costs between $50 and $140. A full toilet replacement costs $150 to $450+ for the new fixture, plus installation hardware and the labor cost of removing and resetting the commode. Replacing only the broken lid saves money and keeps heavy vitreous china out of local landfills.
What should I do if my porcelain lid is completely discontinued?
If an OEM lid is no longer manufactured, start by contacting architectural salvage yards and online vintage plumbing specialists with your model stamp and cardboard template dimensions. If an exact ceramic match cannot be found after checking salvage inventories, consider a custom composite reproduction lid or an aftermarket plastic multi-fit cover before deciding to replace the complete toilet suite.
Conclusion
A shattered cistern lid can be alarming, but it rarely means you need an entirely new toilet. By safely cleaning up the sharp pieces, identifying your manufacturer part number, and confirming internal clearances, you can easily restore your bathroom fixture with an exact-match replacement lid in less than fifteen minutes.
If your toilet suffered broader structural damage, or if you are dealing with stubborn internal leaks, height clearance issues, or cracked porcelain around the bowl or tank body, our team is here to help. Contact All Pro Service Group today for dependable, high-quality professional plumbing repair services across the Greater Salt Lake Valley.