
Repair a Broken Toilet Flange Before It Causes a Leak
To repair a broken toilet flange, first remove the toilet and scrape away the old wax ring so you can inspect the damage. Use a stainless steel repair ring for cracked bolt slots or a damaged outer rim, install a spacer kit if the flange sits below the finished floor, and replace the flange if the pipe connection or hub is cracked. Secure the repair to the solid subfloor, then reset the toilet with new closet bolts and a new wax or wax-free seal.
A broken flange often shows up as a toilet that rocks, water seeping from the base after flushing, or a sewer-gas smell near the floor. Catching the problem early can help prevent damaged flooring and a much larger repair.
This is usually an intermediate DIY project that can take less than two hours when the damage is limited to the flange ring. Basic replacement materials may cost about $11 to $25, but damaged cast iron, a cracked drain pipe, or a soft, rotted subfloor may call for professional plumbing help.
I’m Gary Leany with All Pro Service Group, serving homeowners in the Greater Salt Lake Valley with plumbing repairs and inspections since 2008. In this guide, I’ll explain how to repair a broken toilet flange safely, choose the right low-cost repair method, and know when the issue goes beyond a simple flange fix.
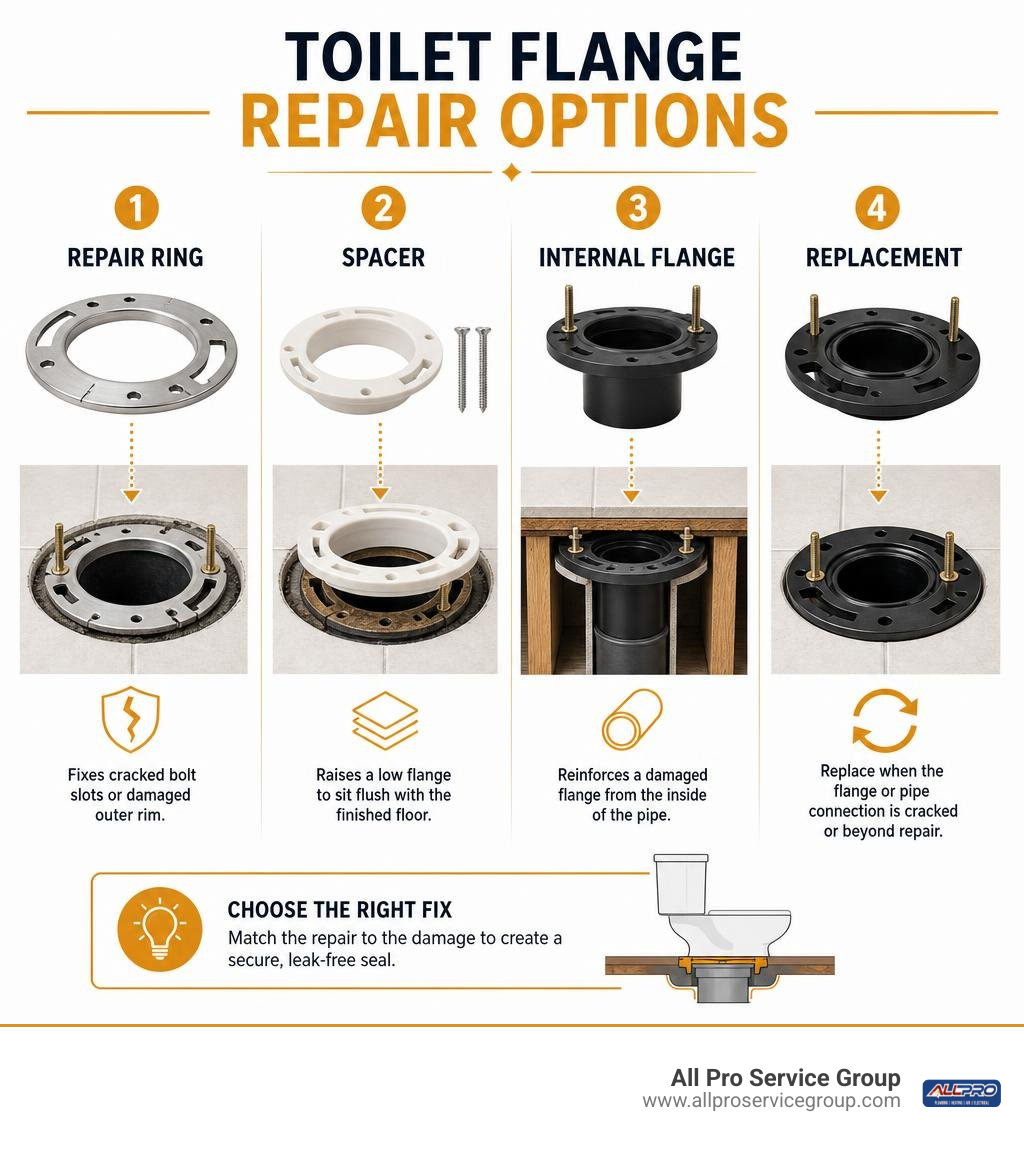
Identifying Flange Damage: Signs and Repair vs. Replacement
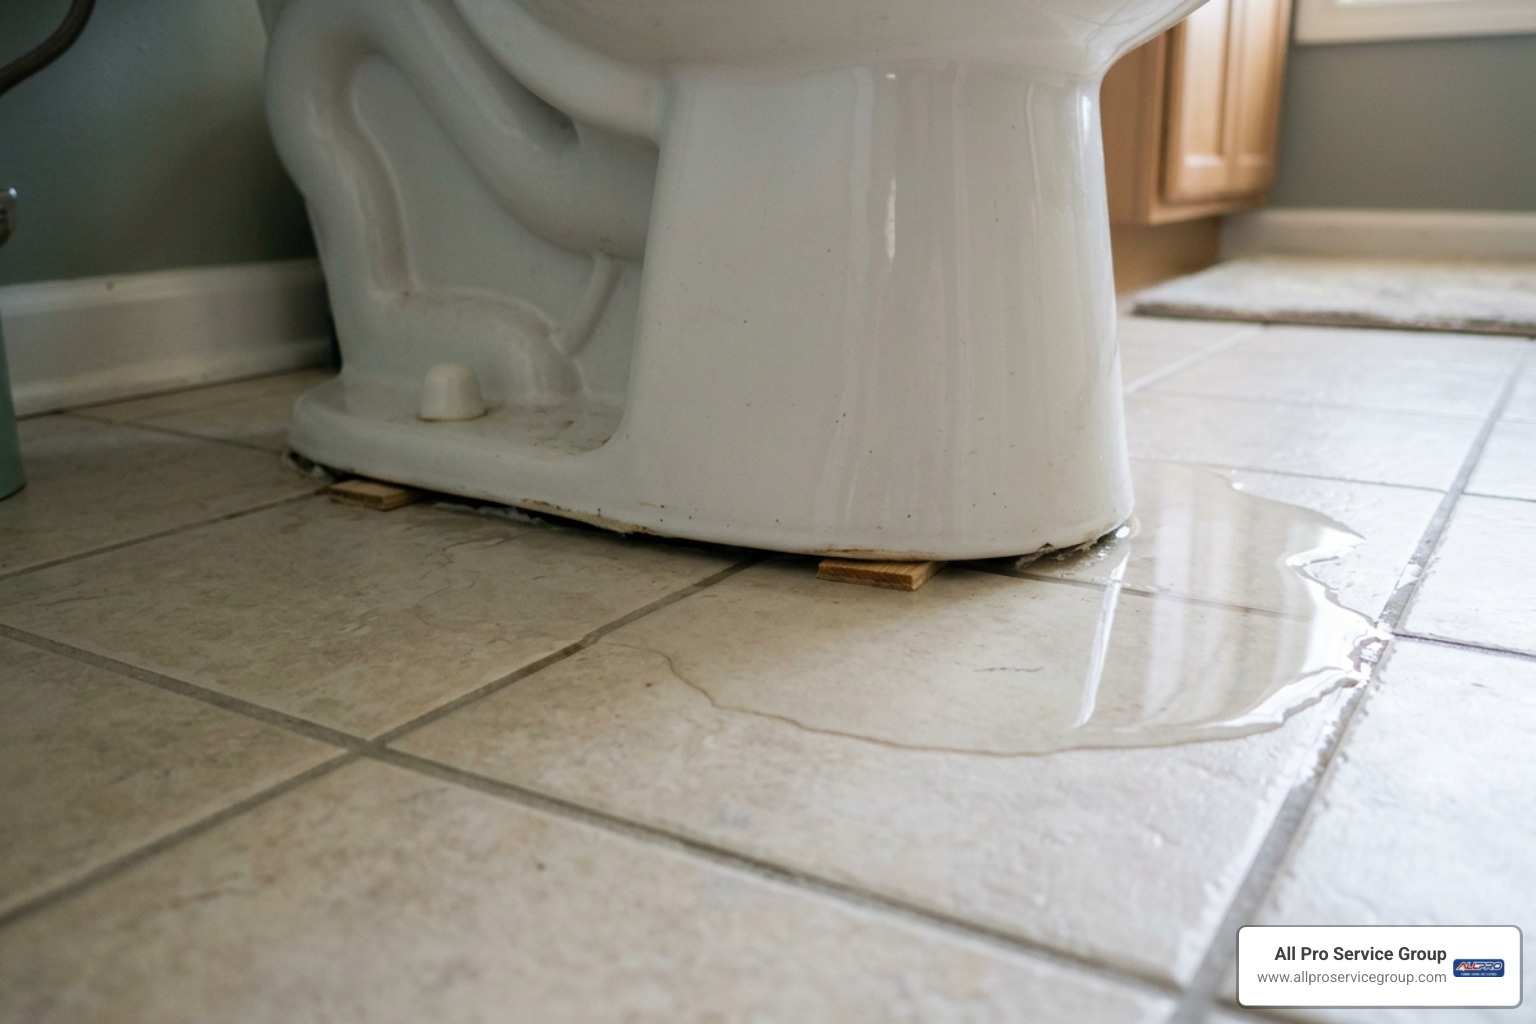
The toilet flange (also called a closet flange) serves two mechanical purposes: it anchors the heavy porcelain fixture securely to the floor and forms an airtight, watertight channel connecting the toilet horn to your home's drainage pipe. When this fitting breaks, your bathroom quickly gives you warning signs.
Homeowners usually notice three telltale symptoms:
- The commode rocks or shifts: If sitting down causes the bowl to wobble, the closet bolts have likely pulled free from cracked bolt channels.
- Water seeping across floor tiles: A commode leaking around base after a flush indicates the wax gasket has ruptured due to movement.
- Foul sewer gas odors: A cracked collar or compromised seal allows noxious sewer air to bypass the water trap and enter living spaces.
Ignoring a broken toilet flange can lead to hidden subfloor rot, ruined drywall in ceilings below, and toxic black mold growth.
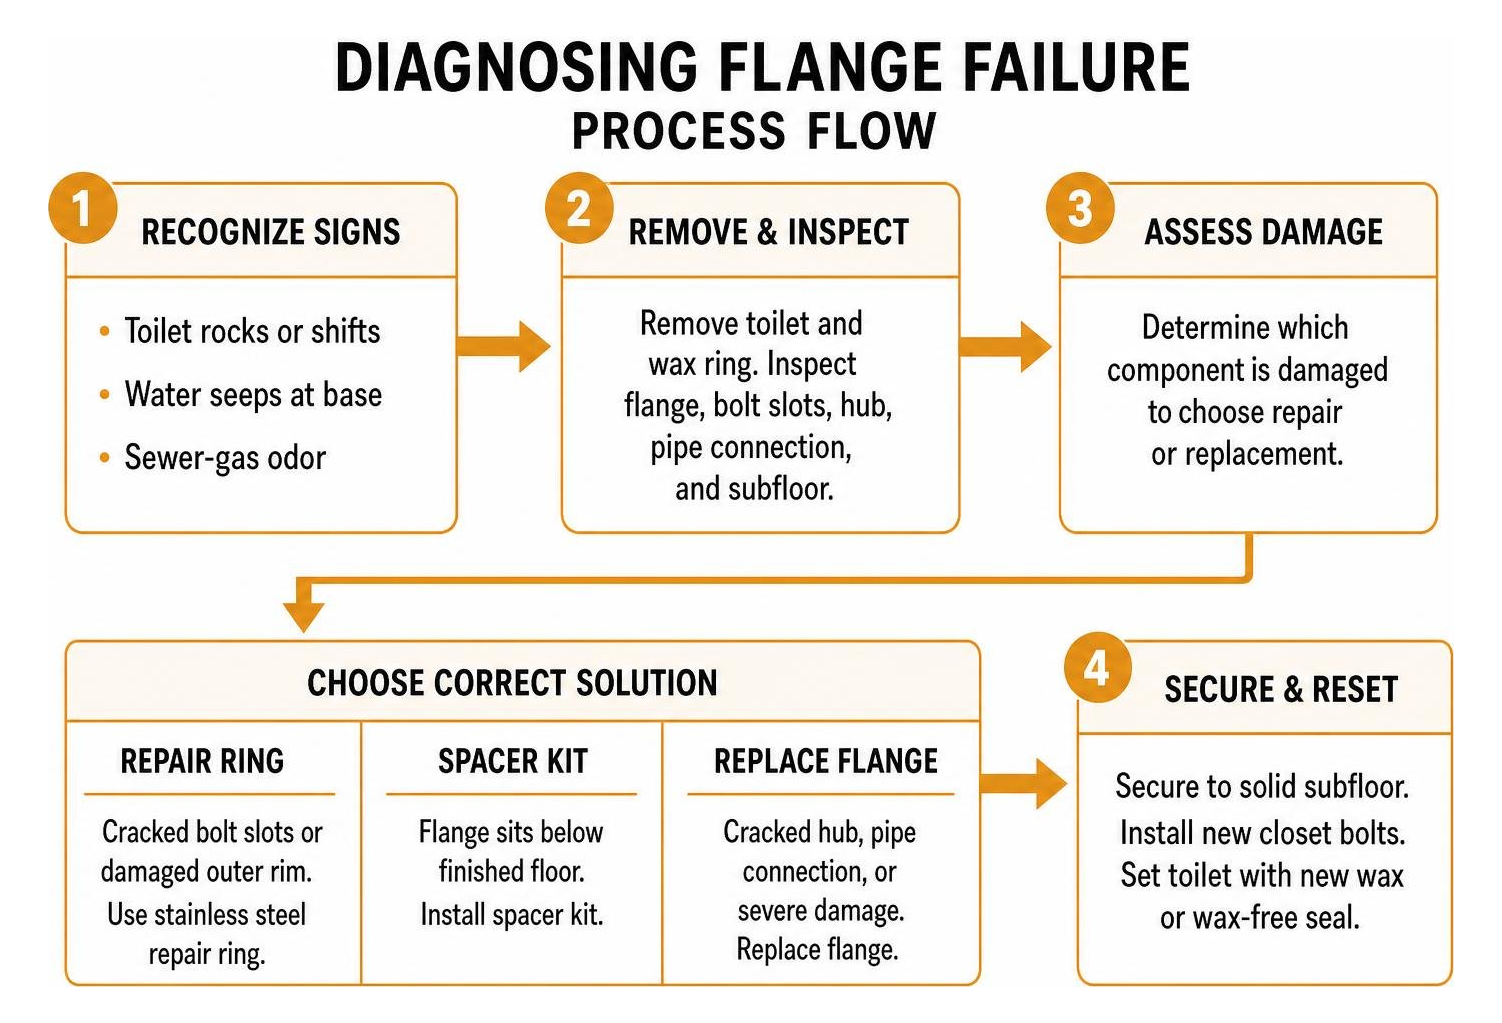
To choose between a budget-friendly repair and an invasive replacement, inspect the structural integrity of the fitting using this quick reference:
| Damage Category | Visual Indicator | Recommended Fix | Estimated Material Cost |
|---|---|---|---|
| Broken Bolt Track | Outer plastic/metal lip snapped off at bolt slot | 304 Stainless Steel Split Repair Ring | $12 – $18 |
| Recessed Flange | Flange sits lower than finished tile/vinyl flooring | Stackable UPC-Listed Flange Spacers | $15 – $24 |
| Sheared Surface Hub | Top lip cracked completely off pipe at floor grade | Push-Fit Internal Rubber Gasket Flange | $18 – $28 |
| Cracked Waste Stack | Vertical fracture running down into drain pipe | Full Pipe Cut-Out & Solvent Welded Replacement | $25 – $50+ (or Pro Service) |
As noted in Plumber Magazine's guide on flange repair vs replacement, surface repairs are ideal for damaged bolt tracks, but fractures extending deep into the drain pipe hub require complete mechanical or solvent-welded pipe replacement to ensure long-term structural integrity.
Essential Tools, Materials, and Budget-Friendly Repair Options
Fixing your closet flange on a budget doesn't mean sacrificing durability. Spending between $11 and $25 on quality repair hardware allows you to save $145 to $165 in professional service fees while delivering a permanent fix.
Before opening your toolbox, gather these essential supplies:
- Safety Gear: Nitrile plumbing gloves, eye protection, and a clean towel.
- Hand Tools: Stiff putty knife, adjustable wrench, screwdriver, and a tape measure.
- Power Tools (Optional): Cordless drill with driver bits, hammer drill (for concrete), and an oscillating multi-tool.
- Replacement Hardware: 304-grade stainless steel repair ring or push-fit flange, 5/16-inch brass closet bolts with retainers, and corrosion-resistant subfloor screws (wood screws or Tapcon masonry anchors).
- Sealing Materials: 100% silicone sealant, a deep-seal wax ring with built-in plastic horn, and a sponge/bucket.
How to Repair a Broken Toilet Flange: Step-by-Step Methods
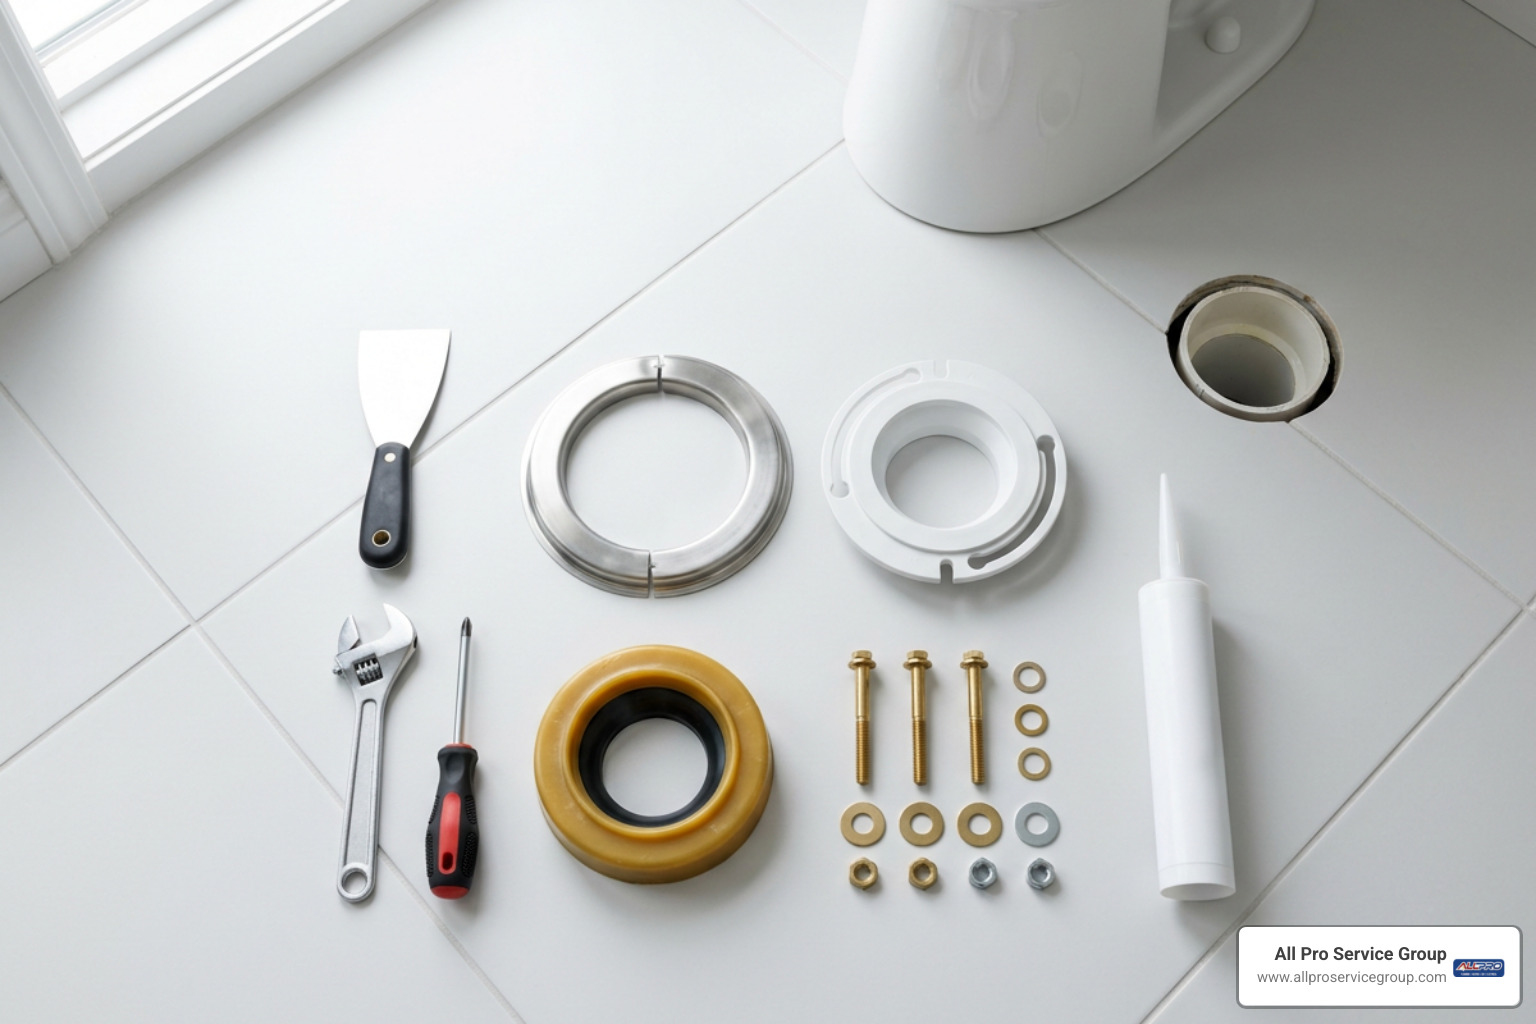
Before attempting any flange restoration, prepare your workspace to prevent water damage and unpleasant odors:
- Turn off the water supply: Turn the angle-stop valve behind the toilet clockwise until fully closed.
- Drain the commode: Flush the tank and hold down the lever. Sponge out any standing water left in the bottom of the tank and bowl.
- Disconnect plumbing lines: Unthread the flexible water line from the bottom of the fill valve using an adjustable wrench.
- Unbolt and lift the toilet: Remove the decorative bolt caps, unthread the nuts, and lift the commode straight up by bending at your knees. Rest the porcelain bowl safely on a drop cloth or old cardboard.
- Block hazardous sewer gas: Immediately push an old rag or towel into the open drain opening.
- Scrape old wax residue: Use your putty knife to scrape away the sticky, degraded wax seal from the floor and flange throat.

Understanding How to Repair a Broken Toilet Flange with a Metal Split Ring
If the bolt slots on your PVC, ABS, or cast iron flange have snapped, installing a heavy-duty stainless steel split repair ring is the most cost-effective solution.
- Dry-fit the split ring: Slide the two interlocking crescent halves of the 304 stainless steel ring under the broken lip of the existing plastic flange.
- Position the bolt slots: Rotate the ring until the closet bolt channels sit parallel to the back wall at the 3 o'clock and 9 o'clock positions (roughly 12 inches out from the drywall).
- Apply a silicone bedding layer: Run a generous bead of 100% silicone sealant beneath the repair ring to fill air gaps and prevent water penetration.
- Anchor into the subfloor: Drive 1 1/2-inch stainless steel screws through the ring's mounting holes directly into the wooden subfloor. This transfers all mechanical clamping force away from the broken PVC and onto your home's structural framing. For extra guidance, check out Bob Vila's guide to closet flange replacement on securing loose assemblies.
How to Repair a Broken Toilet Flange Using an Internal Push-Fit Collar
When an old plastic flange breaks off flush with the floor, there is often no remaining lip to hold a split ring. In these cases, an internal push-fit replacement collar offers a zero-demolition alternative that bypasses the need to tear out drywall or cut pipes beneath the floor.
- Measure pipe diameter: Check whether your home uses 3-inch or 4-inch drain pipe.
- Lubricate the gasket: Coat the expanding multi-fin rubber gasket of the replacement flange with plumber's grease or soapy water.
- Insert into the drain: Push the tailpiece straight down inside the existing waste pipe until the metal mounting ring sits flat against the floor.
- Secure the collar: Fasten the metal ring to the subfloor with corrosion-resistant screws to hold the compression seal in place.
Raising Recessed Flanges with Stackable Spacer Kits
When new bathroom tile, luxury vinyl plank, or stone flooring is installed over an old floor, the original flange often ends up recessed below finished floor grade. A low flange prevents the wax ring from compressing properly, leading to leaks.
A toilet flange should rest 1/4 inch above the finished floor —never below it.
- Clean the top rim of the recessed flange thoroughly.
- Select stackable, UPC-listed flange extenders (available in 1/8-inch, 1/4-inch, and 1/2-inch thicknesses).
- Apply a continuous bead of 100% silicone sealant between each stacked spacer layer to ensure a watertight bond.
- Drive extra-long stainless steel screws through the entire spacer assembly directly into the subfloor below. Never stack two wax rings together; double-stacked wax rings frequently slip, blowout, and leak over time.
Material-Specific Repairs: Cast Iron, ABS, and Concrete Subfloors
Different plumbing materials require specific repair techniques:
- Cast Iron Waste Lines: Corroded cast iron flanges do not require complete pipe teardown. Secure a heavy-gauge drop-in stainless steel repair bracket over the rusted iron hub, drill pilot holes, and fasten it directly into the subfloor.
- ABS Black Plastic Lines: When working with black ABS pipe, avoid standard PVC cement. If gluing a new hub, use dedicated ABS-to-ABS solvent cement or universal transition cement. If internal fragments must be cut free, use an internal pipe cutter chucked into a power drill.
- Concrete Subfloors: When mounting a repair plate over slab-on-grade concrete, use a hammer drill and a masonry bit to drill pilot holes matching the exact diameter of Tapcon concrete anchors. Drive blue Tapcon screws through the flange collar to prevent the toilet from wobbling.
Reinstalling the Toilet, Setting the Wax Ring, and Testing for Leaks
With your flange secured, you are ready to complete the reinstallation:

- Remove the drain plug: Pull the protective rag out of the open drain pipe.
- Install closet bolts: Slide 5/16-inch solid brass T-bolts into the 3 o'clock and 9 o'clock channels on the flange, securing them upright with plastic retainer washers.
- Place the new seal: Position a fresh, deep-seal wax ring (equipped with a plastic directional horn pointing downward) centered over the flange opening.
- Lower the toilet bowl: Carefully lift the commode, align the mounting holes in the porcelain base directly over the upright brass bolts, and lower the fixture straight down.
- Compress the seal: Apply steady, downward body weight onto the center of the toilet bowl to compress the wax ring evenly. Do not twist or rock the commode, as twisting ruins the airtight wax seal. For step-by-step seal troubleshooting, explore our detailed guide on how to fix toilet seal issues.
- Tighten hold-down nuts: Thread the washers and nuts onto the bolts. Tighten each side alternately using small turns with an open-end wrench. Stop tightening the moment the bowl feels firm against the floor; overtightening will crack the porcelain base.
- Reconnect and test: Reattach the flexible braided water supply line, open the shutoff valve, let the tank fill, and perform three test flushes while inspecting the base with a flashlight for any signs of moisture.
Frequently Asked Questions About Toilet Flange Repair
Can you use epoxy or plumbing adhesive to fix a cracked flange?
No. Epoxy putty and plumbing adhesives should never be used to repair broken closet flanges. Epoxy lacks the structural shear strength required to withstand the tension of tightened closet bolts combined with the shifting weight of an adult sitting on the toilet. Always use a mechanical stainless steel repair ring or install a replacement flange.
Do you need to replace the wax ring every time you remove a toilet?
Yes. Wax rings undergo permanent mechanical deformation when compressed under the weight of the commode. Once a toilet is lifted or shifted, the old wax ring cannot rebound to create an airtight seal. Reusing an old wax ring almost always causes leaks into the subfloor.
What should you do if the drain pipe beneath the floor is cracked?
If the vertical waste stack beneath the floor is split or cracked, surface repair rings will not resolve the problem. A broken drain pipe leaks sewage and allows dangerous sewer gas into your home. This issue requires opening the ceiling or floor cavity to cut out the damaged pipe section and solvent-weld new pipe fittings.
Protect Your Bathroom Floors with a Solid Flange Repair
Repairing a broken toilet flange yourself is a practical, budget-conscious project that keeps your bathroom clean, safe, and leak-free. By using heavy-duty stainless steel split rings, expanding push-fit collars, or stackable height extenders, you can anchor your commode securely and protect your subfloor from costly water damage.
However, if you discover rotted wooden joists, stubborn rusted cast iron, or cracked drain stacks hidden below your flooring, our experienced team at All Pro Service Group is ready to step in. We deliver dependable, high-quality plumbing repair services throughout Salt Lake City, Sandy, West Jordan, and the entire Greater Salt Lake Valley to ensure your home's plumbing functions smoothly.