
Rinnai Tankless Water Heater No Hot Water: Start With These Checks
A Rinnai tankless water heater no hot water problem usually comes down to lost power, restricted water flow, a closed gas valve, an error code, or a blocked vent. Before taking anything apart, check the display, confirm the breaker and outlet have power, make sure the gas and water valves are open, and try a different hot-water fixture.
| What you notice | Likely issue to check first |
|---|---|
| No hot water after an outage | Reset the unit and verify power at the breaker and outlet |
| Cold water works, but hot side has little or no flow | Clean the cold-water inlet filter and check for a frozen inlet pipe |
| Hot water turns hot and cold with no code | Check for low flow, dirty aerators, scale buildup, or a restricted filter |
| Kitchen sink will not trigger hot water | The fixture may be below the heater's ignition flow threshold |
| Error code on the controller | Use the model-specific manual and stop if it points to gas, venting, or internal parts |
Tankless units need enough water flow to ignite and stay running. Rinnai gas models generally need about 0.4 to 0.6 gallons per minute to start heating, so a clogged aerator or inlet screen can create a no-hot-water problem even when the heater has power.
All Pro Service Group has been serving Greater Salt Lake homeowners with plumbing, HVAC, and electrical repairs since 2008. When diagnosing a rinnai tankless water heater no hot water issue, our team starts with the simple, safe checks before identifying problems that need trained repair.
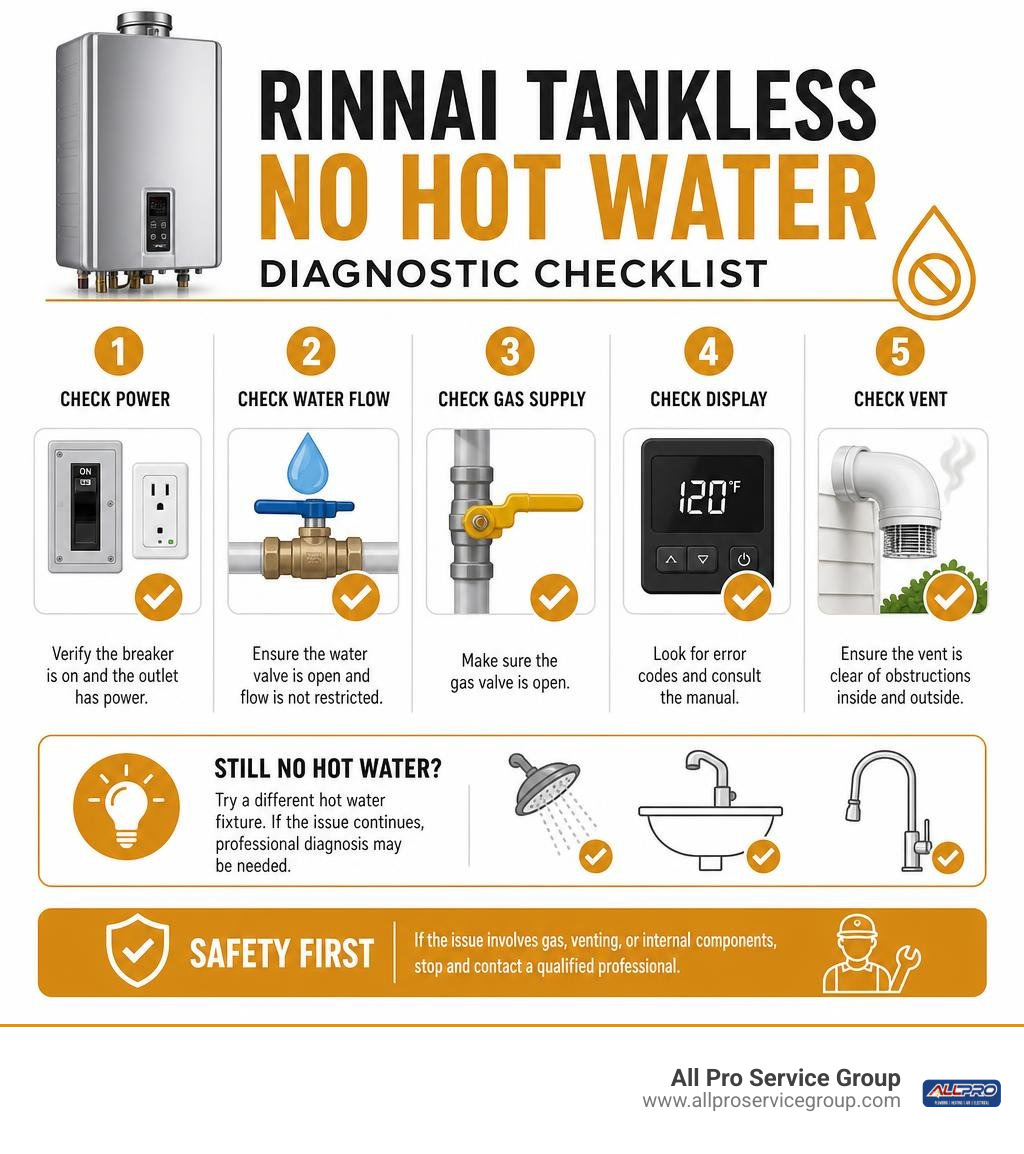
Primary Causes of Rinnai Tankless Water Heater No Hot Water
When a Rinnai tankless unit stops generating domestic hot water, the underlying failure usually stems from one of four primary systems: water supply flow, gas delivery, power supply, or internal sensor logic. Unlike continuous storage tank systems that maintain a reservoir of heated water, on-demand units require a precise alignment of physical conditions to ignite the burner and maintain heat transfer. If any single variable falls outside operating tolerances, the internal safety controls halt operation immediately.
To explore how these systems interact, you can read our Tankless Water Heater Complete Guide.
A closed gas supply valve, tripped circuit breaker, low incoming water pressure, or ice formation in exposed piping can immediately result in a rinnai tankless water heater no hot water scenario. On top of external plumbing and electrical causes, internal hardware issues—such as mineral scaling on heat exchanger copper fins, stuck water flow servo valves, or dirty flame rods—will trigger safety shut-offs. Modern Rinnai Residential Tankless Systems feature self-diagnostic microprocessors designed to protect components from severe damage, but understanding why these trips occur helps isolate the root cause quickly.
Understanding Activation Thresholds and Flow Rates
One of the most common reasons a Rinnai unit fails to produce hot water is insufficient water flow volume through the system. Rinnai gas tankless units require a minimum water flow rate to activate the burner, typically between 0.4 and 0.6 gallons per minute (GPM) depending on the specific model generation. Once the unit ignites, it requires a sustained continuous flow rate of at least 0.26 GPM to keep the gas valve open and the burner lit.
If incoming water flow falls below this activation threshold, the electronic flow turbine will not spin fast enough to send a start signal to the control board. As a result, the unit remains in standby mode, permitting cold water to pass through the heater without firing the gas burner. This phenomenon frequently occurs at ultra-low-flow bathroom faucets, water-saving showerheads, or kitchen sinks fitted with restrictor aerators.
When debris, calcium scale, or pipe sediment partially clogs fixture aerators or the heater's internal inlet screen, total water volume drops. Homeowners often mistake this operational design feature for a system breakdown, when in fact clearing flow obstructions or adjusting the set temperature solves the problem.
Decoding Rinnai Diagnostic Codes and Sensor Errors
When an operational parameter fails inside a Rinnai unit, the digital controller display usually flashes an error code to signal what went wrong. Understanding these diagnostic codes helps narrow down whether you are dealing with a minor maintenance requirement or a component failure. You can review detailed technical schematics in the official Rinnai Controller Diagnostics document.
- Error Code 11 (No Ignition): Indicates the unit attempted to ignite three times without detecting a flame. Common causes include closed gas supply valves, air purged into gas supply lines, low gas pressure (below 3.5" W.C. for natural gas or 8.0" W.C. for propane), or loose igniter wire connections.
- Error Code 12 (Flame Failure): Occurs when the burner ignites but the flame sensor loses signal during heating. This is often caused by carbon buildup on ceramic flame rods, ground wire disconnects, or sudden gas pressure drops under high operational load.
- Error Code 10 (Air Supply or Exhaust Blockage): Signals severe airflow restrictions in either the intake pipe or flue exhaust pipe. Leaves, bird nests, heavy snow accumulation, or dislodged venting joints can trigger this safety shutdown.
- Error Code 25 (Condensate Trap Issue): Found on condensing models (such as the SENSEI series) when condensed acidic liquid cannot drain freely due to clogged condensate trap lines or frozen drain tubing.
- Error Codes 32 & 33 (Thermistor Faults): Point to electrical resistance failures in outgoing water temperature sensors or heat exchanger thermistors.
- Error Code 65 (Water Flow Servo Fault): Indicates the motorized water volume control valve is jammed, stuck, or failed due to scale buildup or electrical surge disruption.
Troubleshooting Rinnai Tankless Water Heater No Hot Water Step-by-Step
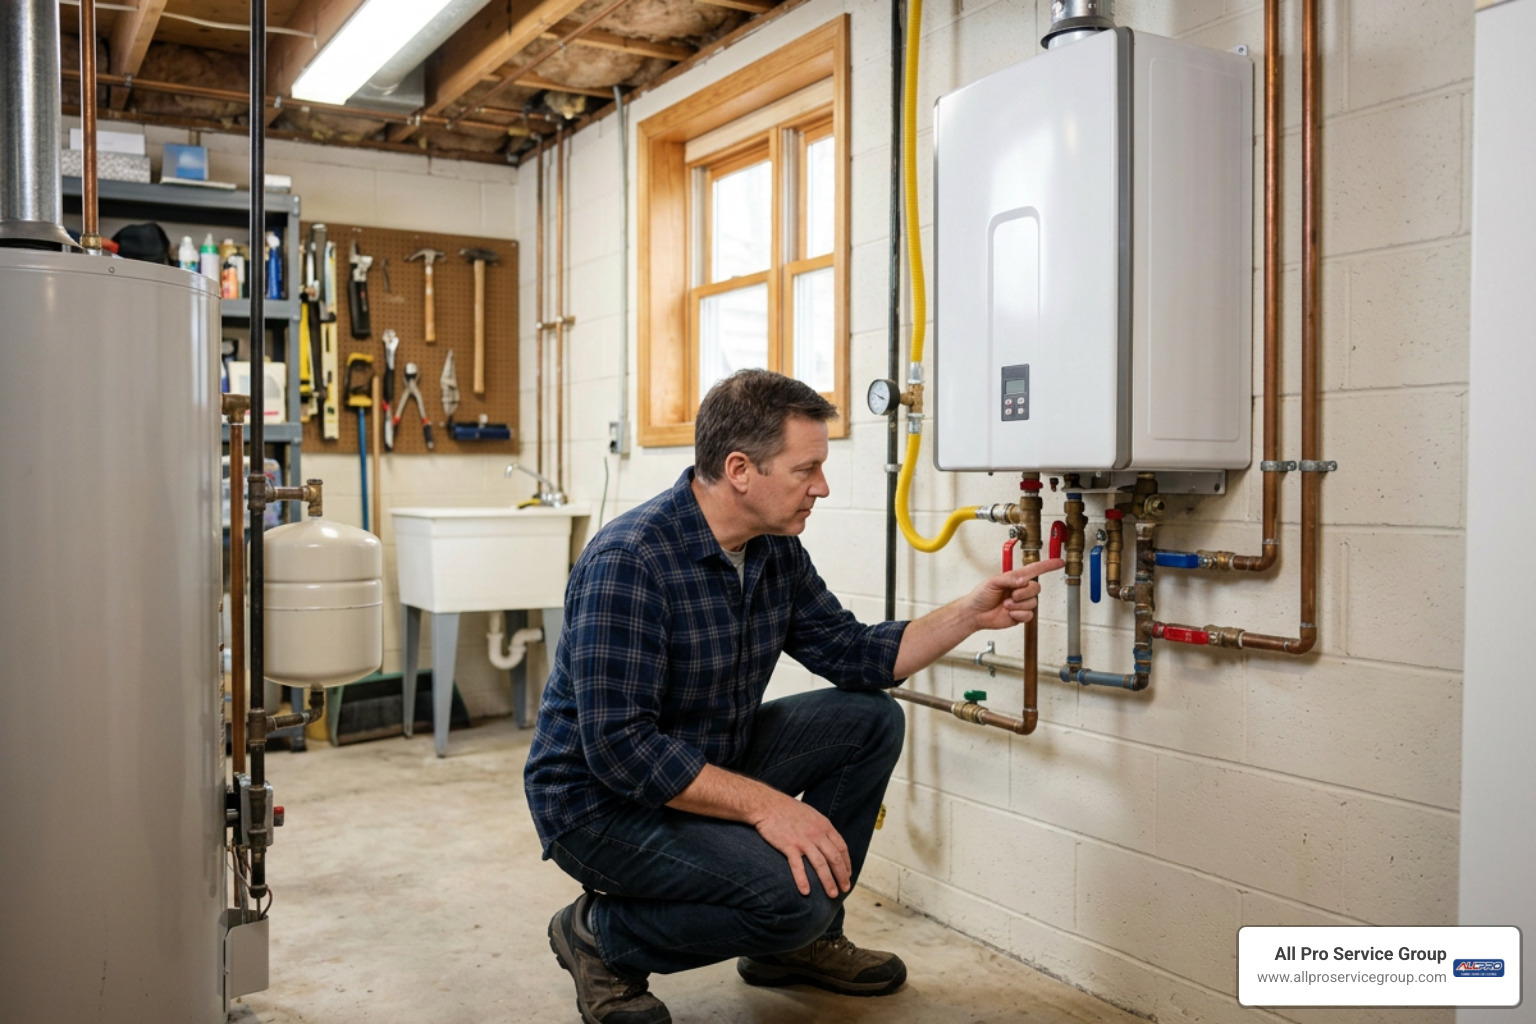
Resolving a persistent hot water outage requires a systematic, day-by-day diagnostic process. Rather than guessing at components, following a organized elimination approach helps isolate whether the breakdown is electrical, mechanical, environmental, or related to routine maintenance.
Day 1: Solving Rinnai Tankless Water Heater No Hot Water After Power Outages
Electrical storms, grid outages, and sudden voltage spikes frequently disrupt tankless water heater operation. A Rinnai tankless water heater requires a steady 120-volt AC, 60 Hz electrical supply drawing under 3 amps to power its internal microprocessor, electronic proportional gas valves, direct-spark igniter, and forced-combustion blower fan.
When grid power drops and returns suddenly, the internal microprocessor can lock up in a safe state. Furthermore, power outages often cause internal motorized water servo valves (such as those in Rinnai RL, RU, and SENSEI series) to freeze in a closed position. When this occurs, water flow through the hot side may be severely restricted or stopped completely, even after main power is fully restored to your home.
To execute a complete hard electrical reset:
- Turn off the water heater's digital controller power button.
- Go to your home's main breaker panel and switch off the dedicated circuit breaker supplying the tankless unit.
- Unplug the unit's power cord from the GFCI wall outlet.
- Leave the unit completely unpowered for 10 full minutes. This extended discharge time allows residual electrical voltage in the control board capacitors to drain completely, forcing the microprocessor and motorized servo motors back to factory homing positions.
- Plug the power cord back into the GFCI outlet and flip the circuit breaker back to the ON position.
- Turn on the digital controller and run a high-demand hot water fixture, such as a bathtub faucet, to initiate a fresh ignition cycle.
Day 2: Fixing Rinnai Tankless Water Heater No Hot Water Flow and Clogged Filters
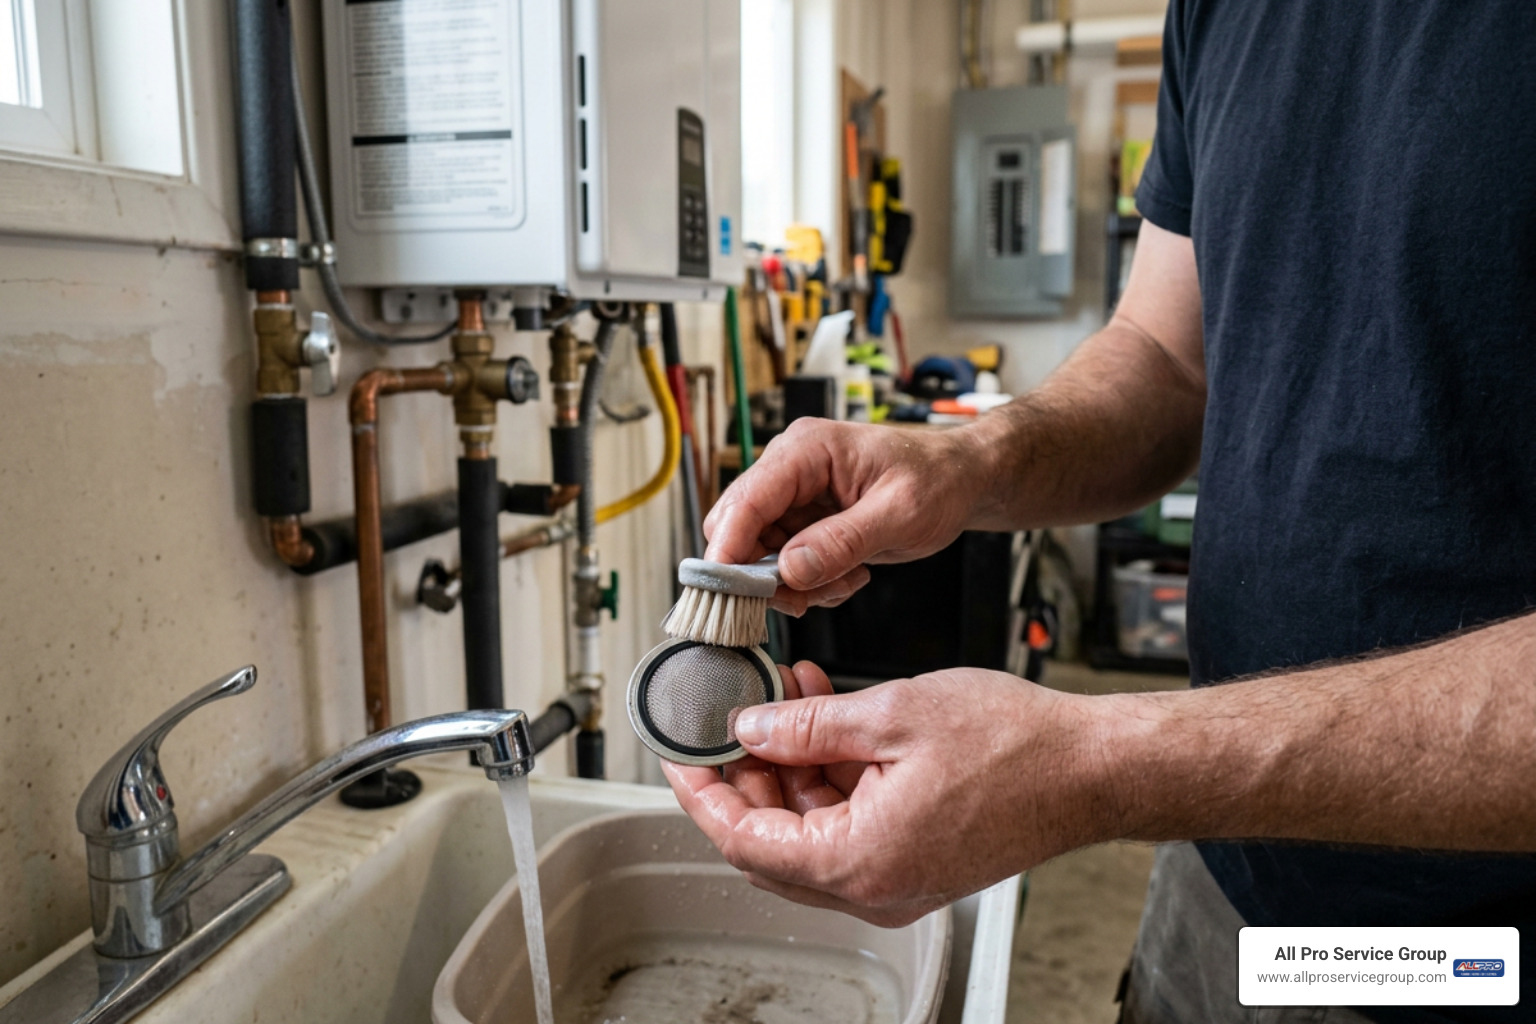
If your home has normal cold water pressure but opening a hot water tap yields only a trickle or zero water flow, the primary suspect is the cold water inlet filter screen. Rinnai units incorporate a removable inline fine-mesh filter basket where the main cold water supply pipe enters the bottom of the cabinet. This strainer prevents rust flakes, pipe solder, municipal sediment, and well-water sand from entering the delicate water flow turbine and heat exchanger channels.
Over months of operation, sediment fills this strainer mesh. As water flow becomes restricted below the 0.4 GPM activation threshold, the flow turbine stops sending pulses to the control board, preventing burner ignition.
Cleaning the inlet filter screen involves a brief process:
- Turn off power to the water heater at the digital remote control and unplug the main electrical cord.
- Shut off the cold water inlet isolation valve (usually tagged with a blue handle) located directly beneath the unit.
- Close the hot water outlet isolation valve (red handle).
- Place a small bucket beneath the cold water filter plug located at the bottom right or bottom center of the unit.
- Open the drain port on the cold water isolation valve or open a nearby hot tap to relieve trapped line pressure.
- Unscrew the cold water filter plug counterclockwise using a pair of pliers or a crescent wrench. A small amount of trapped water will spill into your bucket.
- Remove the cylindrical mesh filter screen. Inspect it for rust debris, sand, or white calcium buildup.
- Wash the filter screen thoroughly under warm running tap water. Use a soft-bristled toothbrush to scrub away stubborn mineral deposits. Never use harsh chemical cleaners that could degrade the rubber O-ring seal.
- Inspect the rubber O-ring gasket on the filter assembly for cracks, flaking, or damage. Replace it if necessary to prevent future water leaks.
- Reinsert the filter screen into the housing and thread the plug back in by hand, tightening securely with a wrench without over-torquing.
- Slowly reopen the cold water valve, check for leaks, turn the power back on, and test hot water flow at a nearby fixture.
Day 3: Addressing Low-Flow Fixtures and Faucet Activation Issues
A frustrating scenario occurs when hot water works perfectly in high-volume fixtures like garden tubs or master showers, but fails completely when you turn on a kitchen sink or bathroom faucet. This specific issue is almost never a broken water heater; rather, it is a flow rate activation conflict caused by low-flow aerators or mixing valve ratios.
Modern kitchen faucets often incorporate internal water-saving restrictor disks designed to cap flow at 1.0 to 1.5 GPM. When you open the kitchen sink faucet on lukewarm or moderate heat, the faucet mixes cold water directly with hot water under the sink. The actual hot water volume pulled through the water heater can drop below 0.4 GPM, causing the burner to shut down instantly.
To troubleshoot fixture activation issues:
- Perform a Bucket Flow Test: Place a 1-gallon jug beneath the affected faucet, turn the hot water handle on fully, and time how long it takes to fill. If filling takes longer than 2 minutes (less than 0.5 GPM total flow), the fixture flow rate is too low to reliably trigger ignition.
- Clean or Remove Faucet Aerators: Unscrew the aerator screen assembly from the tip of the faucet spout. Clean out grit, sand, and white limescale using white vinegar. If necessary, remove or drill out internal water-saving flow restrictor disks to increase output volume.
- Check Under-Sink Angle Stops: Ensure the hot-side shutoff valve located inside the cabinet beneath the sink is turned fully counterclockwise to its wide-open position.
- Adjust Temperature Settings to Alter Mixing Ratios: If a low-flow sink fails to trigger hot water, lower the target temperature setting on your Rinnai digital controller from 120°F down to 110°F or 112°F. Lowering the set temperature forces you to turn the hot water tap higher (pulling more hot water through the heater) rather than blending in large amounts of cold water at the sink fixture.
Day 4: Eliminating No-Error-Code Temperature Oscillations
When hot water repeatedly cycles between scalding hot and icy cold without displaying any error codes on the wall controller, homeowners experience what is known as the "cold water sandwich" effect or thermal hunting. This behavior indicates that the water heater's gas burner is continuously igniting, extinguishing, and reigniting while water runs.
Three primary non-code issues trigger temperature oscillations:
- Fouled Magnetic Flow Turbine: Inside the water flow sensor sits a small impeller wheel equipped with tiny magnets. Over time, microscopic iron oxide or manganese particles from well water or aging city pipes cling to the turbine wheel axle. This magnetic friction causes the wheel to spin erratically or stall intermittently. When the sensor reports zero rotation, the control board turns off the burner. As water continues pushing past, the wheel spins again, restarting the ignition cycle 10 to 15 seconds later.
- Improperly Submerged Condensate Lines: On condensing Rinnai models (RUC, RU, SENSEI series), acidic condensate collects in an internal plastic trap and drains through a vinyl hose. If this drain hose is pushed deep into an external condensate pump reservoir below the water line, backpressure prevents condensate from draining out of the heat exchanger. The internal float safety switch trips, cutting power to the gas valve without throwing an immediate error code. Raising the drain hose above the reservoir water line instantly resolves the issue.
- Plumbing Cross-Connections: A failing single-lever shower valve cartridge, worn washing machine bypass valve, or improperly piped recirculating loop can allow cold water to bleed continuously into the hot water distribution lines. To test for a cross-connection, turn off the cold water supply valve directly beneath the tankless heater and open any hot water faucet in the house. If water continues flowing out of the hot faucet indefinitely, cold water is leaking into your hot water lines through a defective plumbing fixture elsewhere in the home.
Day 5: Descaling Heat Exchanger Mineral Scale Buildup
In areas with hard water, such as many communities throughout Utah and the Greater Salt Lake Valley, dissolved calcium and magnesium minerals precipitate out of solution when heated inside the water heater. These minerals form a hard, glass-like scale coating on the inside of the copper heat exchanger tubing.
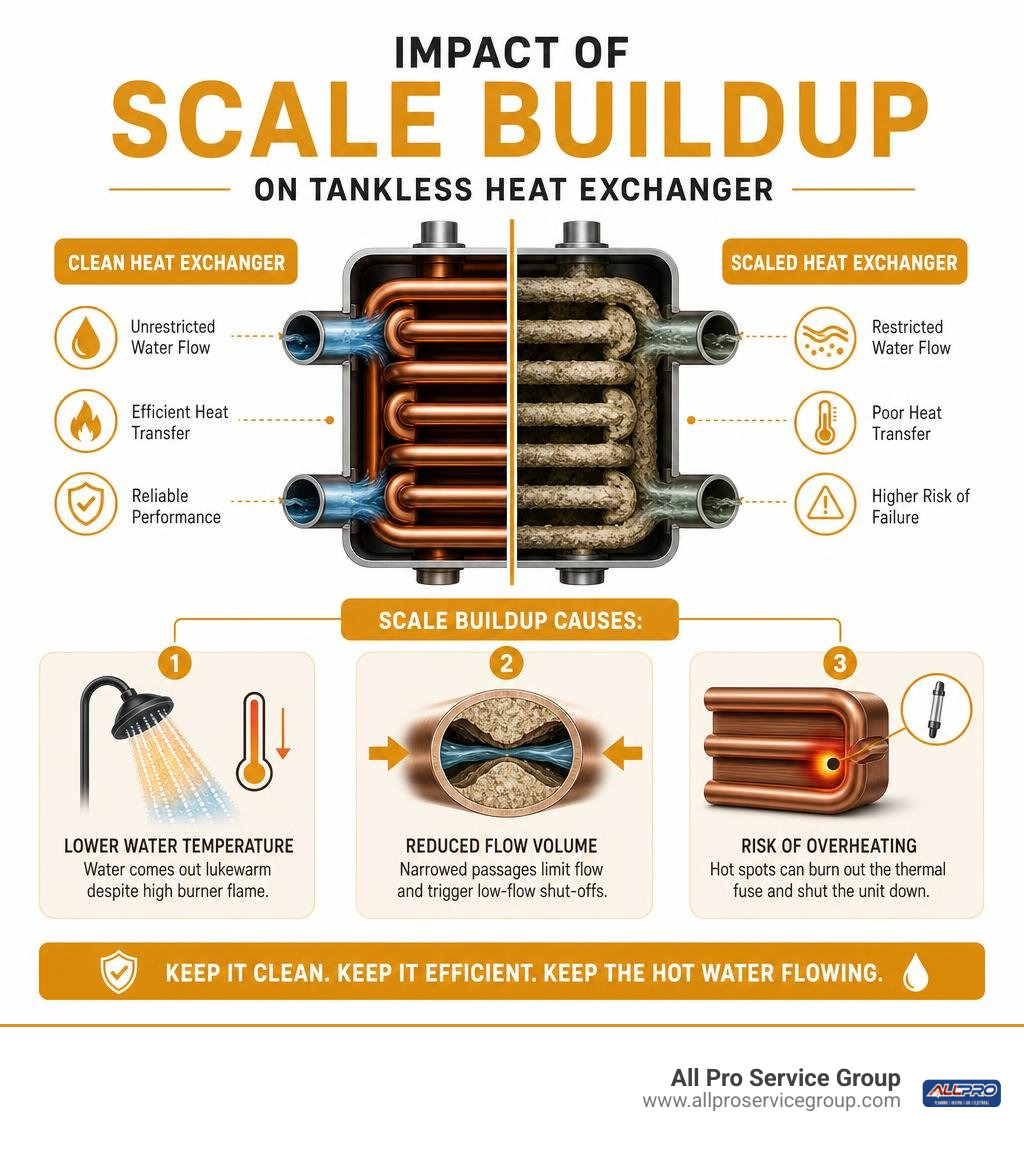
Because calcium scale acts as a thermal insulator, heat from the gas burner cannot transfer efficiently into the water passing through the exchanger. Scale buildup causes three major problems:
- Water temperature drops, producing lukewarm output despite high burner flame.
- Internal copper water passages narrow, reducing flow volume and triggering low-flow shut-offs.
- Hot spots develop on copper exchanger walls, eventually blowing the single-use thermal fuse wrapped around the exchanger (triggering Error Code 14).
Rinnai recommends descaling the heat exchanger at least once every 12 months—or every 6 months in hard water areas—using a non-corrosive flushing procedure.
For detailed instructions on performing this service yourself, read our complete guide on Flushing Tankless Water Heater.
The standard descaling procedure involves attaching a 1/6 HP submersible sump pump to the isolation service valves beneath the unit, circulating 3 to 4 gallons of food-grade white vinegar or an approved citric acid descaling solution through the internal heat exchanger for 45 to 60 minutes. This process dissolves calcium deposits, restoring full heat transfer efficiency and water flow capacity.
Day 6: Thawing Outdoor Frozen Water Inlet Lines
While indoor Rinnai units are protected inside mechanical rooms or basements, outdoor models installed on exterior walls depend on internal freeze protection heating elements. Rinnai outdoor units feature built-in electric freeze protection ceramic heaters designed to safeguard internal copper piping down to -4°F (-20°C) when protected from direct wind exposure (and down to -22°F for indoor units).
However, these factory freeze heaters only protect internal components inside the metal cabinet shell. They do not protect external plumbing lines, shutoff valves, or uninsulated pipe fittings exposed beneath the unit. During sub-zero cold snaps, incoming cold water supply pipes right at the connection point can freeze solid.
When an inlet pipe freezes:
- Cold water line pressure stops completely at the entry point of the heater.
- Opening a hot faucet yields zero flow or a faint dribble.
- The unit will fail to ignite because zero water moves across the flow turbine.
To safely thaw a frozen inlet pipe:
- Leave the main electrical power cord plugged in so internal cabinet heat plates remain operational.
- Open a hot water faucet inside the home to relieve line pressure.
- Use a standard electric hair dryer set to medium or high heat to gently apply warmth back and forth along the exposed metal pipes and brass shutoff valves directly beneath the bottom of the heater cabinet.
- Alternatively, wrap the frozen pipe section in warm, moist towels. Never use open-flame blowtorches, propane heaters, or high-output heat guns, as extreme rapid heating can melt internal plastic flow components, ruin rubber seals, or rupture copper lines.
- Once water flow resumes, install heavy-wall foam pipe insulation over all exposed exterior pipe runs and wrap exposed fittings with thermostatically controlled electric pipe heating cables (heat tape).
Day 7: Cleaning Venting, Intake, and Flame Rod Components
On the final day of system troubleshooting, focus shifts to air intake filtration, exhaust venting, and burner sensing hardware. Gas tankless units require a precise stoichiometric ratio of fresh air and fuel gas to achieve clean, efficient combustion.
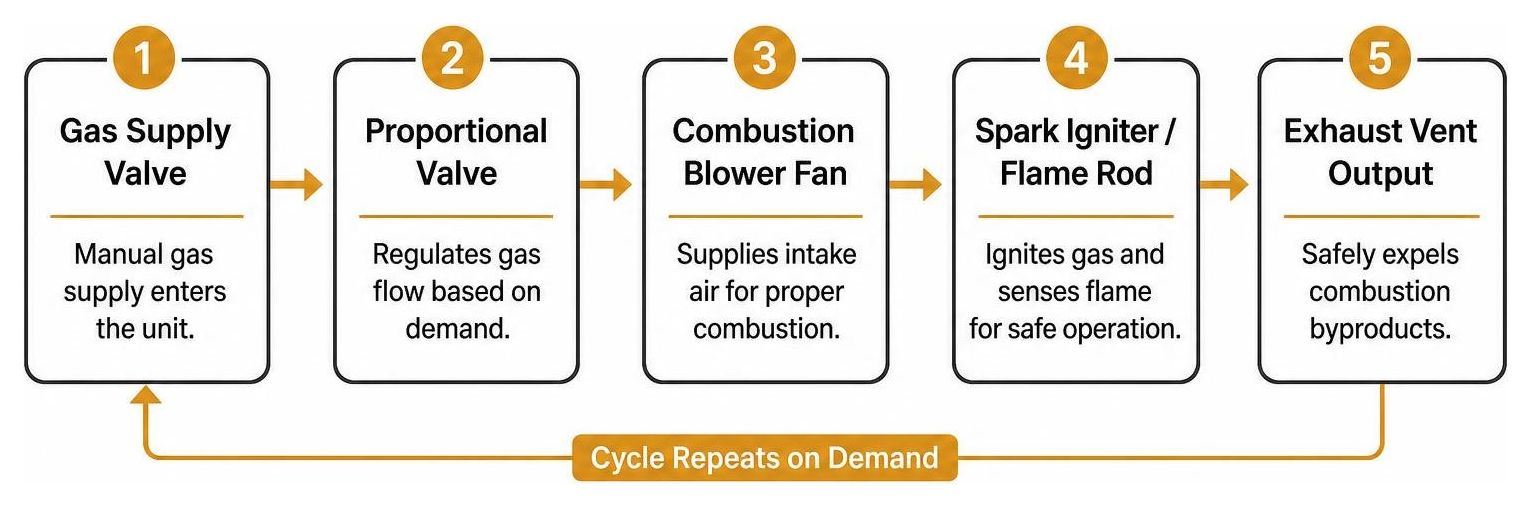
Over time, dust, pet hair, lint, and outdoor insects accumulate on the cabinet air intake filter screen or inside the combustion fan's squirrel-cage impeller. When airflow drops below safety margins, the microprocessor limits gas flow or shuts down completely, displaying Error Code 10.
To clean air intake and ignition components safely:
- Turn off electrical power and shut off the main manual gas supply valve to the unit.
- Remove the front panel cover casing by unscrewing the mounting screws located at the top and bottom corners.
- Locate the plastic air intake duct assembly near the top left of the interior cabinet. Pull out the removable washable mesh air filter screen.
- Wash accumulated dust and debris off the screen using warm water and dish soap. Allow it to dry completely before reinstallation.
- Inspect the flame rod assembly mounted into the front lower burner plate. The flame rod is a slender stainless steel rod embedded in a ceramic insulator shell connected by a yellow or blue wire.
- Over thousands of ignition cycles, microscopic carbon soot builds up on the surface of the metal rod. Carbon acts as an electrical insulator, preventing the flame sensing circuit from measuring the micro-amp current (which must remain at 1.0 µA or higher) generated across the burner flame.
- Unplug the wire connector, remove the mounting screws, and carefully extract the flame rod assembly.
- Gently polish the metal sensor rod using 100-grit fine sandpaper, steel wool, or a clean dollar bill until the metal shines brightly. Clean off lingering dust, inspect the sealing gasket, reinsert the rod into the burner housing, and tighten the mounting hardware.
- Reinstall the front cover panel, turn on the gas supply, restore electrical power, and initiate a test ignition sequence.
Frequently Asked Questions About Rinnai Tankless Water Heater Issues
How do I reset my Rinnai unit after a power surge or outage?
To perform a proper system control reset after an electrical surge or power failure, turn off the digital controller switch on the front control panel or wall remote. Unplug the electrical power cord from the wall outlet or switch off the dedicated circuit breaker in your main service panel. Leave the system unpowered for 10 full minutes. This extended pause drains residual capacitance from the control board circuitry and forces motorized water control valves to return to baseline operating positions. Restore power, turn the controller back on, and run a high-flow hot water fixture to re-establish normal heating operation.
Why does my water heater shut off during low-flow kitchen sink use?
Your Rinnai tankless water heater turns off during low-flow kitchen sink use because the total water volume flowing through the heater drops below the system's minimum activation threshold (typically 0.4 to 0.6 GPM to ignite and 0.26 GPM to maintain operation). When you open a faucet on lukewarm settings, the fixture blends cold tap water under the sink, reducing the volume of hot water pulled through the heater's internal turbine sensor. Cleaning clogged sink aerators, clearing mineral debris from under-sink shutoff valves, or lowering the target set temperature on your Rinnai digital controller forces higher hot water draw across the sensor, preventing unexpected burner shutdowns.
When should I call a professional for tankless water heater repair?
You should schedule service with a certified technician when troubleshooting basic power, water flow filters, and reset steps fails to restore hot water service. Immediate professional attention is required if you smell natural gas or propane, notice active water leaks inside the cabinet, hear metallic rumbling or loud banging during ignition, or encounter recurring high-severity diagnostic codes—such as Error Code 14 (overheat safety fuse trip), Error Code 52 (proportional gas valve electrical fault), or Error Code 61 (combustion blower motor failure).
For comprehensive diagnostic help or component repairs, contact our team for expert Plumbing/Water Heater Repair.
Conclusion
A rinnai tankless water heater no hot water issue can disrupt your household, but systematic troubleshooting reveals that most performance failures stem from manageable triggers: electrical surges, restricted cold water filter screens, fixture flow rate limitations, or scale accumulation inside heat exchanger channels. Tankless water heaters represent an advanced home investment capable of delivering up to 20 years of continuous service—nearly double the lifespan of standard storage tank heaters—provided they receive routine maintenance and timely maintenance.
By maintaining clean air and water filter screens, addressing hard water scaling annually, and ensuring proper electrical grounding, homeowners throughout Utah and the Greater Salt Lake Valley can count on consistent, energy-efficient hot water for decades. When hardware failures exceed basic DIY steps, gas pressure issues arise, or internal control sensors require replacement, professional intervention ensures your equipment operates safely and reliably.
If your home is experiencing complex water heating disruptions or requires precision replacement services, turn to the licensed team at All Pro Service Group for expert tankless water heater installation and complete plumbing solutions.