
What You Need to Know About Flushing a Tankless Water Heater
Flushing a tankless water heater is the process of circulating a descaling solution — typically undiluted white vinegar — through the heat exchanger to dissolve mineral buildup. Here's the short version:
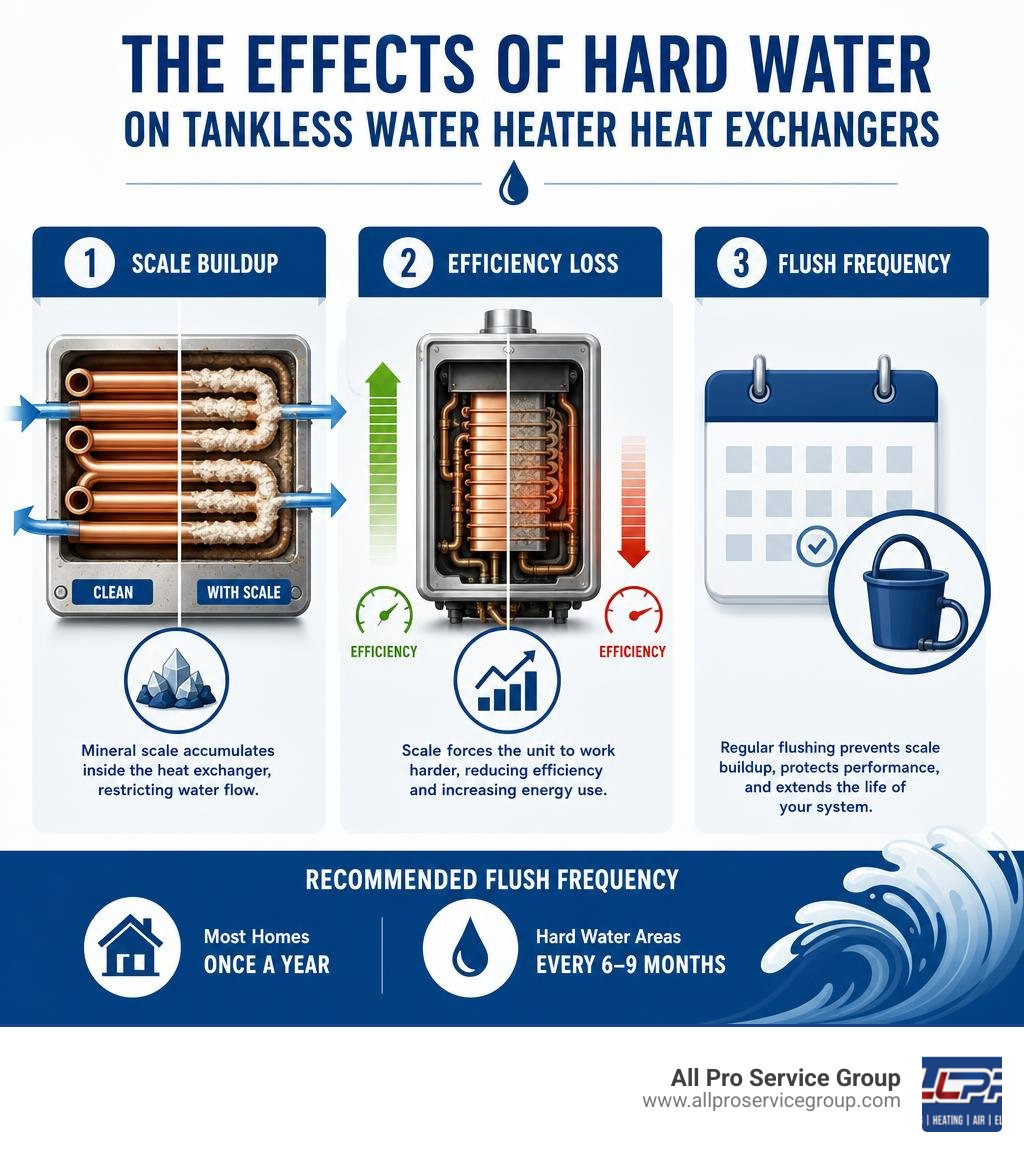
- How often: Once a year for most homes; every 6–9 months if you have hard water
- What you need: A submersible pump, two hoses, a bucket, and white vinegar
- How long it takes: About 60–90 minutes total
- Can you DIY it? Yes, if your unit has isolation valves installed
- What happens if you skip it? Reduced efficiency, higher energy bills, and potential system failure
Most homeowners don't think about their tankless water heater until something goes wrong. But by then, mineral scale has often been quietly building up inside the heat exchanger for years — restricting water flow, forcing the unit to work harder, and cutting years off its lifespan.
The good news: a simple annual flush with white vinegar can prevent all of that.
We are All Pro Service Group, and we've been helping Greater Salt Lake Area homeowners with tankless water heater maintenance — including flushing tankless water heater systems clogged with Utah's notoriously hard water — since 2008. In this guide, we'll walk you through exactly how to do it safely and correctly.
Why Flushing Tankless Water Heater Units is Crucial
Unlike traditional tank water heaters that store dozens of gallons of hot water, tankless systems heat water on demand. They do this by forcing cold water through incredibly narrow copper or stainless steel passages inside a component called a heat exchanger. While this design is highly efficient and saves an immense amount of space, those small internal tubes are highly susceptible to mineral accumulation.
Every time water is heated, dissolved minerals like calcium carbonate and magnesium naturally separate from the water. These minerals settle on the hot metal surfaces of the heat exchanger, forming a hard, chalky white crust known as scale.
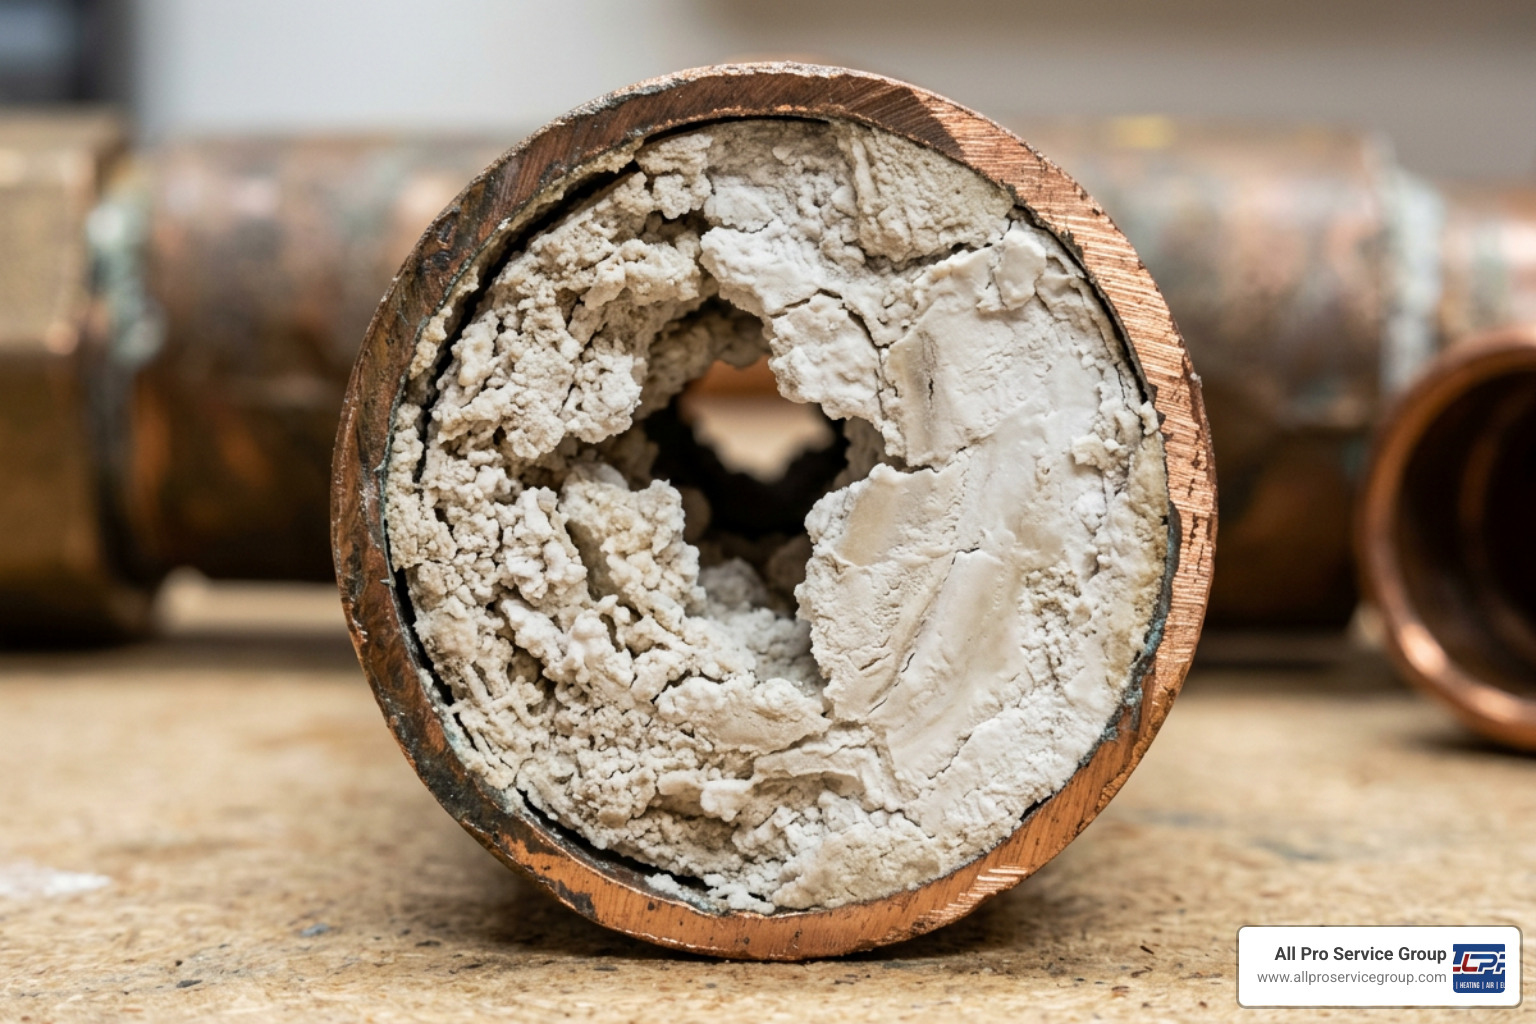
Over time, this scale buildup acts as an insulating barrier. Instead of directly heating the water, your water heater’s burner must first heat the thick layer of mineral scale, which then heats the metal, which finally heats the water. This thermal barrier causes several major issues:
- Reduced Thermal Efficiency: Your system has to run hotter and longer to provide the same amount of hot water.
- Spiking Energy Bills: Because the burner works overtime, your gas or electricity consumption climbs.
- Erosion and Overheating: The extreme internal temperatures can actively erode the walls of the heating chamber, leading to premature metal fatigue and heat exchanger failure.
- Voided Warranties: Most major manufacturers explicitly state in their warranty terms that damage caused by scale buildup or a lack of documented annual maintenance is not covered.
By performing regular descaling, you protect the system's efficiency and ensure your unit reaches its full potential lifespan of 20+ years. To learn more about general maintenance, check out this guide on How to Clean a Tankless Water Heater.
Signs Your Unit Needs Descaling
If you haven’t flushed your unit recently, it may already be struggling. Here are the most common warning signs that mineral scale has reached a critical level:
- The "Cold Water Sandwich" Effect: This occurs when you turn on the shower, get a brief burst of hot water, followed by a sudden wave of cold water, before it slowly warms up again. This happens because scale restricts the water flow and slows down the heat transfer process.
- Fluctuating Water Temperatures: If your hot water constantly cycles between warm and lukewarm during a single shower, the thermostat and heating elements are likely coated in scale.
- Drop in Hot Water Pressure: Because scale physically narrows the pathways inside the heat exchanger, you will notice a distinct loss of water pressure when running hot water compared to cold water.
- System Error Codes: Modern tankless units are equipped with sensors that monitor internal temperatures and flow rates. If the system detects overheating or restricted flow, it will trigger specific error codes on the digital control panel.
- Unusual Noises: If you hear popping, rumbling, or clicking sounds coming from the unit during operation, it is often the sound of water trapped beneath a thick layer of scale boiling rapidly and escaping.
If your system is already displaying these symptoms, it is critical to address the issue immediately. You can read More info about water heater repair services to understand how we diagnose and resolve these advanced scale issues.
How Often Should You Flush a Tankless Water Heater?
As a general rule of thumb, most manufacturers and plumbers recommend flushing tankless water heater systems at least once every 12 months. However, this is a baseline recommendation for average water conditions. Your actual maintenance schedule depends heavily on two key factors: your household's daily hot water usage and the hardness of your local water supply.
Water hardness is measured in Grains Per Gallon (GPG). The higher the GPG, the faster mineral scale will accumulate. If your home has hard water (above 7 GPG) or very hard water (above 10 GPG), professionals usually recommend flushing the system every six to nine months to prevent permanent damage.
The table below outlines the recommended flushing frequency based on your water hardness and household size:
| Water Hardness (GPG) | Water Classification | Small Household (1-2 People) | Large Household (3+ People) |
|---|---|---|---|
| 0 – 3 GPG | Soft Water | Every 18 to 24 months | Every 12 months |
| 3 – 7 GPG | Moderately Hard | Every 12 months | Every 9 to 12 months |
| 7 – 10 GPG | Hard Water | Every 9 months | Every 6 to 9 months |
| 10+ GPG | Very Hard Water | Every 6 months | Every 3 to 6 months |
For a deeper look into how household demand and water chemistry dictate your maintenance window, you can read How Often Should You Flush a Tankless Water Heater?.
The Impact of Utah's Hard Water
If you live in the Greater Salt Lake Area — whether in South Jordan, West Jordan, Park City, Provo, West Valley City, or Salt Lake City — you are dealing with some of the hardest municipal water in the United States. The water flowing from our mountain-fed aquifers is rich in dissolved calcium and magnesium.
In these Utah communities, water hardness routinely exceeds 12 to 20 GPG. This means that if you own a tankless water heater in Utah, waiting a year between flushes is often waiting too long. Without proactive maintenance, a brand-new tankless unit can suffer severe scale damage in as little as 15 to 18 months.
While installing a water conditioning system can dramatically slow down this process, even homes with water treatment systems require periodic descaling to account for trace minerals. If you want to tackle the root cause of the issue and protect all your household appliances, you can find More info about water softener installation on our site.
Step-by-Step Guide to DIY Maintenance
Flushing a tankless water heater is a highly manageable DIY project that takes about 60 to 90 minutes. By learning how to perform this maintenance yourself, you can save on annual plumbing service costs. However, before you begin, you must ensure your unit is equipped with isolation valves (also known as service valves).
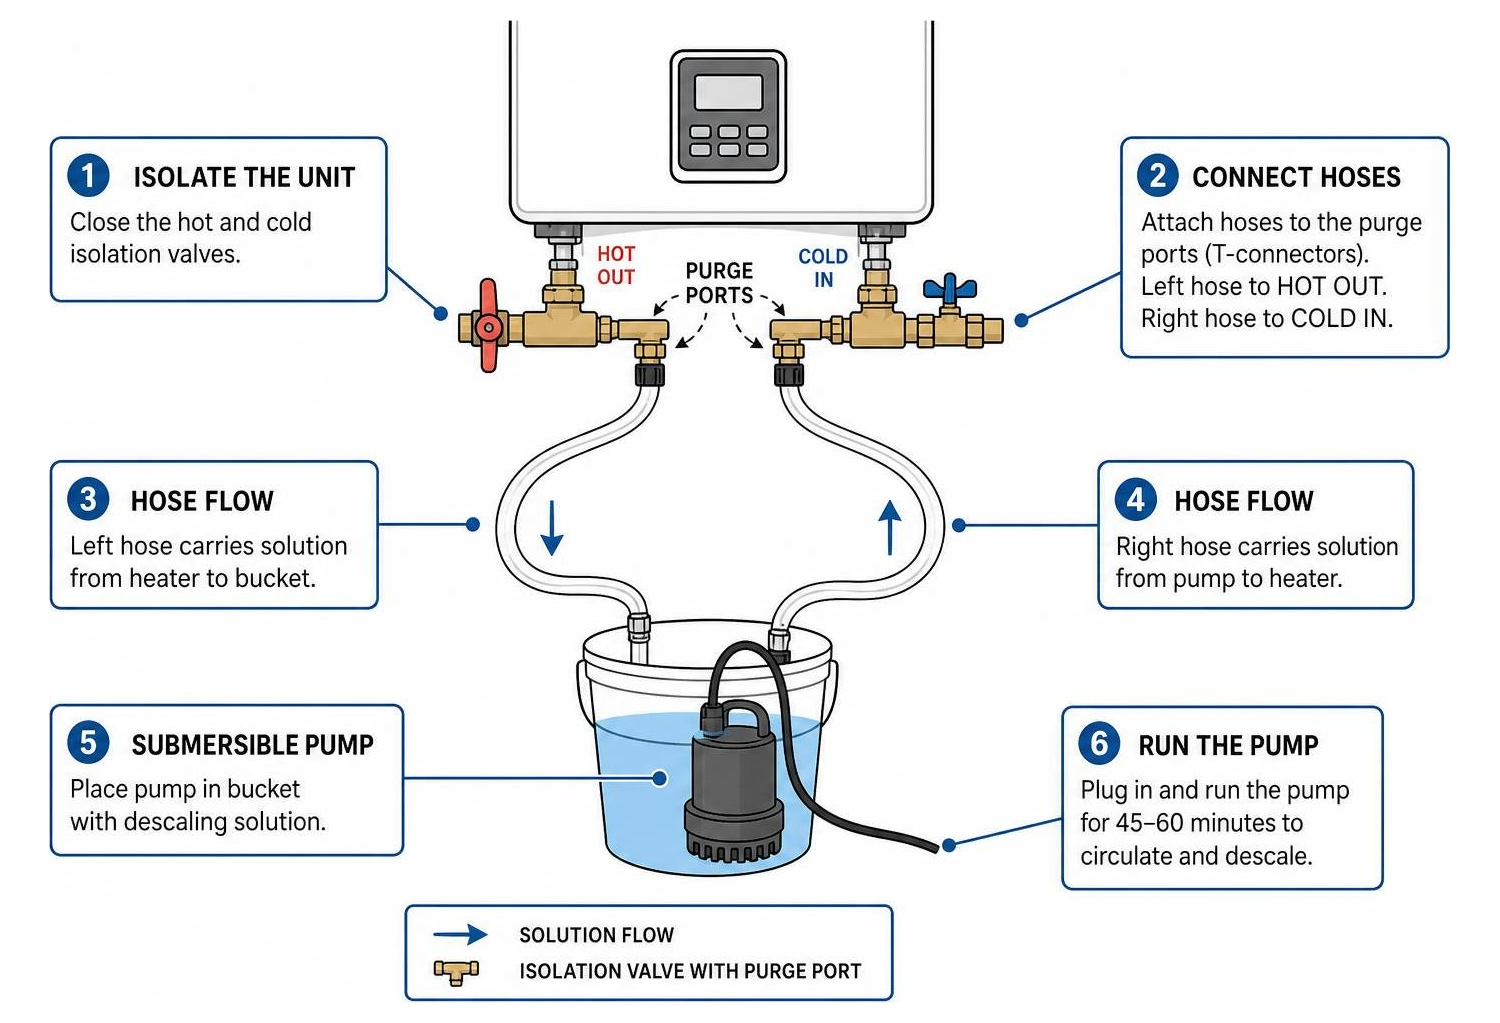
These valves are typically located directly beneath the water heater and consist of color-coded (red and blue) handles with separate, capped T-connector purge ports. If your system was installed without these valves, you will not be able to connect a pump to circulate the cleaning solution, and you will need to have a licensed plumber install them first.
Tools and Materials Needed for DIY Descaling
Before starting, gather all your tools and materials. Having everything ready in one place will ensure the process goes smoothly and safely.
- A Submersible Utility Pump: A small 1/6 horsepower (HP) pump is ideal. It should be rated for utility use and have a flow rate of roughly 3 to 4 Gallons Per Minute (GPM) or up to 1100 Gallons Per Hour (GPH). Ensure the pump has thermal overload protection.
- A Clean 3-to-5-Gallon Utility Bucket: This will hold your flushing solution. Ensure it is completely free of dirt, debris, or chemical residues that could be pumped into the narrow passages of your water heater.
- Two 1/2-Inch or 3/4-Inch Connection Hoses: Heavy-duty, female-threaded PVC or rubber hoses (such as standard washing machine utility hoses) that are roughly 5 to 6 feet long.
- Undiluted White Vinegar: You will need 3 to 4 gallons of standard, food-grade white distilled vinegar. Vinegar is a mild, non-toxic acid that safely dissolves calcium carbonate without damaging the copper components of your heat exchanger. Alternatively, you can use a manufacturer-approved, biodegradable descaling powder.
- Channel Lock Pliers or a Crescent Wrench: For removing the tight caps on your service ports.
- Safety Gear: Rubber gloves and safety glasses to protect against accidental splashes.
Preparing for Flushing Tankless Water Heater Systems
Safety is the absolute priority when working with electrical appliances, gas lines, and water. Follow these preparation steps carefully to prevent electrical shocks, gas leaks, or system damage:
- Turn Off the Power: Unplug the water heater's electrical power cord from the wall outlet, or switch off the dedicated circuit breaker in your electrical panel. Never attempt to flush the unit while it is electrically powered.
- Shut Off the Gas or Electrical Heating Elements: Close the manual gas control valve on the gas line leading to the unit (the valve handle should be perpendicular to the pipe). If you have an electric tankless water heater, ensure the double-pole breakers are completely shut off.
- Close the Water Isolation Valves: Locate the main cold-water inlet valve (blue handle) and the main hot-water outlet valve (red handle) directly below the unit. Turn both handles so they are perpendicular to the pipes. This isolates the water heater from the rest of your home’s plumbing system.
- Relieve Internal Pressure: Slowly unscrew the caps on the cold and hot purge ports (the small T-connections on the side of the isolation valves) using your pliers. Have a small towel or bucket handy, as a small amount of pressurized water will drain out.
- Preserve the Rubber Sealing Discs: Inside each purge port cap is a small rubber sealing washer or disc. These are critical for preventing leaks when you put the caps back on. Remove them carefully and place them in a safe spot.
- Apply the Rinnai SENSEI Power-Cycling Trick (If Applicable): If you own a Rinnai SENSEI model, the manufacturer recommends a specific sequence to properly align the internal bypass valves for flushing. As detailed in Technical Bulletin 188, you should unplug the unit, plug it back in for exactly 20 seconds, and then unplug it again. This ensures all internal chambers are fully open to the descaling solution.
Step-by-Step Guide to Flushing Tankless Water Heater Units
Once your system is fully prepared, you can set up your closed-loop circulation system and begin the flush.
Step 1: Connect the Hoses
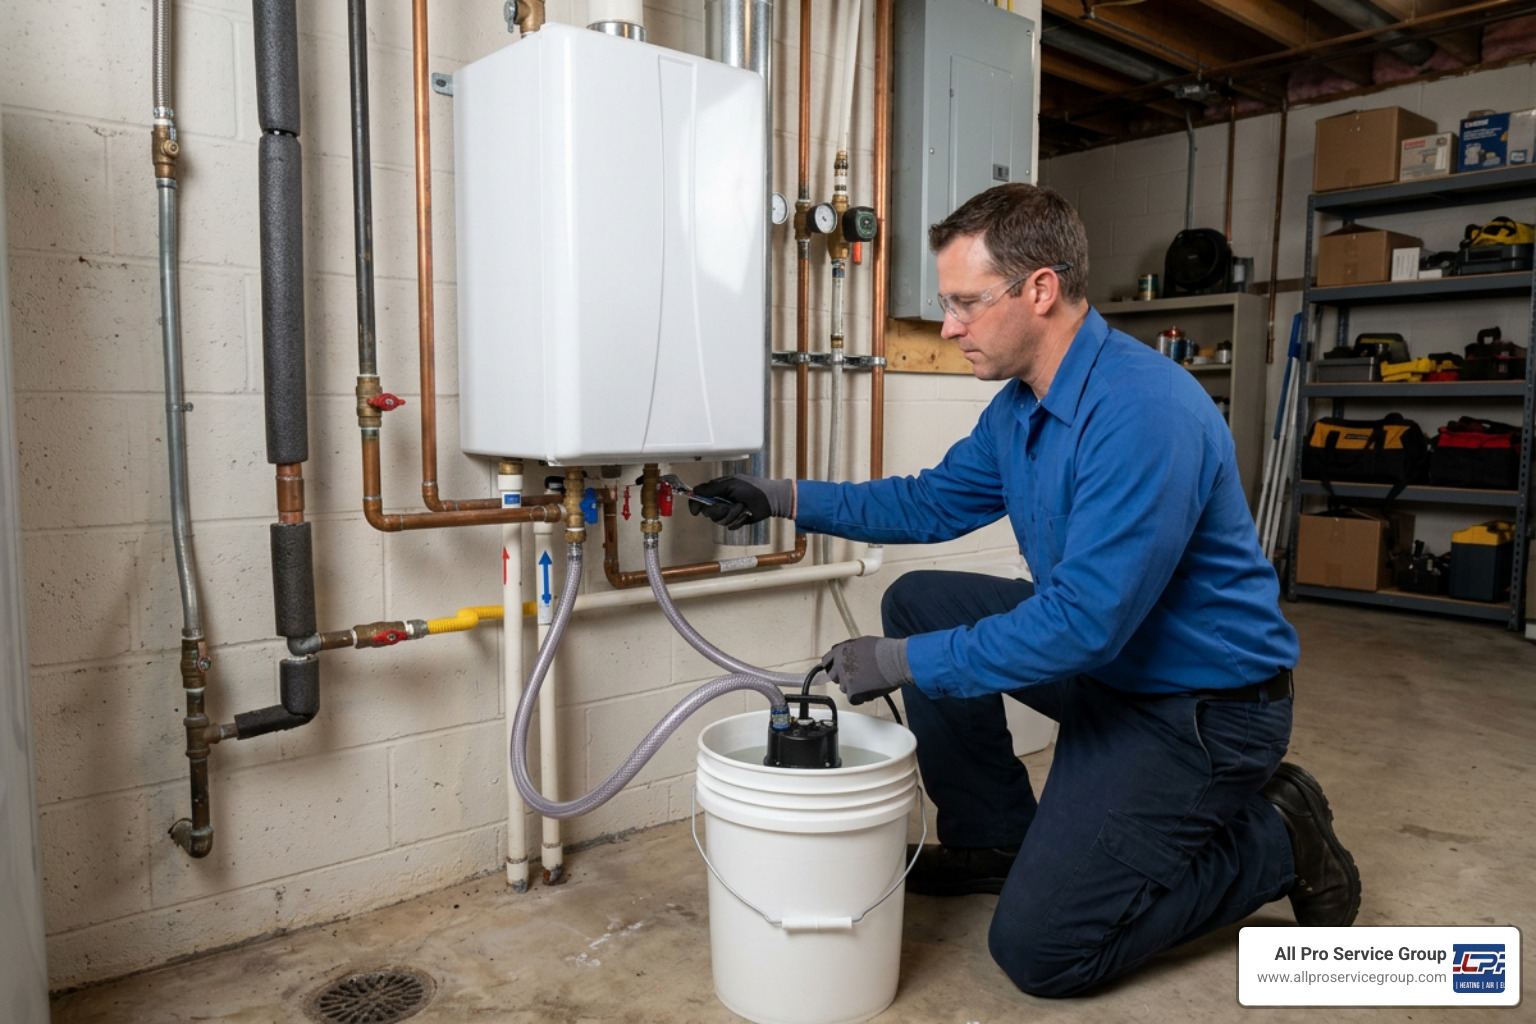
Take your first utility hose and connect one end to the threaded discharge outlet of your submersible utility pump. Connect the other end of this hose to the cold-water purge port(blue-coded valve). Take your second hose and connect it to the hot-water purge port(red-coded valve). Place the open, free end of this second hose directly into the bottom of your utility bucket.
Step 2: Prepare the Pump and Solution
Place your submersible pump flat at the bottom of your utility bucket. Pour 3 to 4 gallons of undiluted white distilled vinegar into the bucket, ensuring the pump’s intake screen is fully submerged.
Step 3: Open the Purge Valves
Open both the cold and hot purge port valves by turning the small T-handles parallel to the purge ports. This opens the pathway for the vinegar to flow into the unit through the cold port, circulate through the heat exchanger, and exit back into the bucket through the hot port hose.
Step 4: Circulate the Vinegar
Plug the submersible pump into a grounded electrical outlet. You should immediately see vinegar pumping out of the bucket, through the water heater, and draining back into the bucket in a continuous loop. Let the pump run and circulate the vinegar for 45 to 60 minutes.
Pro Tip: If the vinegar begins to turn a light blue or greenish tint during the flush, do not panic. This is a normal reaction caused by the mild acid dissolving tiny amounts of copper oxide from the interior walls of the heat exchanger tubes.
Step 5: Perform a Fresh Water Flush
Once the circulation time is up, unplug the pump. Do not disconnect the hoses yet. You must flush out the residual vinegar to prevent it from lingering in your system.
- Empty the dirty vinegar from the bucket down a drain.
- Close the cold-water purge valve(turn the T-handle perpendicular).
- Disconnect the hose from the cold purge port.
- Keep the hose connected to the hot-water purge port with its free end in the empty bucket or routed to a nearby floor drain.
- Slowly open the main cold-water inlet valve(blue handle). This will send fresh municipal water through the heat exchanger, pushing the remaining vinegar and loose sediment out of the hot-water purge port and into your drain. Run this fresh water flush for 5 to 10 minutes or until the water runs completely clear and no longer smells like vinegar.
Step 6: Clean the Inlet Filter Screen
Most tankless water heaters have a small mesh prefilter screen located at the cold water inlet to catch incoming dirt and rust. While the system is drained, unscrew this filter, rinse it thoroughly under clean running tap water to remove any trapped sediment, and thread it securely back into place.
Step 7: Restore the System to Service
Now you can safely reassemble and restart your system:
- Close the hot-water purge valve.
- Disconnect the remaining hose from the hot purge port.
- Carefully place the rubber sealing discs back inside the purge port caps and screw them back onto the ports. Tighten them firmly with your pliers, but do not overtighten, as this can crush the rubber seals.
- Fully open both the main cold-water inlet and hot-water outlet valves (handles parallel to the pipes).
- Go to a nearby sink and turn on the hot water tap. Let it run for 2 to 3 minutes. It will sputter and hiss as trapped air is purged from the lines. Once you have a steady, unbroken stream of water, turn the tap off.
- Reopen your manual gas valve (or turn on the electrical breakers).
- Plug the water heater’s power cord back into the outlet.
- Turn on a hot water faucet to verify that the unit ignites and delivers clean, hot water. Check all your connections under the unit for any slow drips or leaks.
For a visually detailed breakdown of this setup, you can reference the steps outlined in How to Flush a Tankless Water Heater (Step-by-Step Guide).
Frequently Asked Questions about Tankless Water Heater Maintenance
Can I use chemical descalers instead of vinegar?
Yes, you can use commercial descaling solutions, but they must be specifically formulated for tankless water heaters and approved by your unit's manufacturer. Many commercial solutions utilize citric acid, which is highly effective and works faster than vinegar (often reducing flush times to 20 or 30 minutes).
However, you should never use harsh industrial chemical drain cleaners, bleach, or non-approved acids (like muriatic acid). These chemicals present severe health risks if they contaminate your household drinking water, and they can easily corrode and ruin the copper heat exchanger inside your unit.
What happens if I never flush my tankless water heater?
If you completely neglect tankless water heater maintenance, mineral scale will continue to build up until it completely blocks the narrow copper tubes. This will restrict water flow, cause severe temperature fluctuations, and force the unit to consume significantly more energy.
Eventually, the extreme localized heat trapped behind the scale barrier will cause the copper walls of the heat exchanger to crack, warp, or burn through, resulting in catastrophic water leaks and complete system failure. Because manufacturers exclude scale damage from warranty coverage, you will be forced to pay thousands of dollars out-of-pocket for a full system replacement.
Can I flush a tankless water heater myself, or should I hire a professional?
If your water heater already has isolation valves installed and you feel comfortable working with basic tools, a submersible pump, and vinegar, flushing the system yourself is a highly cost-effective DIY project.
However, you should hire a professional plumber if:
- Your system does not have isolation valves installed.
- Your unit is currently displaying active error codes or failing to ignite.
- You notice active water leaks around the heat exchanger or pipe connections.
- You do not have the time, equipment, or comfort level to perform the steps safely.
Conclusion
Regularly flushing tankless water heater systems is the single most important maintenance task you can perform to protect your investment, keep your utility bills low, and guarantee a steady stream of hot water for your family. While a DIY flush with vinegar is highly achievable, we understand that home maintenance can sometimes feel overwhelming.
At All Pro Service Group, we have been providing dependable, "Gephardt Approved" plumbing, heating, air, and electrical services across the Greater Salt Lake Area since 2008. Our trained experts serve communities throughout Ogden, Park City, Provo, South Jordan, West Jordan, and West Valley City. Whether you need a professional annual descaling service, a brand-new system installation, or the addition of isolation valves to your existing unit, we are here to help.
Don't wait until an error code cuts off your hot water. Schedule a professional tankless water heater installation or maintenance service with All Pro Service Group today, and let our family take care of yours!