When Your Ice Maker Breaks Down: What to Do First
Ice maker repairs are often simpler than they look — and in many cases, you can fix the problem yourself before calling a professional.
Here's a quick look at the most common ice maker issues and what causes them:
| Problem | Most Likely Cause |
|---|---|
| No ice at all | Frozen fill tube, failed water inlet valve, or freezer too warm |
| Small or hollow cubes | Water pressure below 20 psi or clogged water filter |
| Cloudy or bad-tasting ice | Dirty/expired water filter or mineral scale buildup |
| Ice maker leaking | Cracked fill tube, worn inlet valve, or misaligned water line |
| Ice maker won't stop making ice | Faulty shut-off arm or defective control board |
| Ice maker cycles but produces nothing | Failed harvest motor or thermostat issue |
Most residential ice maker repairs cost between $150 and $450 in parts and labor, and the majority are finished in a single visit of 45 to 90 minutes. If your unit is under 10 years old, repair is almost always the smarter move over replacement.
A working ice maker is one of those things you don't think about — until it stops. One day you reach for a cold drink and nothing comes out. Suddenly a small appliance becomes a big inconvenience, especially during a hot Salt Lake Valley summer.
The good news? Most ice maker failures come down to a short list of fixable problems: a frozen water line, low water pressure, a clogged filter, or a worn-out valve. This guide walks you through how to diagnose what's wrong, what you can fix yourself, and when it makes sense to call in a pro.
At All Pro Service Group, our team has handled countless ice maker repairs across the Greater Salt Lake Valley since 2008 — from simple filter swaps to full inlet valve replacements. We'll give you the straight facts so you can make the right call for your home.
Common Ice Maker Problems and Their Causes
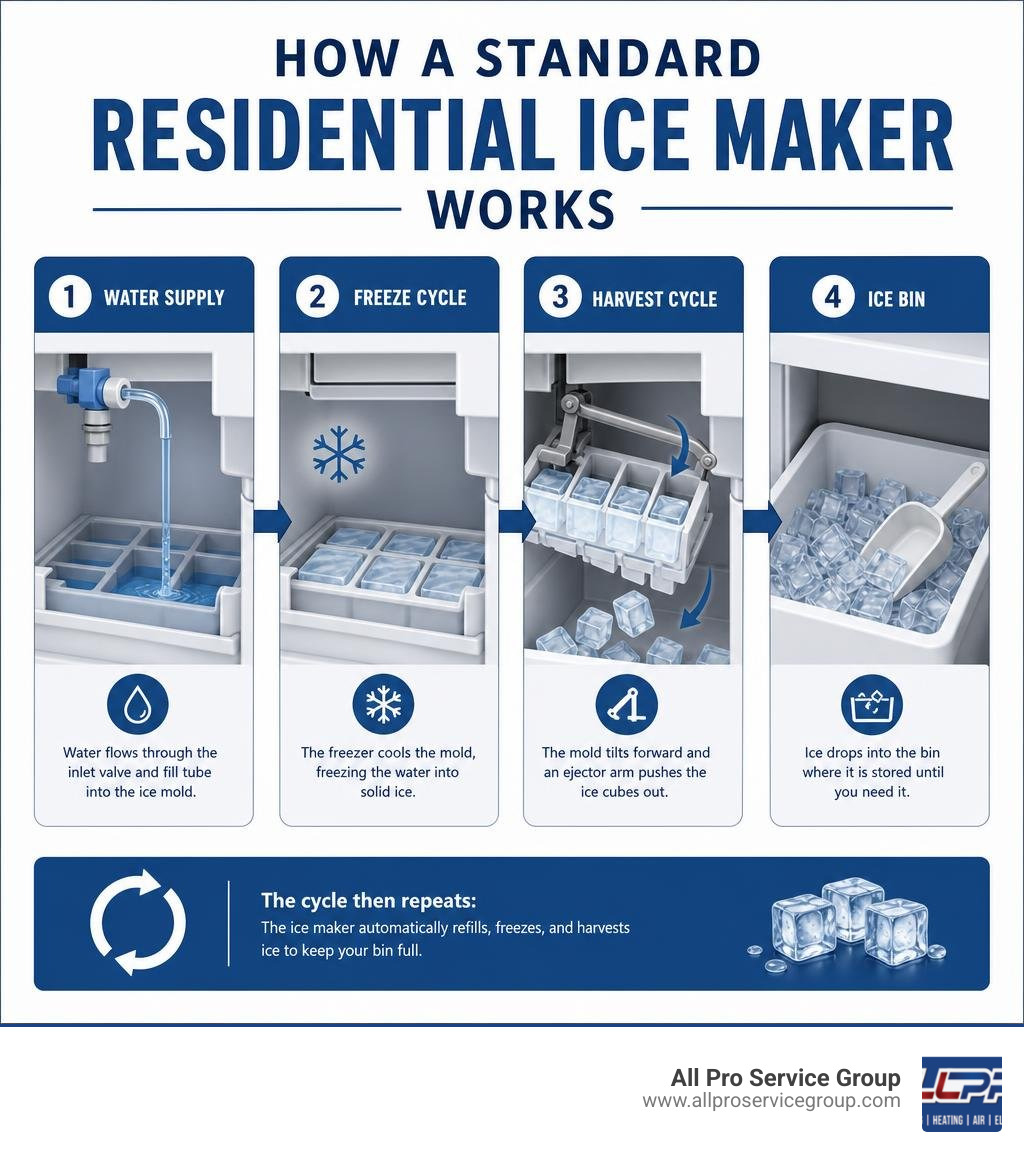
When your ice machine acts up, it helps to understand that it operates on a timed cycle. It needs three things to work: electricity (usually 120 volts), consistent water pressure, and a cold environment. If any of these elements are disrupted, the cycle breaks down.
If you are dealing with a built-in or freestanding unit, identifying the specific symptom is the first step toward a successful Professional Ice Maker Repair. Let's look at the primary failure modes.
Why Your Ice Maker Isn't Making Ice
If your machine has stopped producing ice entirely, the issue is typically electrical, thermal, or mechanical. Here are the most common culprits:
- Incorrect Freezer Temperature: For an ice maker to cycle efficiently, the freezer temperature must stay between 0°F and 5°F (-18°C to -15°C). If the temperature rises above 10°F to 15°F, the internal thermistor will not signal the control module to harvest the ice, halting production entirely.
- The Shut-Off Arm is Engaged: This is the simplest fix. Most ice makers use a mechanical metal bail arm or an infrared sensor to detect when the ice bin is full. If the arm is accidentally pushed up into the "off" position, or if a tall box of frozen food is blocking the sensor, the machine assumes the bin is full and shuts down.
- Faulty Door Switch: On most refrigerator models, a built-in door switch automatically disables the ice dispenser and ice maker when the door is open. If the switch is broken, the machine may behave as though the door is permanently open, preventing ice production. You can test this by checking if the interior light turns off when you manually depress the switch.
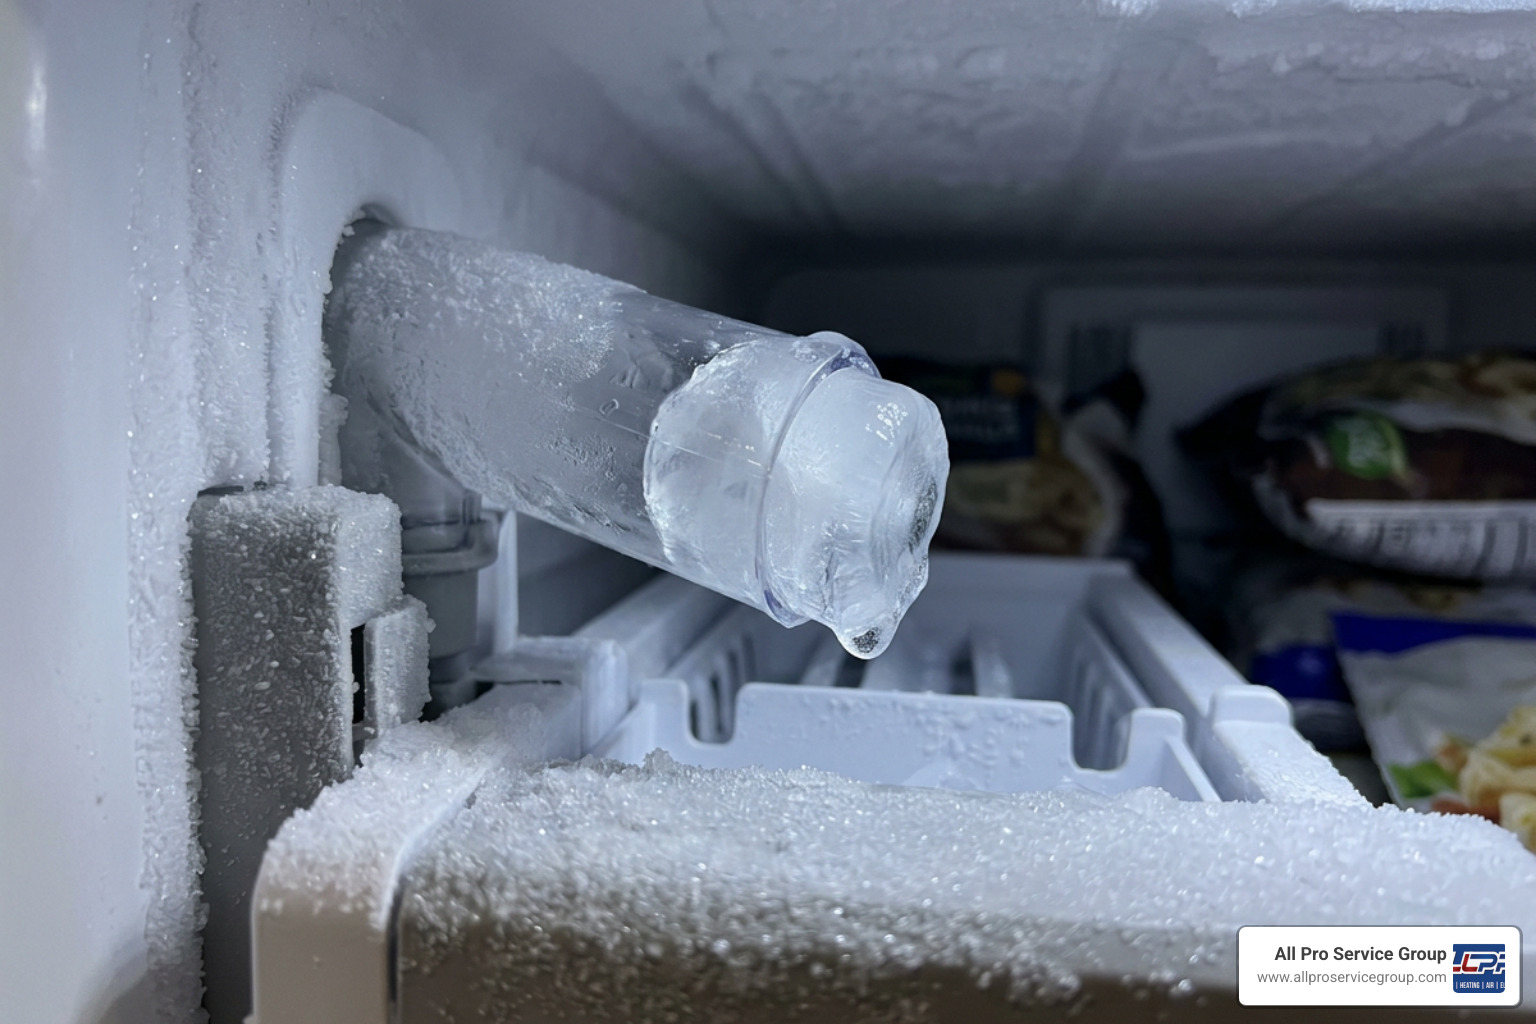
- Frozen Fill Tube: Water enters the ice mold through a small fill tube. If water drips slowly due to a weeping inlet valve, it can freeze inside the tube, creating an ice block that completely shuts off the water supply.
If the internal motor or mold heater fails, the entire ice maker assembly typically needs to be replaced, as individual internal gears and ejector motors are rarely sold separately. For more complex built-in issues, you can check out More info about refrigerator repair services.
What Causes Cloudy, Small, or Oddly Shaped Ice Cubes?
If your machine is still producing ice but the quality is poor, you are likely dealing with a water supply or mineral issue:
- Low Water Pressure: Ice makers require a minimum water supply pressure of 20 psi (up to 120 psi) to operate correctly. If the pressure drops below 20 psi, the water inlet valve won't open fully or close properly. This restricts the water flow, resulting in small, hollow, or misshapen ice cubes.
- Clogged Water Filter: A water filter left in place for more than six months will accumulate sediment, restricting water flow and lowering the pressure reaching the ice maker.
- Mineral Scale Buildup: In many parts of Utah, including Salt Lake City, Provo, and West Jordan, hard water is highly common. High levels of calcium and magnesium leave mineral deposits (scale) on the evaporator plates and inside water lines. This scale can prevent ice from harvesting properly, resulting in cloudy, bad-tasting, or malformed cubes.
DIY Troubleshooting Before Calling for Ice Maker Repairs
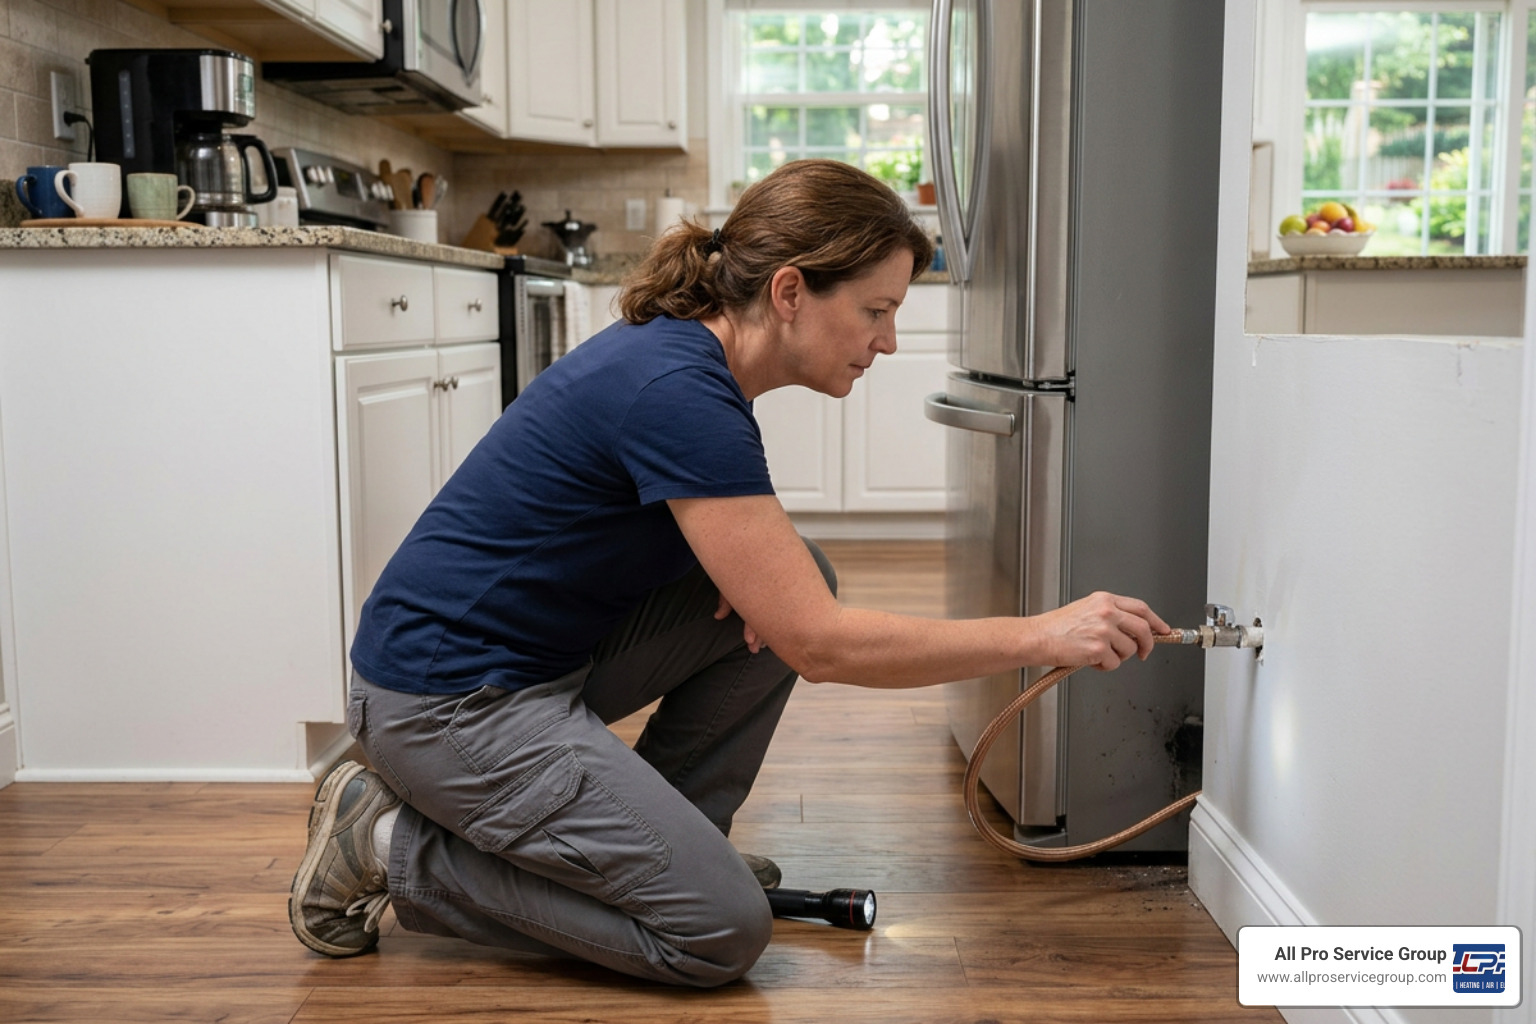
Before you search for ice maker repair near you or call in a technician, there are several basic checks you can perform to rule out simple issues.
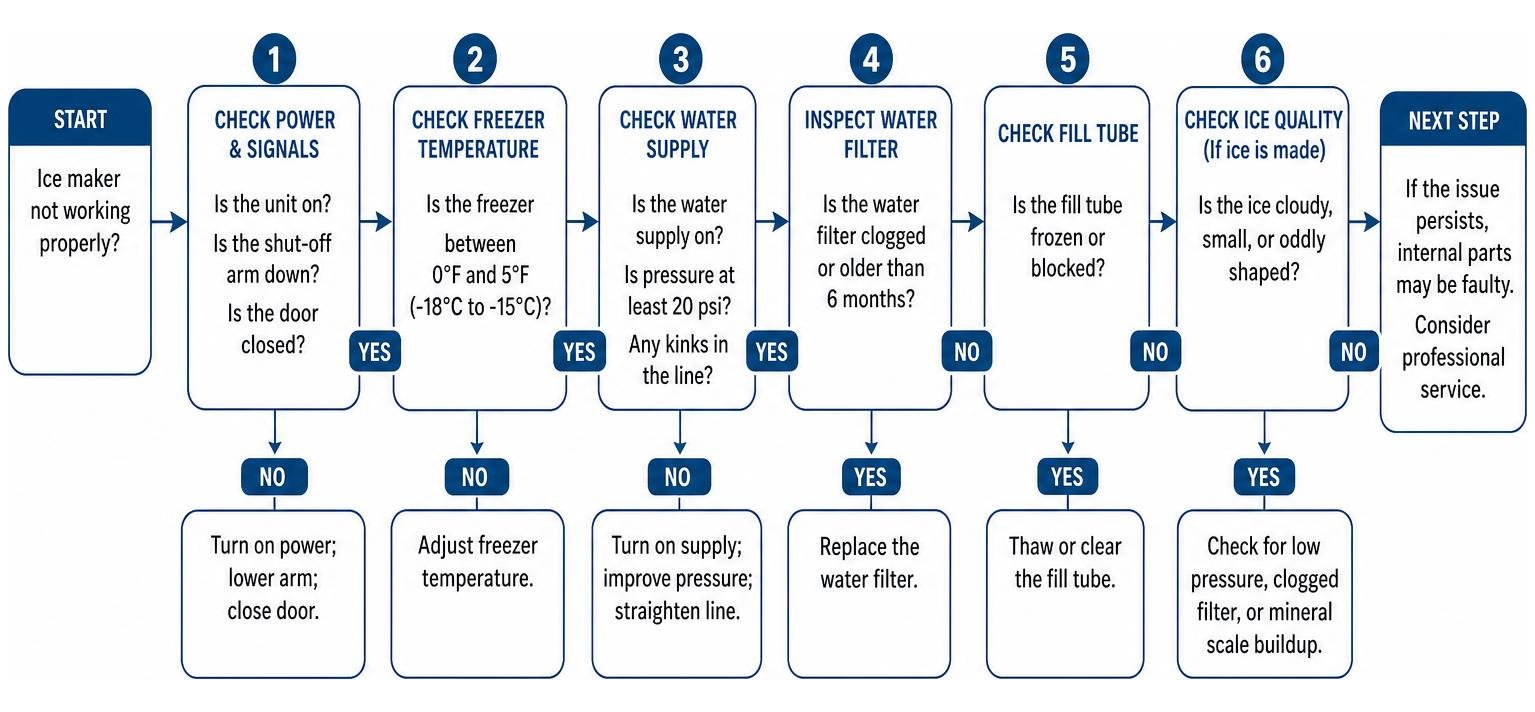
To help you systematically troubleshoot, use this quick reference table:
| Troubleshooting Step | What to Check | Solution |
|---|---|---|
| 1. Verify Power & Signals | Is the unit turned on? Is the shut-off arm down? | Reset the power switch; lower the mechanical bail arm. |
| 2. Perform a System Reset | Does your model have a reset button? | Press and hold the reset button for 5 seconds to force a harvest cycle. |
| 3. Check Freezer Temp | Is the freezer running too warm? | Adjust thermostat to keep the temperature between 0°F and 5°F. |
| 4. Inspect the Water Line | Are there visible kinks or ice blocks in the tubing? | Pull the fridge out, straighten the line, or thaw the fill tube. |
How to Clear a Frozen Water Line
If you suspect the fill tube is frozen, you can clear it using a few household tools:
- Safety First: Unplug the refrigerator or turn off the circuit breaker. Shut off the water supply valve, which is typically located under the kitchen sink, in the basement, or directly behind the refrigerator.
- Locate the Fill Tube: Locate the small plastic or metal tube that directs water into the back of the ice maker assembly.
- Apply Gentle Heat: Use a handheld hairdryer on a low, warm setting to melt the ice block inside the tube. Keep the hairdryer moving to avoid overheating and warping the plastic components. Keep a dry towel handy to catch any water drips.
- Manual Defrost Alternative: If you prefer not to use a hairdryer, you can turn off the refrigerator and leave the doors open for several hours to perform a manual defrost.
- Restore Power and Water: Once the line is clear, turn the water supply back on, plug the unit in, and monitor the next cycle.
Checking Water Pressure and Clogged Filters
If your ice cubes are small or hollow, check your water supply system:
- Test the Water Pressure: Turn off the water supply valve behind the refrigerator. Disconnect the water line from the back of the appliance. Hold the end of the line over a bucket and turn the supply valve back on. If the water flows in a weak, slow trickle, your home's water pressure is likely too low, or there is a clog in the saddle valve.
- Replace the Filter: If the water flow from the disconnected line is strong, but the water coming out of the refrigerator dispenser is weak, your water filter is clogged. Replacing the filter every six months prevents restricted water flow and protects the water inlet valve from strain. If you run into deeper plumbing issues while checking your water lines, you can find More info about plumbing repair.
Why Is My Ice Maker Leaking Water?
Water pooling inside your freezer or leaking onto your kitchen floor is an urgent issue that can quickly damage your subfloor and promote mold growth. If you notice a leak, immediately shut off the water supply valve and investigate these common causes:
- Cracked or Misaligned Fill Tube: If the fill tube is not perfectly aligned with the ice mold, water can splash over the edges of the tray during the fill cycle. Over time, plastic or silicone fill tubes can also crack due to the constant freezing temperatures.
- Worn-Out Water Inlet Valve: The water inlet valve uses a small solenoid to open and close the water supply. If the valve is worn or damaged by mineral deposits, it may fail to close completely. This causes water to weep continuously into the ice mold, leading to overflows and leaks.
- Kinked or Damaged Supply Line: Plastic water lines can become brittle and crack. Upgrading to a braided stainless steel supply line is a highly recommended way to prevent kinks and leaks.
- Condensation and Drain Line Clogs: On standalone and under-counter ice machines, a clogged drain line can cause melted water to back up and overflow onto the floor.
If you need professional assistance to trace a stubborn leak or inspect your home's water connections, you can find More info about plumbing services.
Repair vs. Replace: When to Call a Professional
Most modern household appliances, including built-in ice makers, have an average shelf life of about ten years. When deciding whether to repair or replace your unit, a good rule of thumb is the 20%-30% rule: if the cost of the repair is less than 20% to 30% of the price of a brand-new freestanding or high-end built-in ice machine, repairing the unit is the more cost-effective choice.
When to Call a Professional for Ice Maker Repairs
While homeowners can easily handle filter replacements and basic thaws, certain repairs require specialized tools and professional training:
- Sealed System Work: If your under-counter or standalone ice machine has a refrigerant leak or compressor failure, the repair must be handled by a technician holding an EPA Section 608 Universal certification.
- Electrical Diagnostics: Testing live voltage on control boards, thermostats, or water inlet valves using a multimeter carries safety risks and is best left to licensed professionals.
- Complex Part Replacements: Some components require disassembling the entire freezer door or ice maker housing.
During a professional service visit, technicians commonly replace the following parts:
- Water inlet valves
- Complete ice maker modules/assemblies
- Thermostats and thermistors
- Control boards and sensors
- Water filtration lines and tubing
- Harvest ejector motors
For high-end or complex systems, seeking professional local services in your area ensures your appliance is handled safely.
Understanding the Cost of Professional Ice Maker Repairs
Professional ice maker repairs are highly cost-effective compared to purchasing a new appliance. Here is what you can typically expect:
- Average Repair Costs: Most residential ice maker repairs land between $150 and $450 in parts and labor. For example, replacing a faulty water inlet valve typically costs between $180 and $320, while replacing a complete ice maker assembly ranges from $200 to $400.
- Diagnostic Fees: Most reputable companies charge a flat diagnostic fee (typically ranging from $80 to $100) to trace the root cause of the issue. Many service providers will credit this fee toward the final repair cost if you choose to move forward with the service.
- Speed of Repair: Once the issue is diagnosed, most standard repairs are completed in a single visit of 45 to 90 minutes, as technicians carry common OEM valves, modules, and sensors directly on their service vans.
If you are ready to get your machine running perfectly again, you can Schedule professional ice maker repair with our team.
Frequently Asked Questions
How often should I have my ice maker professionally serviced or cleaned?
It is generally recommended to have your residential ice maker professionally serviced and descaled every 1 to 3 years, especially if you live in a hard water area like the Greater Salt Lake Valley. For daily maintenance, you should sanitize the ice bin every 6 months and deep-clean the internal system once a year using a specialized citric-acid descaling solution.
What brands of ice makers do repair services commonly work on?
Professional repair services work on a wide variety of brands. Common residential refrigerator-integrated brands include Whirlpool, GE, Samsung, LG, Frigidaire, KitchenAid, and Maytag. High-end built-in and freestanding brands include Sub-Zero, U-Line, and Scotsman. Specialty commercial and standalone brands include Hoshizaki, Manitowoc, and Ice-O-Matic.
Can a clogged water filter completely stop ice production?
Yes. A severely clogged water filter can restrict water flow to the point where the water pressure drops below the 20 psi threshold required to open the water inlet valve. When this happens, the ice mold will not fill, completely halting ice production and putting unnecessary strain on the valve solenoid.
Conclusion
A broken ice maker doesn't have to mean a summer of warm drinks. By understanding how your machine works and following basic troubleshooting steps — like checking your freezer temperature, inspecting your water lines, and replacing your filter every six months — you can resolve many common issues on your own.
When the problem requires professional diagnostic tools, electrical work, or replacement parts, All Pro Service Group is here to help. We are proud to be Gephardt Approved, serving homeowners across the Greater Salt Lake Area — including Ogden, Park City, Provo, South Jordan, West Jordan, and Salt Lake City — since 2008. We provide dependable, honest repair, replacement, and inspection services backed by exceptional customer care.
Don't let a broken ice machine slow you down. Contact us today to Schedule professional ice maker repair and get your kitchen back on track!