Why Your Ice Maker Heater Element Is the Key to Consistent Ice Production
An ice maker heater element is the small but critical component that keeps your refrigerator's ice maker from turning into a frozen, non-functioning block of ice. When it works, you never think about it. When it fails, you notice fast — no ice, stuck cubes, or a jammed ejector arm that groans and grinds without releasing anything.
Quick answer — what you need to know about ice maker heater elements:
- What it does: Warms the ice mold just enough during the harvest cycle to release frozen cubes without melting them
- When it fails: Ice sticks to the mold, the fill tube freezes solid, or the ice maker stops producing entirely
- Common brands affected: Samsung, Whirlpool, Maytag, Frigidaire, and GE all use heater elements in their ice makers
- Popular replacement parts:
- Samsung fill tube heater: DA47-00192E (~$14)
- Whirlpool mold heater assembly: WPW10122523 (~$98)
- Samsung fill tube assembly: DA97-00209Z
- Typical repair time: 15–30 minutes for most DIY-friendly replacements
- Freezer temperature required: Must be at or below 13°F for the heater to activate and complete the harvest cycle
Ice maker freeze-ups are one of the most common refrigerator complaints — and in many cases, a failed heater element is the root cause. The fix is often straightforward once you know what to look for and which part to order.
At All Pro Service Group, our team has diagnosed and repaired countless appliance issues — including ice maker heater element failures — across the Greater Salt Lake Valley since 2008. If you'd rather have a professional handle it, we're here, but this guide will walk you through everything you need to know to understand, diagnose, and replace the part yourself.
What is an Ice Maker Heater Element and How Does It Work?
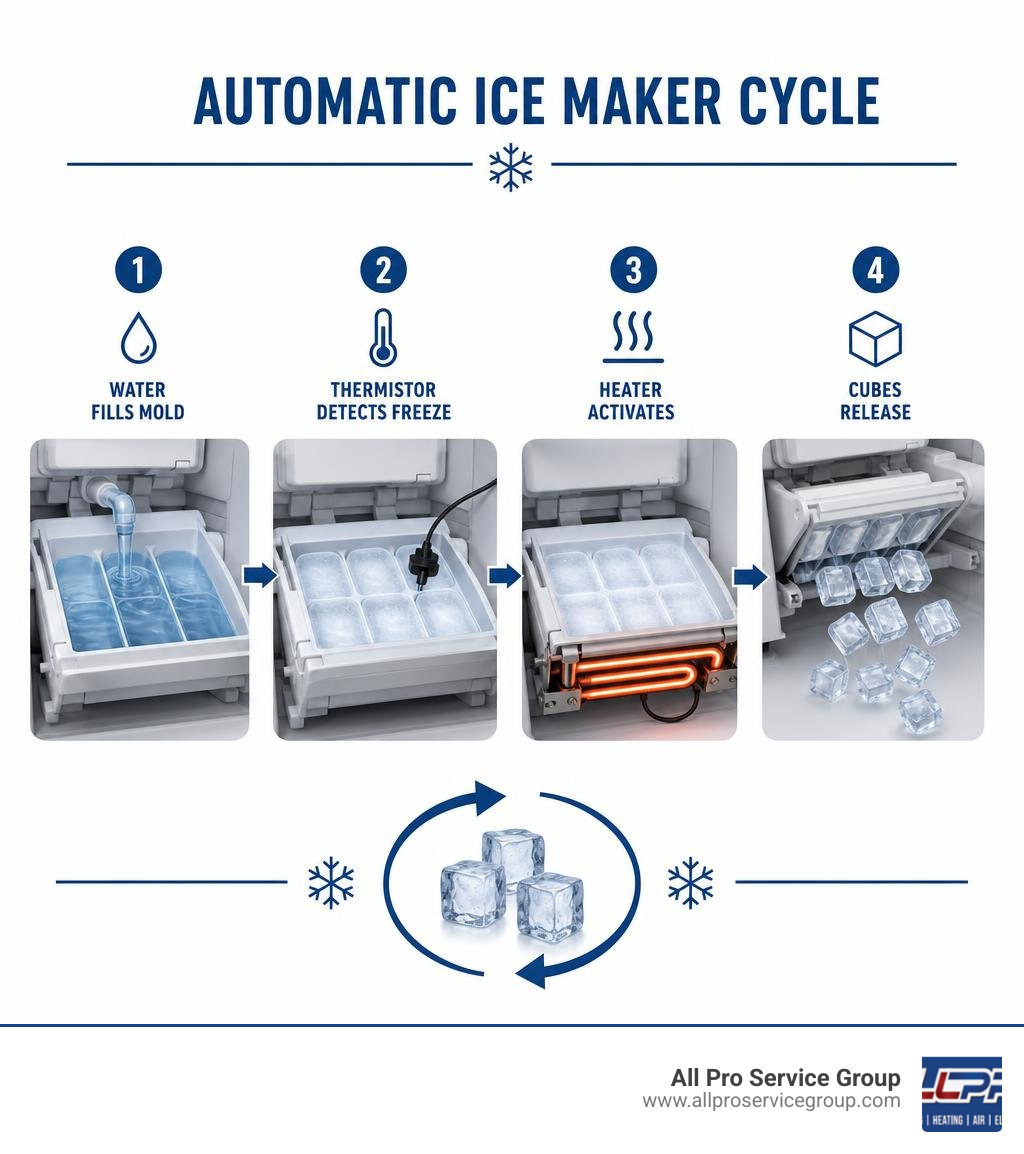
To understand why your ice maker is acting up, it helps to know how the machine operates. An automatic residential ice maker is a finely tuned mechanical and electrical system. The process relies on several key parts working in perfect synchronization: the water inlet valve, the ice mold, a thermistor (temperature sensor), a heating coil, and an ejector motor.
Here is how the standard cycle flows:
- The Fill Cycle: A timer or control board triggers the water valve to open for approximately seven seconds, sending water through a fill tube into the metal ice mold.
- The Freeze Cycle: The water sits in the mold while the freezer's cold air lowers its temperature.
- The Harvest Cycle: This is where the ice maker heater element becomes the star of the show. The thermistor continuously monitors the mold's temperature. Once it detects that the water has frozen solid, it signals the control module to activate the heating coil.
- The Ejection Cycle: The heating coil, situated directly underneath or embedded within the metal mold, warms the tray just enough to melt a microscopic layer of ice touching the metal. This breaks the adhesion. With the cubes loosened, the ejector motor turns the blades, sweeping the cubes out of the mold and into your ice collection bin.
If you are experiencing issues with this cycle in a commercial or highly demanding home setup, our Icemaker Repair services can help restore your system's rhythm.
The Role of the Ice Maker Heater Element in the Harvest Cycle
The mold heater is designed to provide targeted, temporary heat. If the heater ran constantly, your freezer would warm up and your ice would melt. Instead, it uses a precise timing mechanism.
The heater element operates via electrical resistance. When 110-volt (or 230-volt in some European models) current passes through the resistive wire inside the heater, it generates thermal energy. This heat is rapidly transferred to the highly conductive aluminum ice mold.
The heating cycle typically lasts about 5 minutes. This is just long enough to soften the outer edges of the cubes so they slide out easily. Once the ejector blades complete their rotation and the shut-off arm confirms the bin isn't overfilled, the heater shuts off, and the water valve opens to start the process over again.
Why Ice Makers Freeze Up and Fail to Release Cubes
When the ice maker heater element fails, the physical adhesion between the frozen ice and the aluminum mold remains unbroken.
Because the ice is still frozen solid to the tray, the ejector blades cannot sweep the cubes out. The ejector motor will still attempt to turn, leading to gear slipping, plastic teeth stripping, and audible "groaning" or "growling" noises that can last for several minutes.
Furthermore, because the cubes never cleared the tray, the next fill cycle will dump more water on top of the existing ice. This causes massive ice clumps, frost buildup, and eventual water flow blockage. The water line can freeze solid, creating an ice blockage that stops all ice production and can even cause water to leak down the back of your refrigerator.
Diagnosing a Faulty Ice Maker Heater Element
Before you run out and buy a brand-new ice maker assembly, it is wise to run a few diagnostic tests. A failed heater element shares symptoms with other issues, such as a faulty water inlet valve or a broken thermostat.
Common Symptoms of a Failed Heating Coil
If your ice maker is suffering from a bad heating coil, you will likely notice one or more of these common warning signs:
- Stuck Cubes: The ice maker makes ice, but the cubes remain permanently frozen to the metal ice form, jamming the ejector arm.
- Ice Clumping and Frost Buildup: You notice a giant block of ice forming around the ice maker housing, particularly on the lower plastic cover.
- Error Codes: On modern smart refrigerators, especially Samsung models, a failed heater or frozen line will trigger specific diagnostic codes, such as the infamous E33 error code (which points directly to a fill tube heater issue).
- No Ice Production: The system detects a jam or a temperature fault and shuts down entirely to prevent damage.
- Physical Damage: If you remove the ice maker, you might see visible signs of electrical arcing, melted plastic near the wire harness, or carbon buildup around the heater connectors.
How to Test the Ice Maker Heater Element with a Multimeter
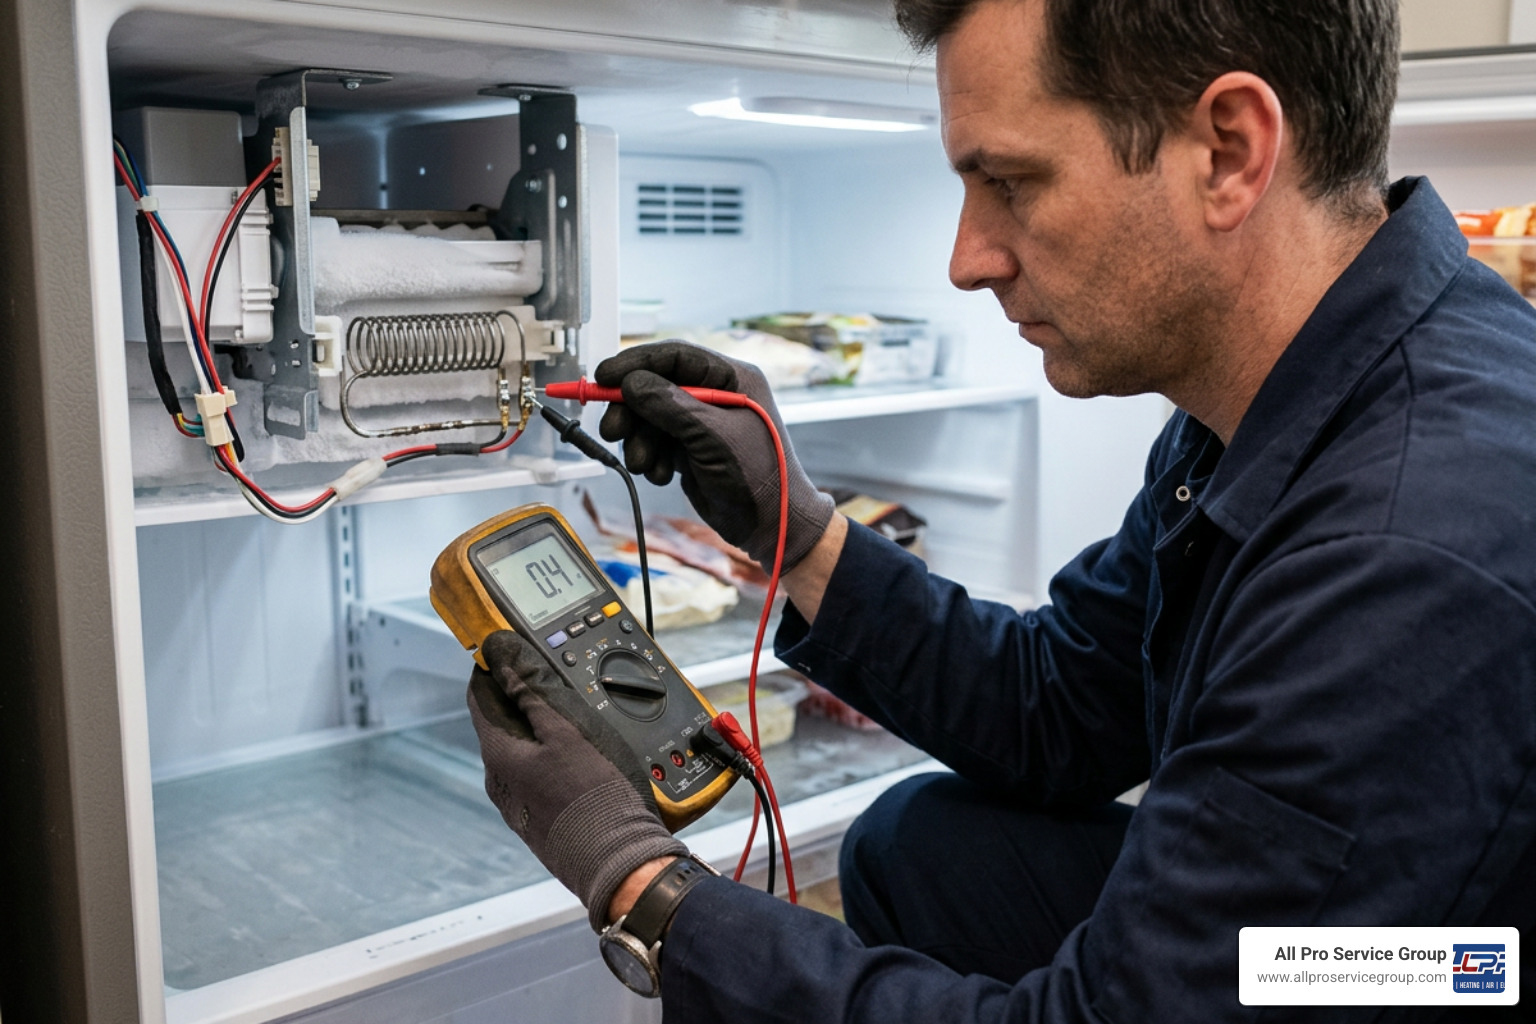
The most accurate way to diagnose a bad heater is by performing a continuity and resistance test using a digital multimeter. Here is how to do it safely:
- Disconnect Power: Unplug your refrigerator or shut off the circuit breaker.
- Access the Ice Maker: Remove the ice bin and unscrew the mounting screws holding the ice maker assembly in place. Carefully slide the unit forward and disconnect the wire harness.
- Locate the Heater Leads: Find the two wires connecting directly to the heating element underneath the mold.
- Set Your Multimeter: Turn your multimeter dial to the Ohms ($\Omega$) setting.
- Measure Resistance:
Place your multimeter probes on the heater terminals.
- A healthy heating element should typically read between 10 and 30 Ohms.
- A failed heating element will show a reading of 0(a direct short) or infinity/OL(an open circuit, meaning the internal resistive wire has broken).
- Check for Ground Shorts: Place one probe on a heater terminal and the other on the metal mold. If you get any resistance reading other than open/infinite, the heater is shorted to ground and must be replaced.
On some models, like older GE units, there are no accessible test points on the module, making a complete replacement of the assembly the most practical diagnostic and repair path. For helpful discussions on these specific limitations, you can review the Expert Solutions for Ice Maker Heating Element Issues | JustAnswer thread.
OEM vs. Aftermarket Replacement Parts and Upgrades
When purchasing a replacement ice maker heater element, you will face a choice: buy an Original Equipment Manufacturer (OEM) part or opt for an aftermarket upgrade.
| Feature | OEM Replacement Parts | Aftermarket / Upgraded Kits |
|---|---|---|
| Compatibility | Guaranteed exact fit for specific models | May require slight wiring modifications |
| Lifespan | Typically 5–10 years under normal use | 3–4 years in high-use/rental environments |
| Technology | Standard Calrod-type resistive wire | Upgraded ceramic or secondary silicone pads |
| Cost | Generally higher ($90–$120 for full assemblies) | Lower for individual components ($15–$45) |
Compatible Parts for Samsung, Whirlpool, and Maytag
Different manufacturers package their heating elements in different ways. Some brands allow you to replace just the heating element, while others require you to replace the entire mold or ice maker assembly.
- Whirlpool & Maytag: The ice maker assembly is historically the most common part to fail on Whirlpool and Maytag refrigerators, often requiring attention within 5 to 10 years of use. For these brands, you can often purchase the WPW10122523 Mold Heater Assembly (Ice Maker) | Genuine Whirlpool OEM In Stock, which includes the heater pre-installed on the aluminum mold.
- Samsung: Samsung refrigerators are notorious for ice maker frost buildup on the lower plastic cover. If your fill line is constantly freezing, you may need the DA97-00209Z Refrigerator Ice Maker Fill Tube Assembly | Genuine Samsung OEM In Stock, which features a built-in 10-watt, 110-volt aluminum foil heater (part DA47-00192E) designed to keep the water flowing freely.
- Frigidaire: Frigidaire systems often utilize a complete modular design. If your thermistor or heater fails, replacing the entire Frigidaire Ice Maker Assembly 243297613 Parts is often the fastest way to resolve the issue.
Upgraded Ceramic and Secondary Heater Kits
Traditional ice maker heaters rely on Calrod-type elements. As detailed in recent Ice maker heater assemblies - Patent Application documentation, these traditional elements can suffer from low thermal efficiency, sometimes resulting in total ice-making cycle times of 250 minutes or more. Modern innovations are shifting toward ceramic substrate heaters with thick-film printed resistive traces, which distribute heat much more uniformly and reduce cycle times.
For homeowners battling chronic frost in Samsung French-door refrigerators, aftermarket secondary heater kits like the BA-00090 have become incredibly popular. This 8.5-inch, 6-watt secondary heater pad adheres to the bottom of the plastic ice maker housing. It taps directly into the ice maker's 120V harvest cycle line, providing gentle warmth to prevent frost accumulation on the cover without melting the usable ice inside the bin.
Step-by-Step Guide: How to Safely Replace an Ice Maker Heater Element
If you have diagnosed a bad heater and have your replacement part ready, you can perform the replacement yourself using basic hand tools. If you run into trouble or feel uncomfortable working with electrical connections, our team at All Pro Service Group is always ready to assist with professional Commercial Appliance Repair and residential services.
Essential Safety Precautions Before You Begin
Before starting any appliance repair, safety must be your top priority:
- Cut the Power: Always unplug the refrigerator or shut off the corresponding breaker at your home's main electrical panel.
- Verify with a Tester: Use a non-contact voltage tester to confirm that no electrical current is flowing to the unit.
- Shut Off the Water: Close the water supply valve to prevent accidental spills or leaks while working.
- Wear Protection: Use protective work gloves to shield your hands from sharp metal edges on the freezer evaporator coils and ice mold.
- Ensure a Dry Workspace: Wipe up any standing water or melted frost before handling electrical wiring.
Removing and Installing the New Heater Assembly
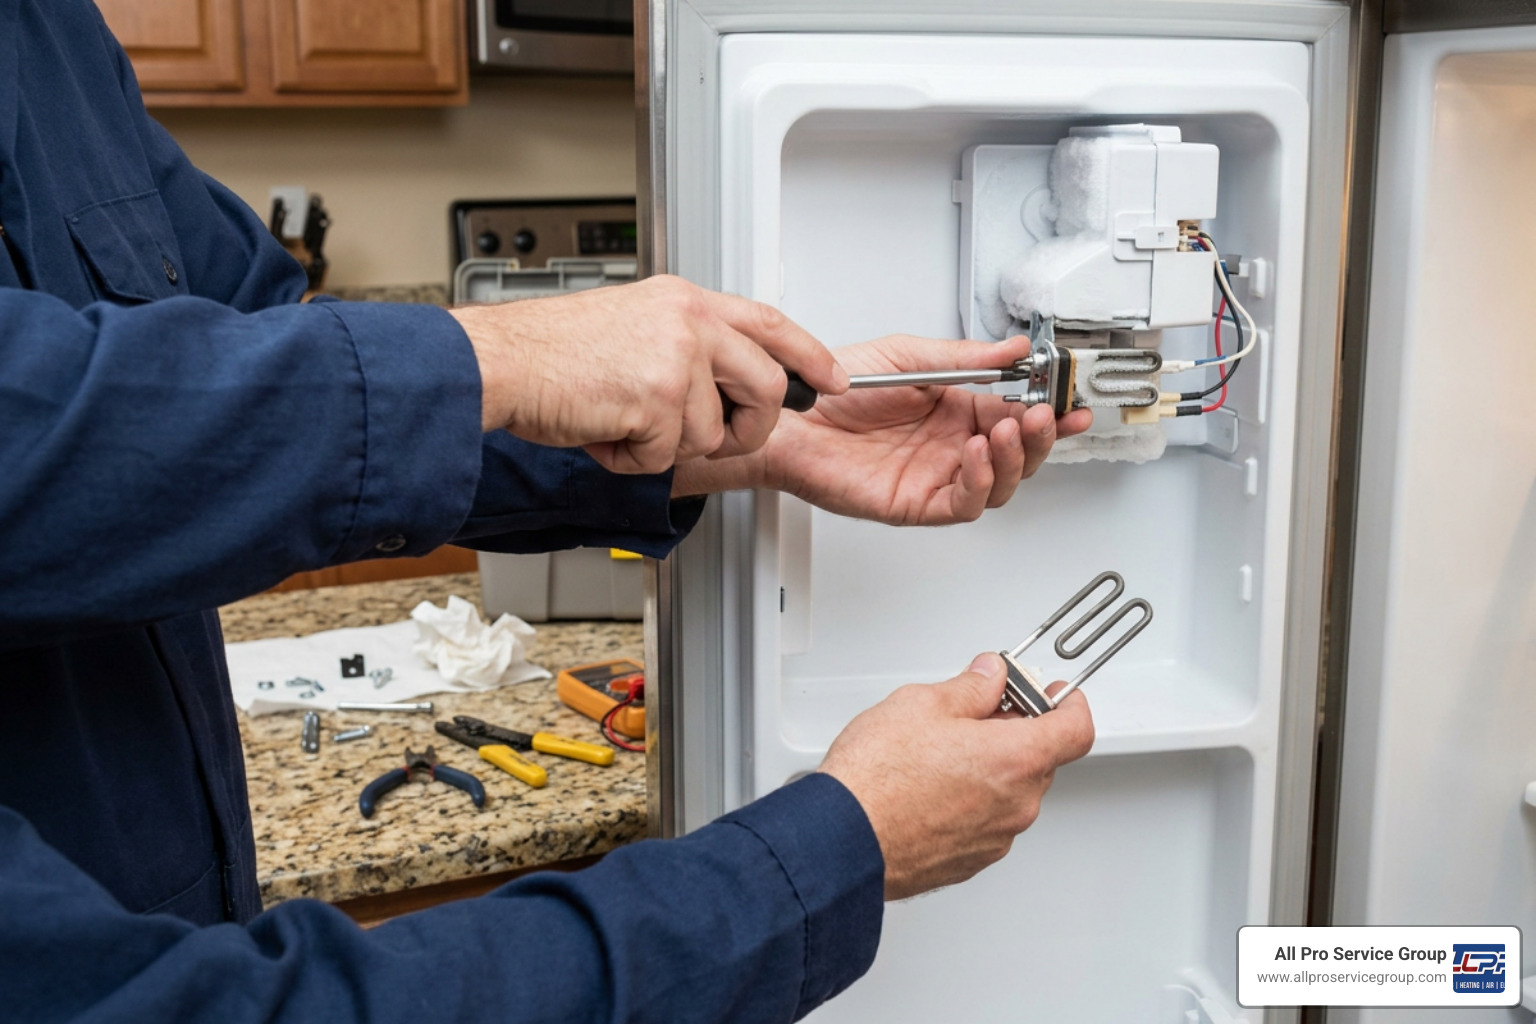
While exact steps vary by brand, this general sequence applies to most standard slide-out ice makers:
- Remove the Ice Bin: Pull out the ice storage drawer to give yourself room to work.
- Unscrew the Ice Maker: Locate the mounting screws holding the ice maker assembly to the freezer wall or ceiling. Remove them using a Phillips-head screwdriver or nut driver.
- Disconnect the Wire Harness: Gently slide the ice maker assembly forward. Press the release tab on the plastic wire harness and pull the plug apart.
- Remove the Old Heater or Mold:
- If replacing the entire mold assembly (like the Whirlpool WPW10122523), transfer any remaining mounting brackets or shut-off arms to the new part.
- If replacing a fill tube heater (like the Samsung DA47-00192E), peel back the old foil heater, clean any adhesive residue off the tube, and wrap the new heater securely around the line.
- Reinstall Insulation: Ensure any thermal insulation or foam sleeves are properly reinstalled around the heater. Missing insulation is a leading cause of premature heater failure.
- Reconnect and Mount: Plug the wire harness back in until it clicks. Align the assembly pins, slide the unit back into place, and tighten the mounting screws.
- Reset the Unit: Many modern ice makers have a small manual reset button on the bottom or side of the module. Press and hold this button for 3 seconds to initiate a manual harvest cycle and test your handy work.
Frequently Asked Questions About Ice Maker Repairs
Why is my ice maker fill tube constantly freezing?
A frozen fill tube is usually caused by two main culprits: low water pressure or a failed fill tube heater. If your home's water pressure is too low, the water inlet valve may not close fully, allowing a tiny trickle of water to seep into the tube and freeze.
Alternatively, if the built-in heater (such as the DA47-00192E on Samsung models) fails, the normal freezing temperatures of your freezer will quickly turn the standing water in the tube to solid ice, triggering error codes like E33.
Can I repair a broken heater wire instead of replacing the whole unit?
If you discover a broken sensor wire or a loose connection, it is technically possible to splice or solder the wires back together. If you choose to do this, always use heat-shrink tubing rather than standard electrical tape to protect the connection from the freezer's moisture.
However, if the electrical arcing has damaged the plastic housing or caused carbon buildup on the heater pins, attempting a DIY solder bypass can pose a fire hazard. In these cases, we strongly recommend replacing the entire heater or ice maker assembly to ensure safety.
What temperature should my freezer be to trigger the harvest cycle?
To trigger the harvest cycle, your freezer must be cold enough to freeze water quickly. Most ice maker thermistors will not allow the heater element to activate unless the freezer temperature is at or below 13°F (typically ideal at 0°F). If your freezer is running too warm (e.g., 15°F to 20°F), the ice maker will stop harvesting ice entirely, even if the heating element is in perfect working order.
Conclusion
A malfunctioning ice maker can put a serious freeze on your daily routine. Whether you are dealing with a stubborn block of stuck ice cubes, a frozen fill tube, or a groaning ejector arm, understanding how your ice maker heater element works is the first step toward a permanent fix.
If you are located in Salt Lake City, West Jordan, South Jordan, Park City, Provo, or anywhere else in the Greater Salt Lake Valley, and would prefer to leave the diagnosis and repair to the experts, All Pro Service Group is here to help. Since 2008, our highly trained, "Gephardt Approved" technicians have provided dependable, top-tier appliance inspections, repairs, and replacements.
Contact us today to schedule your professional Ice Machines Repair and get your freezer back to doing what it does best!