A Broken Underground Sprinkler Line Is Costing You Money Right Now
If you need to fix an irrigation line, here are the basic steps:
- Turn on each zone to find where water is pooling or pressure drops
- Shut off the water supply at the main irrigation valve
- Dig carefully around the wet area to expose the damaged pipe
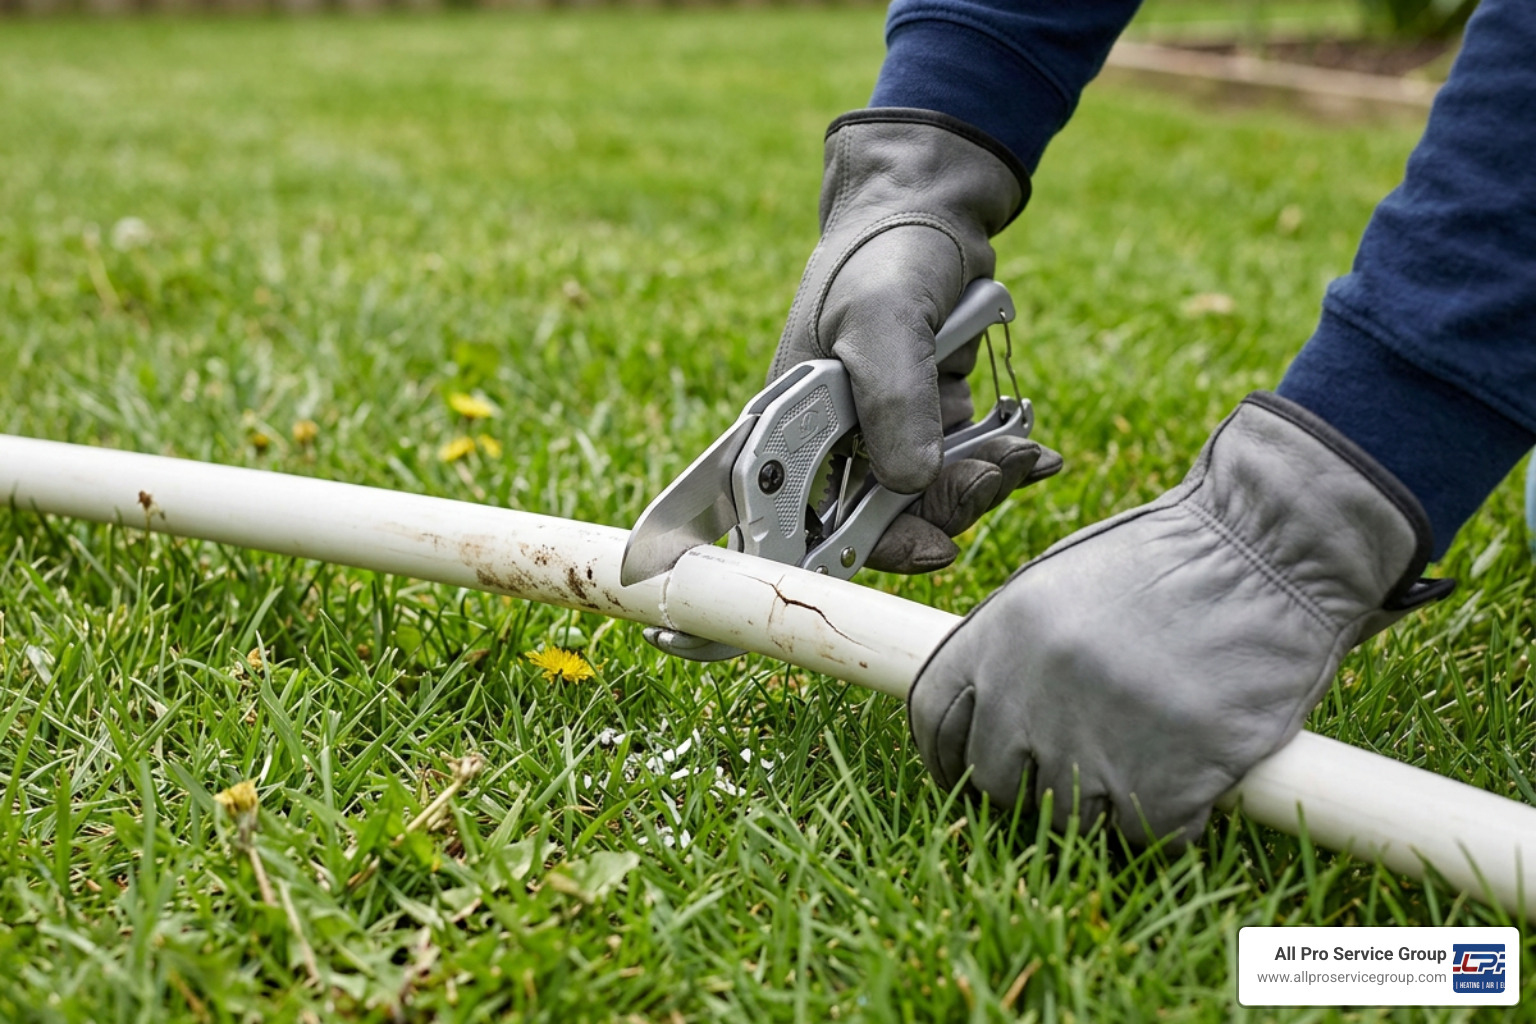
- Cut out the broken section with a PVC cutter, 1-2 inches beyond the damage
- Measure and dry-fit a replacement pipe section with couplings
- Apply PVC primer then cement, push fittings together with a quarter-turn twist
- Wait at least 30 minutes before slowly turning the water back on
- Test for leaks, then backfill the trench in layers
Finding a soggy patch in your yard on a hot Utah summer morning is never a good start to the day. A broken underground sprinkler line doesn't just hurt your lawn — it quietly drives up your water bill every hour it goes unfixed. Small leaks can waste hundreds of gallons before you even notice them.
The good news? Most irrigation line repairs are straightforward DIY jobs that cost $40–$70 in materials and take a few hours to complete.
But before you grab a shovel, it helps to understand exactly what you're dealing with — the pipe type, the damage, and the right repair method — so you don't make things worse.
Our team at All Pro Service Group has helped Greater Salt Lake Valley homeowners fix irrigation lines and tackle all kinds of plumbing issues since 2008. This guide walks you through everything we've learned, so you can handle most repairs yourself with confidence.
Common Causes of Underground Irrigation Line Damage
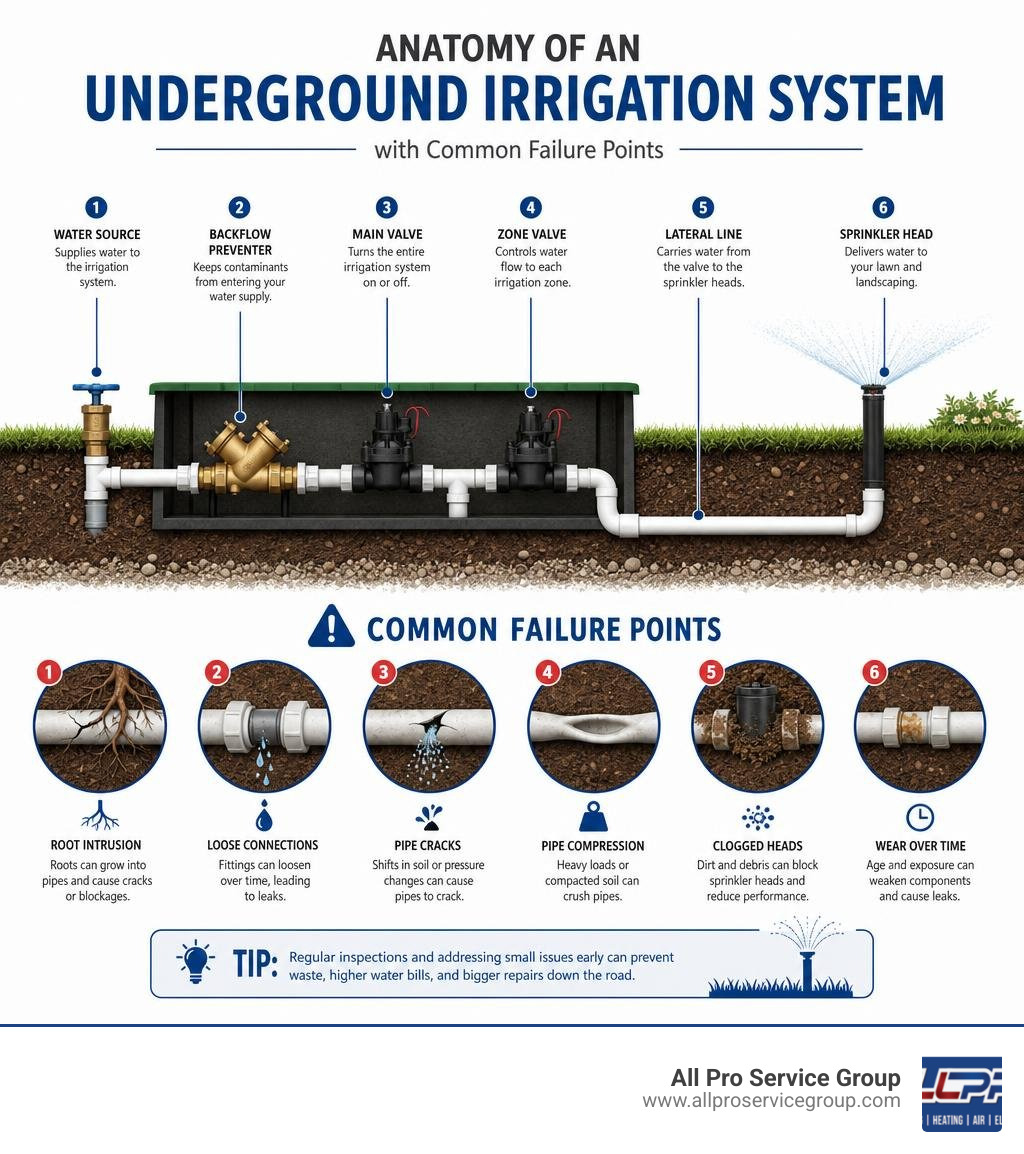
Before we dig into the physical repair, it is helpful to look at why these pipes break in the first place. Underground irrigation lines—whether made of white Schedule 40 PVC or flexible black polyethylene (poly) pipe—are incredibly durable, but they are not bulletproof. Understanding the root cause of the failure can help you prevent the same issue from happening again next season.
1. The Accidental Shovel Strike
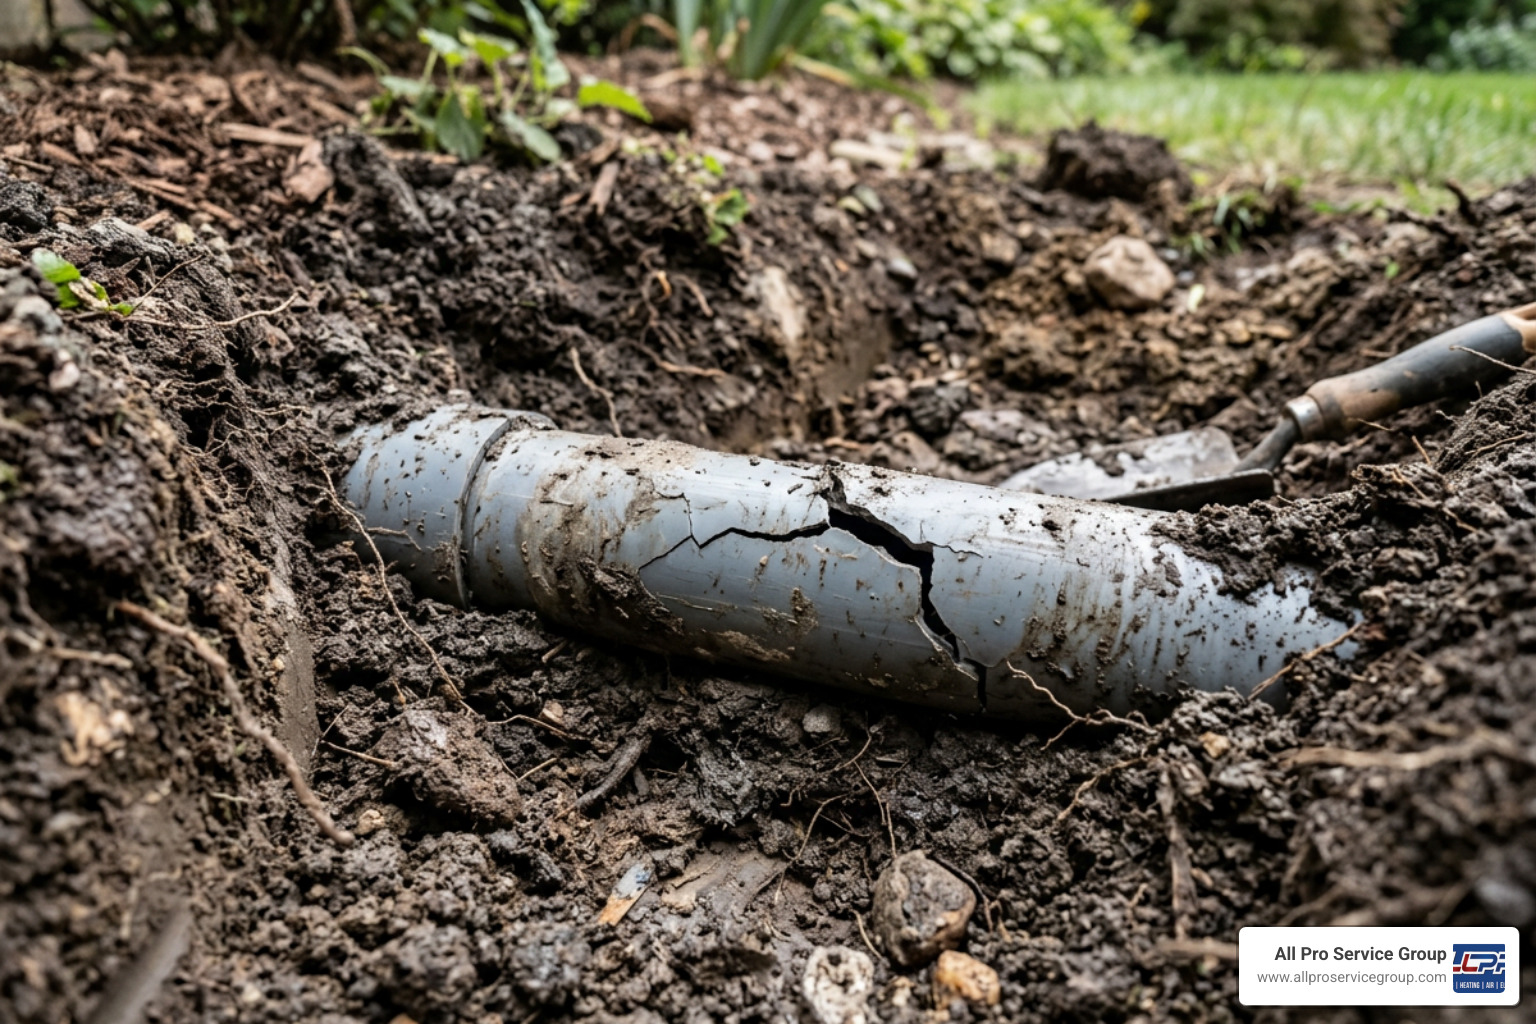
This is by far the most common cause of a punctured sprinkler line. You decide to plant a new rose bush, install a garden border, or anchor a trellis. You drive the spade into the soil, feel a slight "thud," and assume you just hit a stubborn tree root or a rock. A few days later, you notice a miniature geyser bubbling up through your lawn. Hand tools, rototillers, and lawn aerators are notorious for slicing clean through buried lateral lines.
2. Hungry Tree Roots
Trees and large shrubs are constantly searching for water. If your underground pipes have a microscopic leak or a loose joint, tree roots will find it. Over time, the roots wrap around the pipe, applying immense pressure as they grow. Eventually, they will crush the pipe or force their way into the joints, completely blocking water flow and causing severe cracking.
3. Brutal Utah Winters (Freeze-Thaw Cycles)
In places like Salt Lake City, Ogden, and Park City, winter temperatures regularly plunge well below freezing. If your irrigation system is not properly winterized and blown out with compressed air in the fall, residual water trapped inside the lines will freeze and expand. Because water expands by about 9% when it freezes, it exerts thousands of pounds of pressure on the pipe walls, leading to long, jagged splits along the length of the line.
4. Soil Shifting and Compaction
Heavy clay soils, which are incredibly common throughout the Wasatch Front, expand and contract dramatically as they wet and dry. This constant movement puts physical stress on rigid PVC joints. Additionally, heavy foot traffic, driving vehicles over the lawn, or placing heavy landscaping rocks over shallow pipes can crush buried lines over time.
How to Locate the Leak and Prepare the Area to Fix Irrigation Line
Finding the exact location of an underground leak can feel like looking for a needle in a haystack. Because water travels along the path of least resistance, a wet spot on your lawn might actually be 5 to 10 feet away from the actual break in the pipe. Here is how we systematically locate the leak and prepare the workspace to protect your lawn.
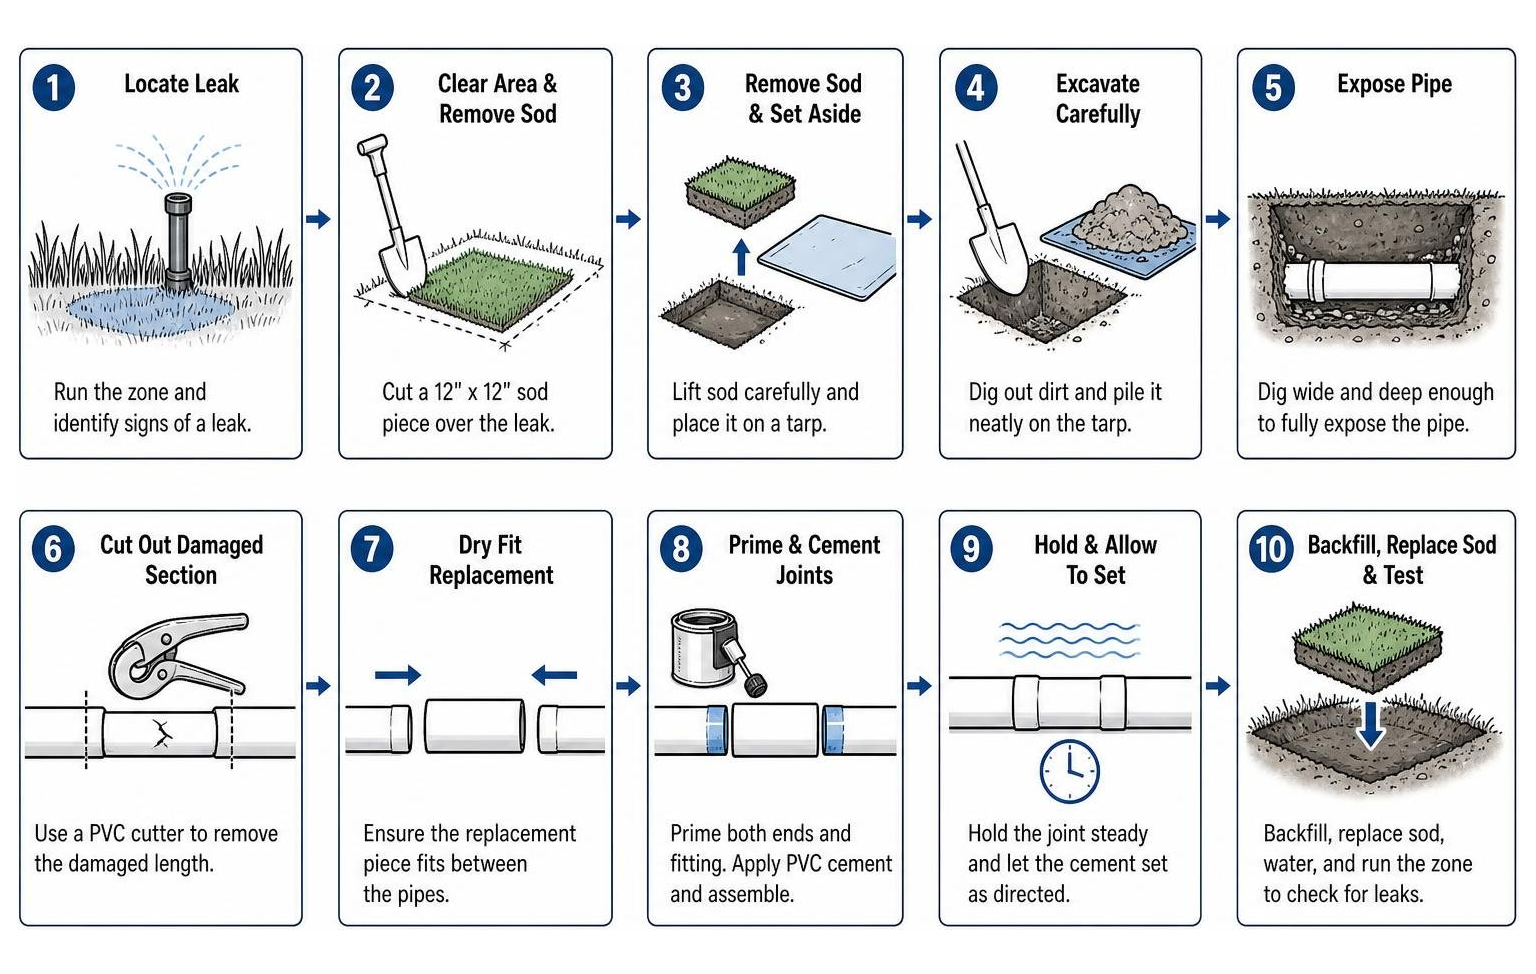
Step 1: Run a Zone Test
Turn on your sprinkler controller and run each watering zone one by one for 2 to 3 minutes. Walk your yard and look for these classic red flags:
- Soggy, squishy turf or water bubbling up through the grass.
- A sudden drop in water pressure where sprinkler heads in a specific zone are barely popping up or misting weakly.
- Hissing sounds coming from underground when the system is running.
- Dry, brown patches of grass surrounded by perfectly green turf, indicating that a broken line is starving downstream sprinkler heads of water.
Step 2: Clear the Area with Turf Preservation in Mind
Once you have narrowed down the leak to a general area, do not just start hacking away at your grass. With a little care, you can make the repair virtually invisible once you are finished.
- Lay down a plastic tarp or a large piece of plywood next to your digging site.
- Use a sharp spade shovel to cut a neat square or rectangle of sod (about 12 inches by 12 inches) directly over the suspected leak. Cut about 2 to 3 inches deep to keep the grass roots intact.
- Carefully lift the sod square out and place it on your tarp. Keep it in the shade and sprinkle a little water on it so it stays fresh.
- Dig the remaining dirt out and pile it neatly on the tarp. This keeps your lawn clean and makes backfilling incredibly easy.
Step 3: Excavate Carefully
Dig down until you expose the pipe. You want to dig a hole that is at least 6 inches wider than the pipe on all sides and at least 4 to 6 inches deeper than the pipe. This extra space is crucial because it keeps mud and debris away from your repair and gives you room to use your tools.
If you are dealing with a flexible poly pipe or a punctured drip line, the repair process is slightly different than rigid PVC. For detailed steps on handling punctures, check out this guide on how to repair a punctured irrigation line.
Step-by-Step Guide to Repairing a 1-Inch PVC Irrigation Line
Once you have exposed the broken pipe and cleared away the mud, you are ready to perform the actual repair. This section focuses on 1-inch Schedule 40 PVC, which is the industry standard for main lines and lateral lines in residential sprinkler systems.
Tools and Materials Needed for the Repair
Before you begin, gather all your supplies. Having everything on hand prevents mid-project trips to the hardware store while your yard is dug up.
- Dedicated PVC pipe cutter(or a fine-tooth hacksaw)
- Replacement 1-inch Schedule 40 PVC pipe(usually a 1- or 2-foot section is plenty)
- Purple PVC primer and medium-body PVC cement
- A clean rag or paper towels
- Tape measure and a marker
- Two PVC couplings(standard slip couplers or telescoping slip couplings)
When choosing your fittings, you have two primary options. Here is a quick comparison to help you decide which is best for your specific situation:
| Fitting Type | Pros | Cons | Best Used For |
|---|---|---|---|
| Standard Couplers | Extremely inexpensive; creates a permanent, rock-solid chemical weld; zero flow restriction. | Requires you to bend and flex the buried pipe to slide the new section into place; difficult in tight spaces. | Long trenches where the pipe has plenty of room to flex. |
| Slip Couplings (Telescoping/Flow Spans) | Can be compressed to fit perfectly into a tight gap and then expanded over the pipe; no pipe flexing required. | Slightly more expensive; requires careful gluing technique to avoid sealing the internal sliding mechanism. | Tight spaces, deep trenches, or rigid pipes with zero play. |
Step 1: Cut and Measure the Pipe to Fix Irrigation Line
To ensure a leak-free repair, your cuts must be clean, straight, and properly measured.
- Identify the full extent of the damage. Cracks can hairline-fracture past what is visible to the naked eye. Always cut at least 1 to 2 inches past the visible ends of the crack to ensure you are bonding to structurally sound pipe.
- Make square cuts. Use a ratcheting PVC pipe cutter to make a clean, perfectly square cut. If you use a hacksaw, make sure the blade is perpendicular to the pipe. Crooked cuts reduce the surface area available for the glue, which can lead to joint failure under high water pressure.
- Deburr the pipe. Use a utility knife or a piece of sandpaper to scrape away any plastic burrs or rough edges left behind by the saw. Smooth pipe ends ensure a tight, flush fit inside the couplings.
- Measure the gap. Measure the exact distance between the two cut ends of your existing underground pipe.
- Cut the replacement piece. Subtract the depth of the center stops in your couplings from your measurement, and cut your new piece of PVC pipe to fit. Always dry-fit the new piece into the gap first to verify that everything aligns perfectly without forcing or bending the pipe excessively.
Step 2: Glue and Install the New Couplings to Fix Irrigation Line
PVC solvent welding is not actually "gluing"—it is a chemical process that temporarily melts the plastic molecules so they fuse together into a single, continuous piece of plastic.
- Dry the pipe completely. Moisture is the absolute enemy of PVC cement. Use a clean towel to wipe away all water, mud, and condensation from the inside and outside of the pipe ends. If water keeps trickling down the line, stuff a small piece of bread or a rag into the pipe upstream to temporarily block the flow (the bread will easily dissolve and flush out through a sprinkler head later).
- Apply purple primer. Apply a generous layer of purple primer to the outside of the pipe ends and the inside of the couplings. Primer cleans away manufacturing oils and softens the plastic, preparing it to accept the cement.
- Apply PVC cement. While the primer is still wet, apply a thin, even layer of PVC cement over the primed areas of both the pipe and the inside of the fitting.
- Push and twist. Quickly push the fitting onto the pipe. As you push it all the way home, give it a quarter-turn twist. This twist distributes the cement evenly throughout the joint and prevents air pockets from forming.
- Hold firmly. Hold the joint together firmly for at least 15 to 30 seconds. Because the pipe is tapered, it will naturally try to push itself out of the fitting until the chemical weld begins to set.
- Clean up. Wipe away any excess cement that squeezes out of the joint.
If you are working with alternative pipe materials like flexible polyethylene, the process involves barbed insert fittings and stainless steel hose clamps rather than solvent welding. For step-by-step instructions on those systems, check out this guide on how to fix a hole in a sprinkler line.
Frequently Asked Questions about Irrigation Line Repair
We know that tackling utility repairs can raise a few questions. Here are the most common questions we hear from homeowners in the Salt Lake area when they are working on their sprinkler systems.
How long should PVC cement cure before turning the water back on?
We recommend waiting at least 30 to 60 minutes before turning the water supply back on, and ideally 2 to 4 hours if you have high water pressure.
While PVC cement "sets" in just a few minutes, it takes time to fully "cure" and reach its maximum pressure rating. Curing times depend heavily on outdoor temperatures:
- Warm weather (above 60°F): 30 to 60 minutes is usually safe for lateral lines.
- Cool weather (40°F to 60°F): Double the curing time to at least 2 hours.
- Cold weather (below 40°F): Avoid gluing if possible, or wait at least 24 hours. PVC cement will struggle to cure properly in freezing temperatures.
When you do turn the water back on, always open the main valve slowly. Opening a valve too quickly sends a violent surge of water and compressed air down the line—a phenomenon known as water hammer—which can easily shatter a freshly glued joint.
What is the preferred coupling method for a 1-inch irrigation line?
For DIYers working in tight underground trenches, telescoping slip couplings (often called flow spans) are highly preferred.
Because buried PVC pipes are rigid and locked in place by the surrounding soil, it is incredibly difficult to force a standard coupler onto both ends of the pipe without digging a massive, 10-foot-long trench just to get enough flex in the line. A slip coupling solves this beautifully. It compresses down so you can slide it easily into the gap, and then expands outward over both pipe ends.
While some purists worry that slip couplings cause minor flow restriction, the reality is that the restriction is so minimal it will not affect your sprinkler performance unless your system is already running at its absolute maximum hydraulic capacity.
How can I minimize lawn damage when digging up a sprinkler line?
The secret to minimizing lawn damage is careful excavation and using a tarp. Never pile loose dirt directly onto your grass; it sifts down into the turf and creates unsightly muddy patches that take weeks to recover.
By cutting clean, deep sod squares and placing all excavated soil neatly on a plastic tarp, you can return 100% of the dirt back into the trench. As you backfill, tamp the soil down in 3-inch layers using your feet or a hand tamper. This prevents the trench from settling and creating a dangerous trip hazard later. Once the dirt is level, slide your sod squares back into place, step on them gently to ensure root-to-soil contact, and water the area thoroughly.
Conclusion
Taking care of your lawn's watering system doesn't have to be an overwhelming chore. With a little patience, a few basic tools, and the right techniques, most homeowners can successfully fix an irrigation line over a single weekend.
However, some irrigation issues are best left to professionals. If you are dealing with a massive break on your main water line, a cracked backflow preventer, complex electrical wiring issues at the valve box, or if you simply do not feel comfortable digging up your yard, we are here to help.
At All Pro Service Group, we have spent nearly two decades providing honest, dependable plumbing and irrigation services to our neighbors throughout the Greater Salt Lake Valley, including Ogden, Park City, Provo, and South Jordan. We are proud to be a "Gephardt Approved" local business, and we treat every home we visit with the utmost respect.
If you hit a snag or decide you would rather leave the digging to the experts, don't hesitate to reach out. You can find more info about water line repair services on our website, or give our team a call to schedule an inspection today!